background image

IS384 - ECN3345 

Page 5 

2.3


ELECTRICAL SUPPLY AND CONNECTION 


Ensure that isolation sockets are free from obstruction and are easily accessible.  


Model AS3 is fitted with a 3-pin plug for connection to a standard switched socket. 


Model AS4 must be connected to the electricity supply by a qualified electrician. Ensure that 

the supply is adequate for the unit to be installed. 

The appliance should be connected to the mains via a suitable isolating switch, having at least 

3mm contact separation in all poles. 


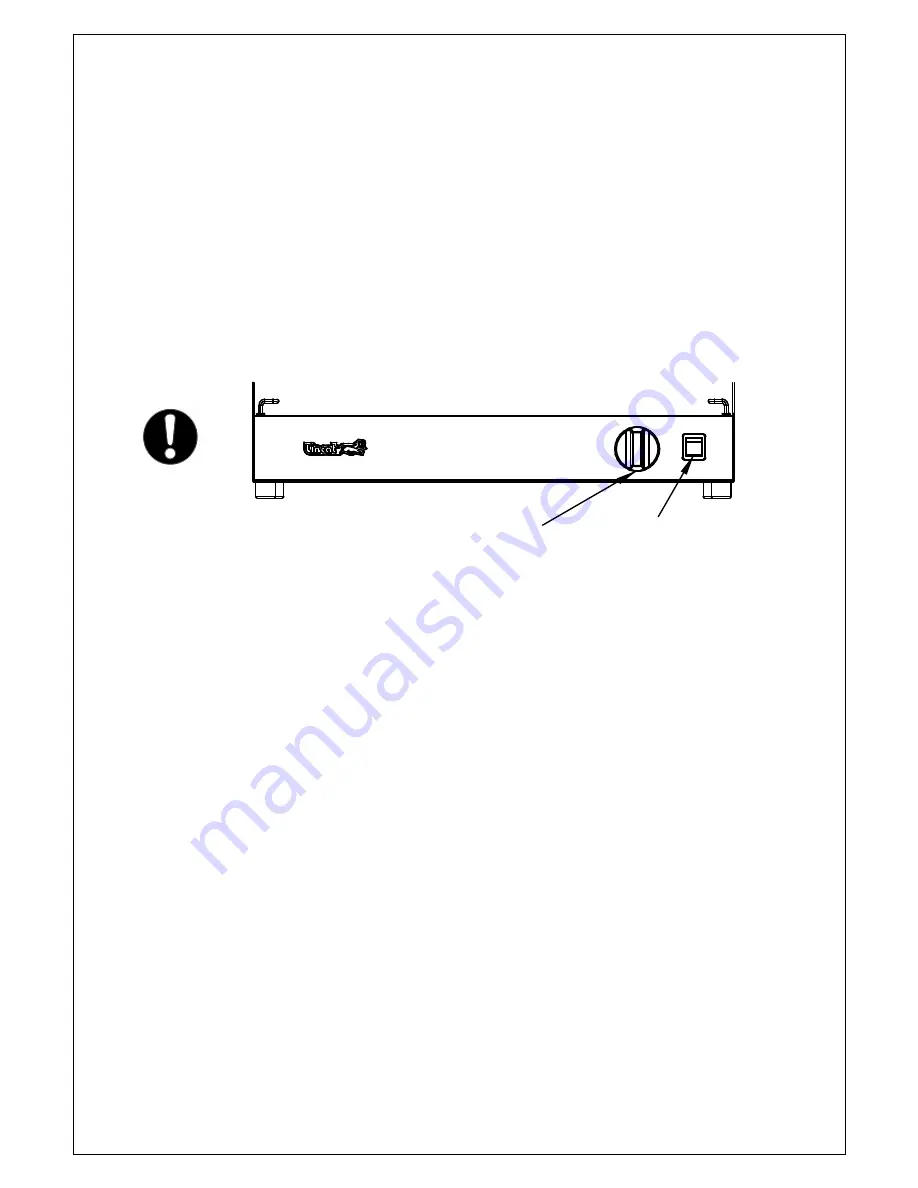
2.4 CONTROL PANEL 


ON/OFF

NEON SWITCH

TIMER

KNOB


2.5 PREPARATION FOR USE 


1.


Ensure element hood moves freely and remains at set height when released. 


2.6 USER INSTRUCTION 


Ensure that the person responsible understands how to safely operate, clean and switch off 

this unit and is made aware of the position of the isolating switch. 


Note: This manual must be kept in a safe and accessible place for future reference. 


SECTION 3 – OPERATION 


1.


Raise element hood to highest position. 

2.


Switch on Salamander – on/off switch will illuminate. 

3.


Warm up time is 10 - 15 minutes. 

4.


Place plates or dishes on grill tray. 

5.


Adjust height of hood to desired position for food. 

6.


Raise hood to maximum height before removing any plates or dishes. 

7.


Ensure sliding grill tray is always fully pushed back after use. 

8.


The audible timer does not control the power. Unit must be switched off at on/off switch. 


Summary of Contents for Silverlink 600

Page 1: ...IS384 ECN3345 User and Installation Instructions Silverlink 600 Electric Salamander Grill AS3 and AS4...

Page 2: ...mandatory that all appliances with a power rating over 3kW are installed commissioned and serviced by a qualified and competent person as defined by the regulations in force in the country of installa...

Page 3: ...ply requirements Single phase 12 2 Amps Single phase 18 8 Amps Electricity supply connection Single phase 13A plug 5 Way terminal block Power rating 240V kW 2 8 4 5 Fig 1 Check list of enclosures Plea...

Page 4: ...material 3 Ensure there is a free flow of air and adequate ventilation around the appliance and that no vents are blocked 4 Silverlink Vertical Travel Salamanders can be either installed on a counter...

Page 5: ...ent hood moves freely and remains at set height when released 2 6 USER INSTRUCTION Ensure that the person responsible understands how to safely operate clean and switch off this unit and is made aware...

Page 6: ...ing operations HEAT SHEILD WIRE TRAY GRID WIRE TRAY SUPPORT DRIP CRUMB TRAY WIRE TRAY RUNNER KNURLED KNOBS Fig 3 1 Lift out wire tray grid and drip crumb tray 2 Slide out wire tray support 3 Loosen kn...

Page 7: ...el and serial numbers from the data plate attached to the unit and give brief details of the service requirement Lincat reserve the right to carry out any work under warranty during normal working hou...

Page 8: ...al usage incorrect adjustment or neglect 3 Incorrect installation maintenance modification or unauthorised service work SECTION 9 ACCESSORIES The following accessories are available for your Lincat sa...

Reviews: