background image

GENERAL DESCRIPTION

The Power Wave 405M semi-automatic power source
is  designed  to  be  a  part  of  a  modular,  multi-process
welding  system.  Depending  on  configuration,  it  can
support constant current, constant voltage, and pulse
welding modes. 

The  Power  Wave  405M  power  source  is  designed  to
be used with the semi automatic family of Power Feed
wire feeders, operating as a system. Each component
in  the  system  has  special  circuitry  to  "talk  with"  the
other system components, so each component (power
source,  wire  feeder,  user  interface)  knows  what  the
other is doing at all times. These components commu-
nicate with Arclink. 

The POWER WAVE 405M is a high performance, dig-
itally controlled inverter welding power source capable
of  complex,  high-speed  waveform  control.  Properly
equipped,  it  can  support  the  GMAW,  GMAW-P,
FCAW, SMAW, GTAW, and CAC-A processes. It car-
ries  an  output  rating  of  350  Amps,  34  Volts  at  60%
duty  cycle  and  300  Amps,  32  volts  at  100%  duty
cycle.

RECOMMENDED PROCESSES AND
EQUIPMENT

RECOMMENDED PROCESSES

The POWER WAVE 405M can be set up in a number
of  configurations,  some  requiring  optional  equipment
or welding programs. Each machine is factory prepro-
grammed  with  multiple  welding  procedures,  typically
including  GMAW,  GMAW-P,  FCAW,  GTAW,  and
CAC-A for a variety of materials, including mild steel,
stainless steel, cored wires, and aluminum. 

The POWER WAVE 405M is recommended for semi-
automatic welding, and may also be suitable for basic
hard automation applications.

• This Power Wave is not recommended for processes

other than those listed. 

b-1

OPERATION

b-1

POWER WAVE 405M

SAFETY PRECAUTIONS

Read  this  entire  section  of  operating  instructions
before operating the machine.

ELECTRIC SHOCK can kill.

• Unless using cold feed feature, when

feeding  with  gun  trigger,  the  elec-
trode  and  drive  mechanism  are
always  electrically  energized  and
could  remain  energized  several  sec-
onds after the welding ceases.

• Do not touch electrically live parts or electrodes

with your skin or wet clothing.  

• Insulate yourself from the work and ground.

• Always wear dry insulating gloves.

-----------------------------------------------------------------------

FUMES AND GASES can be dangerous.

• Keep your head out of fumes.

• Use ventilation or exhaust to remove

fumes from breathing zone.

-----------------------------------------------------------------------

WELDING SPARKS can cause fire or
explosion.

• Keep flammable material away.

• Do not weld on containers that have

held combustibles.

-----------------------------------------------------------------------

ARC RAYS can burn.

• Wear eye, ear, and body protection. 

Observe additional guidelines detailed in the
beginning.

-----------------------------------------------------------------------

WARNING

Summary of Contents for POWER WAVE 405M

Page 1: ...p s u m d o l o r s i t a m e t c o n s e c t e t u e r a d i p i s c i n g e l i t e d d i a m n o n u m m y n i b h e u i s m o d t i n c i d u n t u t e l i t e d d i a m n o n u m m y n i b h e u i s m o d t i n c i d u n t u t l a o r e e t d o l o r e m a g n a a l i q u a m e r a t l a o r e e t d o l o r e m a g n a a l i q u a m e r a t L o r e m i p s u m d o l o r s i t a m e t c o n s ...

Page 2: ...AKER WEARERS SHOULD CONSULT WITH THEIR DOCTOR bEFORE OPERATING Read and understand the following safety highlights For additional safety information it is strongly recommended that you purchase a copy of Safety in Welding Cutting ANSI Standard Z49 1 from the American Welding Society P O Box 351040 Miami Florida 33135 or CSA Standard W117 2 1974 A Free copy of Arc Welding Safety booklet E205 is ava...

Page 3: ...or cooling 3 h Never simultaneously touch electrically hot parts of electrode holders connected to two welders because voltage between the two can be the total of the open circuit voltage of both welders 3 i When working above floor level use a safety belt to protect yourself from a fall should you get a shock 3 j Also see Items 6 c and 8 FUMES AND GASES can be dangerous 5 a Welding may produce fu...

Page 4: ...s to adjacent areas Avoid welding near hydraulic lines Have a fire extinguisher readily available 6 b Where compressed gases are to be used at the job site special precautions should be used to prevent hazardous situations Refer to Safety in Welding and Cutting ANSI Standard Z49 1 and the operating information for the equipment being used 6 c When not welding make certain no part of the electrode ...

Page 5: ...riés et non inflammables 4 Des gouttes de laitier en fusion sont émises de l arc de soudage Se protéger avec des vêtements de protection libres de l huile tels que les gants en cuir chemise épaisse pan talons sans revers et chaussures montantes 5 Toujours porter des lunettes de sécurité dans la zone de soudage Utiliser des lunettes avec écrans lateraux dans les zones où l on pique le laitier 6 Elo...

Page 6: ...the situation with the technical assistance of the manufacturer In some cases this remedial action may be as simple as earthing grounding the welding circuit see Note In other cases it could involve construction of an electromagnetic screen enclosing the power source and the work complete with associated input filters In all cases electromagnetic disturbances must be reduced to the point where the...

Page 7: ...ons Welding Cables The welding cables should be kept as short as possible and should be positioned close together running at or close to floor level Equipotential Bonding Bonding of all metallic components in the welding installation and adjacent to it should be considered However metallic components bonded to the work piece will increase the risk that the operator could receive a shock by touchin...

Page 8: ...y important when identifying the correct replacement parts On Line Product Registration Register your machine with Lincoln Electric either via fax or over the Internet For faxing Complete the form on the back of the warranty statement included in the literature packet accompanying this machine and fax the form per the instructions printed on it For On Line Registration Go to our WEb SITE at www li...

Page 9: ...ase Front Controls B 2 Nominal Procedures B 3 Fringe Procedures B 3 Making a Weld B 3 Welding Adjustment B 3 Constant Voltage Welding B 4 Pulse Welding B 5 TIG GTAW SMAW and Arc Gouging B 6 Power Mode and Recommended Welding Procedures B 7 ________________________________________________________________________ Accessories Section C Optional Equipment C 1 Factory Installed C 1 Field Installed C 1 ...

Page 10: ...es for Combined Length of Electrode and Work Cable Copper 75 C rated DUTY CYCLE CURRENT LENGTH UP 61m 200 FT 61 76m 200 250 FT 100 275 1 0 1 0 60 350 1 0 2 0 POWER WAVE 405M INPUT CURRENT 2 When operating on these inputs the line cord should be changed to an input conductor of 6 AWG or larger 1 Not rated is indicated by 4 x s in the box on the rating plate Recommended Fuse Sizes based On The U S N...

Page 11: ...e t d o l o r e m a g n a a l i q u a m e r a t l a o r e e t d o l o r e m a g n a a l i q u a m e r a t L o r e m i p s u m d o l o r s i t a m e t c o n s e c t e t u e r a d i p i s c i n g L o r e m i p s u m d o l o r s i t a m e t c o n s e c t e t u e r a d i p i s c i n g e l i t e d d i a m n o n u m m y n i b h e u i s m o d t i n c i d u n t u t e l i t e d d i a m n o n u m m y n i b ...

Page 12: ... positive electrode polarity Consult the Power Feed instruction manual for further details A 3 INSTALLATION POWER WAVE 405M A 3 OUTPUT CAbLES CONNECTIONS AND LIMITATIONS Connect a work lead of sufficient size and length per table A 1 between the proper output terminal on the power source and the work Be sure the connection to the work makes tight metal to metal electrical contact To avoid interfer...

Page 13: ...ach the sense lead to the work piece as close to the weld as practical but not in the return cur rent path Enable the work voltage sensing in the Power Wave See Dip Switch Settings and Locations in Installation Section of this manual CAUTION ELECTRODE VOLTAGE SENSING Enabling or disabling electrode voltage sensing is automatically configured through software The 67 electrode sense lead is internal...

Page 14: ...wer source will blink green fast and the welder output will be disabled If a system is not Auto mappable then consult the instruction manual for the accessory being used for configuration infor mation about DIP switch settings or consult your local Lincoln sales representative POWER WAVE 405M RObOT PLC CONTROLLER ANALOG INTERFACE etc POWER WAVE 405M POWER WAVE 405M POWER WAVE 405M FEED HEAD FEED H...

Page 15: ...formation on setting the feeder DIP switches System that is NOT Auto Mappable POWER WAVE 405M POWER WAVE 405M POWER WAVE 405M DUAL HEAD DUAL HEAD ALTERNATE HARD AUTOMATIC APPLICATION using a User Interface Wire Drive Module and POWER FEED 10R COMbINATION HARD AUTOMATION APPLICATION w Semi Auto Feeder Wire Drive Module and POWER FEED 10R DUAL HEAD bOOM FEEDER using two single heads PF 10R FH 1 FH 2...

Page 16: ...ing travel direc tions should be in the direction moving away from the work lead as shown below Connect all of the work sense leads from each power source to the work piece at the end of the weld For the best results when pulse welding set the wire size and wire feed speed the same for all the Power Waves When these parameters are identical the pulsing frequency will be the same helping to stabili...

Page 17: ...A 8 INSTALLATION POWER WAVE 405M A 8 MULTIPLE ARC UNSYNCHRONIzED SENSE LEAD AND WORK LEAD PLACEMENT GUIDELINES ...

Page 18: ...front Locate the 8 position DIP switch and look for switch 8 of the DIP switch 4 Using a pencil or other small object slide the switch to the OFF position if the work sense lead is NOT connected Conversely slide the switch to the ON position if the work sense lead is present 5 Replace the wrap around and screws The PC board will read the switch at power up and configure the work voltage sense lead...

Page 19: ...ing programs Each machine is factory prepro grammed with multiple welding procedures typically including GMAW GMAW P FCAW GTAW and CAC A for a variety of materials including mild steel stainless steel cored wires and aluminum The POWER WAVE 405M is recommended for semi automatic welding and may also be suitable for basic hard automation applications This Power Wave is not recommended for processes...

Page 20: ...es of idling in a ten minute period CASE FRONT CONTROLS All operator controls and adjustments are located on the case front of the Power Wave See Figure b 1 1 POWER SWITCH Controls input power to the Power Wave 2 STATUS LIGHT A two color light that indicates system errors Normal operation is a steady green light Error conditions are indicated per Troubleshooting E Section in this Manual NOTE The P...

Page 21: ...4 71 etc depending on the Control Box options Selecting a welding mode determines the output characteristics of the Power Wave power source For a more complete description of the welding modes available in the Power Wave see the explanation following b 3 OPERATION POWER WAVE 405M b 3 NOMINAL PROCEDURES The Power Wave is designed to operate with 3 4 19 1mm electrode stick out for CV and Pulse proce...

Page 22: ... 4 OPERATION b 4 ARC CONTROL Also known as Inductance or Wave Control Allows operator to vary the arc characteristics from soft to harsh in all weld modes It is adjustable from 10 0 to 10 0 with a nominal setting of 00 0 The nominal set ting of 00 0 may be displayed as OFF on some Power Feed wire feeder control panels See the Welding Mode descriptions below for detailed explanations of how the Arc...

Page 23: ...ckground current for a soft arc good for out of posi tion welding See Figure B 3 POWER WAVE 405M FIGURE b 3 Current Time CURRENT WAVE FORM PULSE PULSE ON PULSE GMAW PP Pulse on Pulse is a Lincoln process specifically designed for use in welding relatively thin less than 1 4 6 4mm 0 thick aluminum See Table B 3 It gives weld beads with very consistent uniform ripple In Pulse on Pulse modes two dist...

Page 24: ...de sticks to the work piece or when the arc pops out during manipulative technique For low hydrogen types of electrodes E7018 E8018 E9018 etc a softer arc is usually desirable and the lower end of the Arc Control suits these types of elec trodes In either case the arc control is available to increase or decrease the energy level delivered to the arc ARC GOUGING Gouging is basically removing metal ...

Page 25: ... MildSteel StainlessSteel StainlessSteel E4043 E5356 L56 L56 L56 L56 L56 L56 E308L E308L 0 035 0 035 0 025 0 025 0 030 0 030 0 035 0 035 0 030 0 035 100 Ar 100 Ar 100 CO2 75 25Ar CO2 100 CO2 75 25Ar CO2 100 CO2 75 25Ar CO2 Tri mix Tri mix 22ga NotRecommended 100 0 8 NotRecommended 90 1 0 20ga 5 0 0 5 5 1 0 8 0 1 0 0 1 7 0 0 0 1 0 1 0 2 1 0 1 0 2 1 18ga 140 1 7 140 1 5 110 1 5 110 1 5 100 2 5 100 2...

Page 26: ...age K1838 1 Valet Style Undercarriage K1796 Coaxial Welding Cable Requires Adapter K2176 1 K2176 1 Twist mate to Lug Adapters Dual Cylinder Kit for K1764 1 is K1702 1 Welding Cable Connectors K852 70 1 0 2 0 CABLE K852 95 2 0 3 0 CABLE COMPATIbLE LINCOLN EQUIPMENT Any ArcLink compatible semi automatic wire feeding equipment POWER WAVE 405M ...

Page 27: ...ield satisfactory weld performance To ensure optimal performance the calibration of output Voltage and Current should be checked yearly CALIbRATION SPECIFICATION Output Voltage and Current are calibrated at the fac tory Generally speaking the machine calibration will not need adjustment However if the weld perfor mance changes or the yearly calibration check reveals a problem contact the Lincoln E...

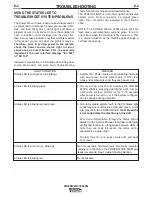
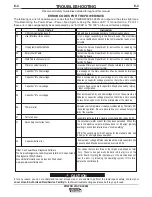
Page 28: ...IBLE CAUSE lists the obvious external possibilities that may contribute to the machine symptom Step 3 RECOMMENDED COURSE OF ACTION This column provides a course of action for the Possible Cause generally it states to contact your local Lincoln Authorized Field Service Facility If you do not understand or are unable to perform the Recommended Course of Action safely contact your local Lincoln Autho...

Page 29: ...on This is a normal situation as the machine goes through a self test at power up LIGHT CONDITION Status LED is solid green no blinking Status LED is blinking green Status LED is blinking red and green Status LED is solid red no blinking Status LED is blinking red MEANING 1 System OK Power source communicating normally with wire feeder and its components if other fea tures and components show they...

Page 30: ...n reloading the Welding Software Contact the Service Department for instructions on reloading the Welding Software Contact the Service Department for instructions on reloading the Welding Software Excessive Primary current present May be related to a short in the main transformer or output rectifier Low voltage on the main capacitors May be caused by improper input configuration When accompanied b...

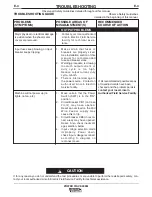
Page 31: ...lity for technical assis tance 1 Make certain that fuses or breakers are properly sized See Installation section of this manual for recommended fuse and breaker sizes 2 Welding procedure is drawing too much output current or duty cycle is too high Reduce output current duty cycle or both 3 There is internal damage to the power source Contact an authorized Lincoln Electric Service facility 1 Make c...

Page 32: ...t has opened After machine has cooled reduce load duty cycle or both Check for material blocking intake or exhaust louvers 3 DC Bus PC board thermostat has opened check for excessive load on 40VDC supply 1 Input voltage is too low or too high Make certain that input voltage is proper according to the Rating Plate located on the rear of the machine 2 If the Thermal LED is also lit see Yellow Therma...

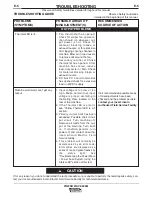
Page 33: ...ne won t produce full output Auxiliary receptacle is dead no auxiliary voltage 1 Secondary current limit has been exceeded and the machine has phased back to protect itself 2 Adjust procedure or reduce load to lower current draw from the machine 1 Input voltage may be too low limiting output capability of the power source Make certain that the input voltage is proper according to the Rating Plate ...

Page 34: ...ify weld mode is correct for processes 3 The power source may require calibration 4 Check the actual current dis played on the Power Feed 10 vs actual current measured via exter nal meter 5 Check the actual voltage dis played on the Power Feed 10 vs actual voltage measured via exter nal meter 6 Check the actual WFS displayed on the Power Feed 10 vs actual WFS measured via external meter 1 Check fo...

Page 35: ...nly It may not be accurate for all machines covered by this manual The specific diagram for a particular code is pasted inside the machine on one of the enclosure panels If the diagram is illegible write to the Service Department for a replacement Give the equipment code number ...

Page 36: ...It may not be accurate for all machines covered by this manual The specific diagram for a particular code is pasted inside the machine on one of the enclosure panels If the diagram is illegible write to the Service Department for a replacement Give the equipment code number ...

Page 37: ...RAM F 3 POWER WAVE 405M Connection Diagram Semi automatic Simple System Electrode Positive CV Pulse Configuration shown POWER WAVE WIRE FEEDER CONTROL CABLE K1543 TO WORK POWER WAVE WIRE FEEDER CONTROL CABLE K1543 TO WORK ...

Page 38: ...C R E W S C A 1 0 0 1 1 0 0 1 N N O T P R O T R U D E M O R E T H A N 0 5 I N 0 5 I N C H E S I N S I D E T H E M A C H I N E C H E S I N S I D E T H E M A C H I N E 1 1 8 4 3 5 0 14 79 12 44 3 44 21 60 27 82 5 50 10 0 10 00 0 MOUNTING HOLE LOCATIONS M19527 13 1 0 1 4 1 4 20 NUT 4 PLACES NOTE MOUNTING SCREWS CA 10 01 10 01 N NOT PROTR UDE MORE THAN 0 5 IN 0 5 INCHES INSIDE THE MACHINE CHES INSIDE ...

Page 39: ...NOTES POWER WAVE 405M ...

Page 40: ... electrically live parts or electrode with skin or wet clothing Insulate yourself from work and ground No toque las partes o los electrodos bajo carga con la piel o ropa moja da Aislese del trabajo y de la tierra Ne laissez ni la peau ni des vête ments mouillés entrer en contact avec des pièces sous tension Isolez vous du travail et de la terre Berühren Sie keine stromführenden Teile oder Elektrod...

Page 41: ... gute Be und Entlüftung des Arbeitsplatzes Mantenha seu rosto da fumaça Use ventilação e exhaustão para remover fumo da zona respiratória Turn power off before servicing Desconectar el cable de ali mentación de poder de la máquina antes de iniciar cualquier servicio Débranchez le courant avant l entre tien Strom vor Wartungsarbeiten abschalten Netzstrom völlig öffnen Maschine anhalten Não opere co...

Page 42: ...s and Service through Subsidiaries and Distributors Worldwide Cleveland Ohio 44117 1199 U S A TEL 216 481 8100 FAX 216 486 1751 WEB SITE www lincolnelectric com World s Leader in Welding and Cutting Products ...

Reviews: