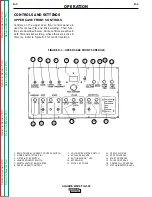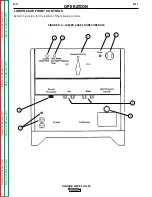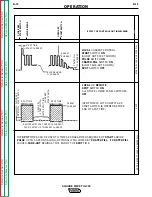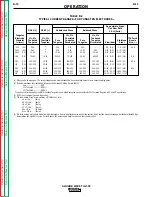
UPPER CASE FRONT CONTROL PANEL
The upper case front panel controls are used for man-
ual TIG and stick welding.
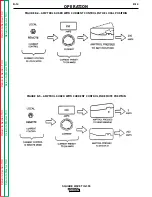
1. CURRENT CONTROL SWITCH
A two-position toggle switch:
LOCAL (PANEL): Current is controlled by the
machine settings; remote Amptrol has no affect
on current.
REMOTE: Current is controlled by a remote
Amptrol up to the current set on the machine.
2.
MODE SWITCH
A two-position toggle switch:
STICK: For stick electrode welding (SMAW), this
position makes the Stick Arc Force control active.
This switch locks out high frequency, the gas and
water valves, and the AC Wave Balance control.
The STICK position also locks out the Spot Time,
Start Time and Crater Fill controls. The Pulse con-
trols are locked out except when an Arc Start
switch connected to the Remote receptacle is
closed.
TIG: For TIG welding (GTAW), this position locks
out the Stick Arc Force control. It makes all other
controls active. To start and stop the welding
sequence and to get output current, an Amptrol or
Arc Start switch must be used when this switch is
in the TIG position.
3.
2-STEP/4-STEP SWITCH
A two-position toggle switch: (Locked out in the
STICK mode.)
2-STEP: For use with an Arc Start switch or an
Amptrol remote current control. The Arc Start
switch must be held down during the entire weld
cycle. Pressing the Arc Start switch starts the
Preflow cycle, and releasing the switch ends the
weld cycle.
NOTE: If the Crater Fill switch (Item 16) is ON,
welding will continue after the Arc Start switch is
released. (See Crater Fill controls.)
4-STEP: For use with an Arc Start switch only. The
Arc Start switch must be pressed and released to
start the weld cycle. Pressing and releasing the
Arc Start switch a second time ends the weld
cycle. This eliminates the need to continuously
hold down the Arc Start switch during a weld. If
the Preflow timer (Item 12) is being used, the Arc
Start switch must be held down during the Preflow
time. The Arc switch can be released once an arc
is established.
NOTE: If the Crater Fill switch (Item 16) is ON,
welding will continue after the Arc Start switch is
pressed and released the second time. (See
Crater Fill Controls.)
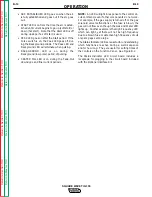
NOTE: If the arc goes out while welding in the 4-
Step mode, the machine will try to re-establish an
arc for a period of two seconds. The output con-
tactor will remain closed, and the High Frequency,
if in the Start Only or continuous mode, will be
activated. If an arc does not re-establish within
two seconds, the weld cycle is automatically
ended.
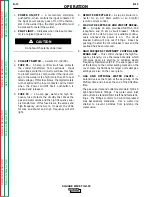
4.
HIGH FREQUENCY SWITCH
A three-position toggle switch: (Locked out in
STICK mode).
CONTINUOUS: High frequency will come on after
the gas Preflow time and remain on until the weld
is stopped.
START : High Frequency will come on for 1-2 sec-
onds after an arc is established, then go off.
(When AC TIG welding, the high frequency will
stay on until after the Start period and come on
again during the Crater Fill period.)
OFF: No high frequency.
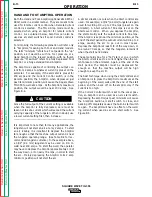
5.
DIGITAL VOLTMETER/AMMETER
Displays the output voltage of the welder when the
VOLTS/AMPS switch (Item 7) is held in the
“VOLTS” position.
When the VOLTS/AMPS SWITCH IS IN THE
“AMPS” position, this display functions as an
ammeter.
When you are not welding, the ammeter displays
the value preset by the Peak Current control.
When you are not welding and the Start Current
Display pushbutton is pressed, the ammeter will
display the preset Start (Item 14). (See Start
Controls)
NOTE: The ammeter display is an indicator of the
preset current. Actual welding current will be
slightly different.
While you are welding, the ammeter displays the
actual welding current. The ammeter is accurate
within ±3% of its reading or ±2 amps, whichever is
greatest. The ammeter displays RMS current.
(RMS current is the actual “heating value” of the
arc.) NOTE: Some types of ammeters will not
accurately read true RMS currents, particularly
when AC TIG welding aluminum. AC only amme-
ters may read as much as 40% low when measur-
ing AC TIG welding currents.
OPERATION
B-6
B-6
SQUARE WAVE TIG 355
Retur
n to Section TOC
Retur
n to Section TOC
Retur
n to Section TOC
Retur
n to Section TOC
Retur
n to Master TOC
Retur
n to Master TOC
Retur
n to Master TOC
Retur
n to Master TOC


