LINCOLN GmbH • Postfach 1263 • D-69183 Walldorf • Tel +49 (6227) 33-0 • Fax +49 (6227) 33-259 • Tx 466088
Page 12 from 13
Owner Manual
Technical Description
2.1A-28001-A94
Subject to modifications
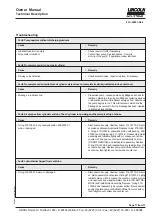
• Fault: Lubricant discharged from reservoir thread
• Cause
•
Remedy
• Gasket 306-17831-3 either worn or damaged.
•
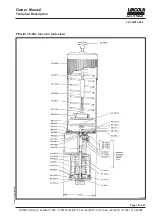
By means of grip pliers withdraw guide rod from top of reser-
voir and latch. Unscrew reservoir from reservoir base and
remove. Unscrew two 201-12018-3 hex. socket screws. Re-
move gasket support 404-20255-2. Replace gasket 306-
17831 and two paper gaskets 306-17833-1. To reassemble,
reserve deassembly procedure.
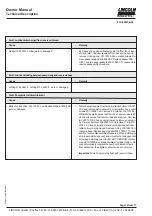
• Fault: Lubricant leaking between pump body and reservoir base
• Cause
•
Remedy
• O-Ring 219-12451-4, O-Ring 219-12227-8 worn or damaged.
• Fault: Pump fails to deliver lubricant
• Cause
•
Remedy
• Balls of check valve, 233-13001-7, and ball seat 404-20235-2 dirty,
•
Disconnect air supply. Unscrew air cylinder bottom 314-187
worn or damaged.
70-2 and remove piston assembly. Unscrew two hex. socket
screws 201-12594-1 and remove air cylinder 314-19108-2.
Withdraw the piston guide rod from top of reservoir and latch.
Unscrew reservoir from reservoir base and remove. Unscrew
two 201-12018-3 hex. socket screws and remove pump bo-
dy. Remove ball seat 404-20235-2 and replace O-ring 219-
12451-4. Clean and inspect check valve ball and ball seat,
replace if worn or damaged. Replace O-ring 219-12227-8 in
reservoir base. Replace paper gasket 306-17833-1. To reas
semble, reverse disassembly procedures. When installing pi-
ston, loosen piston and vent screw counter nut and open vent
screw approximately one turn (DO NOT REMOVE), replace
O-ring 219-12225-6 and reassemble air cylinder bottom. Re-
connect air supply. Operate the pump until lubricant flows
from vent screw, then tighten vent screw and counter nut.
Important: Pump body must be flush with reservoir base.


