Linddana A/S
. Ølholm Bygade 70 . DK-7160 Tørring . T +45 75 80 52 00 . tp@linddana.com . www.linddana.com
Brugsanvisning: TP 230 fra dato 02.11.2015 ©Copyright 2008
21
8.3.5
Casing
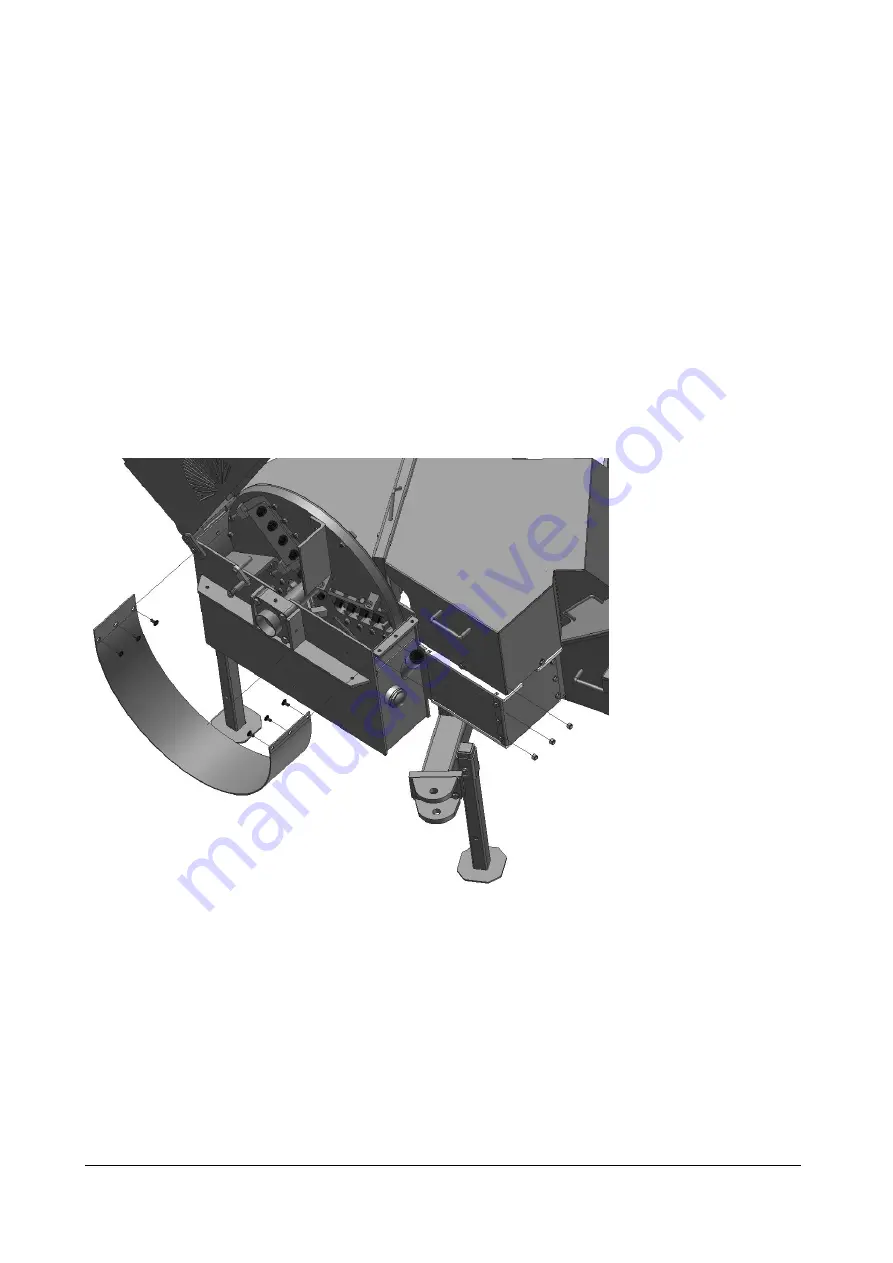
The TP 230 is equipped with a replaceable casing at the base of the rotor housing. The casing
bears the wear and tear that would otherwise affect the base of the rotor housing.
What to do:
Stop the machine and turn off any power. Loosen the bolts holding the two sections of the rotor
housing together and open the rotor housing. Remove the top section of the rotor housing.
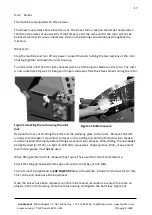
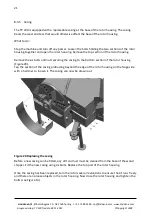
Remove the six bolts and nuts securing the casing to the bottom section of the rotor housing
(Figure 20).
Tap the section of the casing protruding beyond the edge of the rotor housing on the hinge side
with a hammer to loosen it. The casing can now be drawn out.
Figure 20 Replacing the casing
Before a new casing can be fitted, any dirt and rust must be cleaned from the base of the wood
chipper. Fit the new casing using six bolts. Replace the top part of the rotor housing.
Once the casing has been replaced, turn the rotor several revolutions to ensure that it runs freely
and there are no loose objects in the rotor housing. Now close the rotor housing and tighten the
bolts (see Figure 13).

