background image

Manuel Utilisateur 


Français 

- 8 - 


Introduction 

 
Merci d’avoir acheté le LINDY HDMI Switch Remote. Ce commutateur haute performance vous 
permet de connecter jusqu’à 3 périphériques DVI/HDMI à un seul récepteur DVI/HDMI comme 
une télé ou un projecteur.  
 
Conçu pour les installations Home Cinema, le HDMI Switch Remote est compatible Full HDCP 
et supporte de l’audio multi canal et résolutions HDTV jusqu’à 1080p. La commutation entre les 
périphériques se fait en appuyant sur le bouton du commutateur ou par une télécommande 
infrarouge. Une fonction d’amélioration de la qualité du signal permet de connecter l’installation 
même sur de grandes distances. 


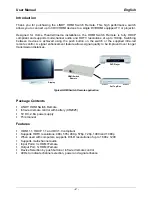
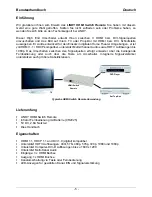
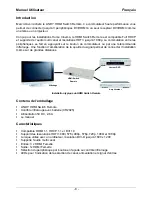
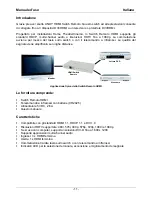
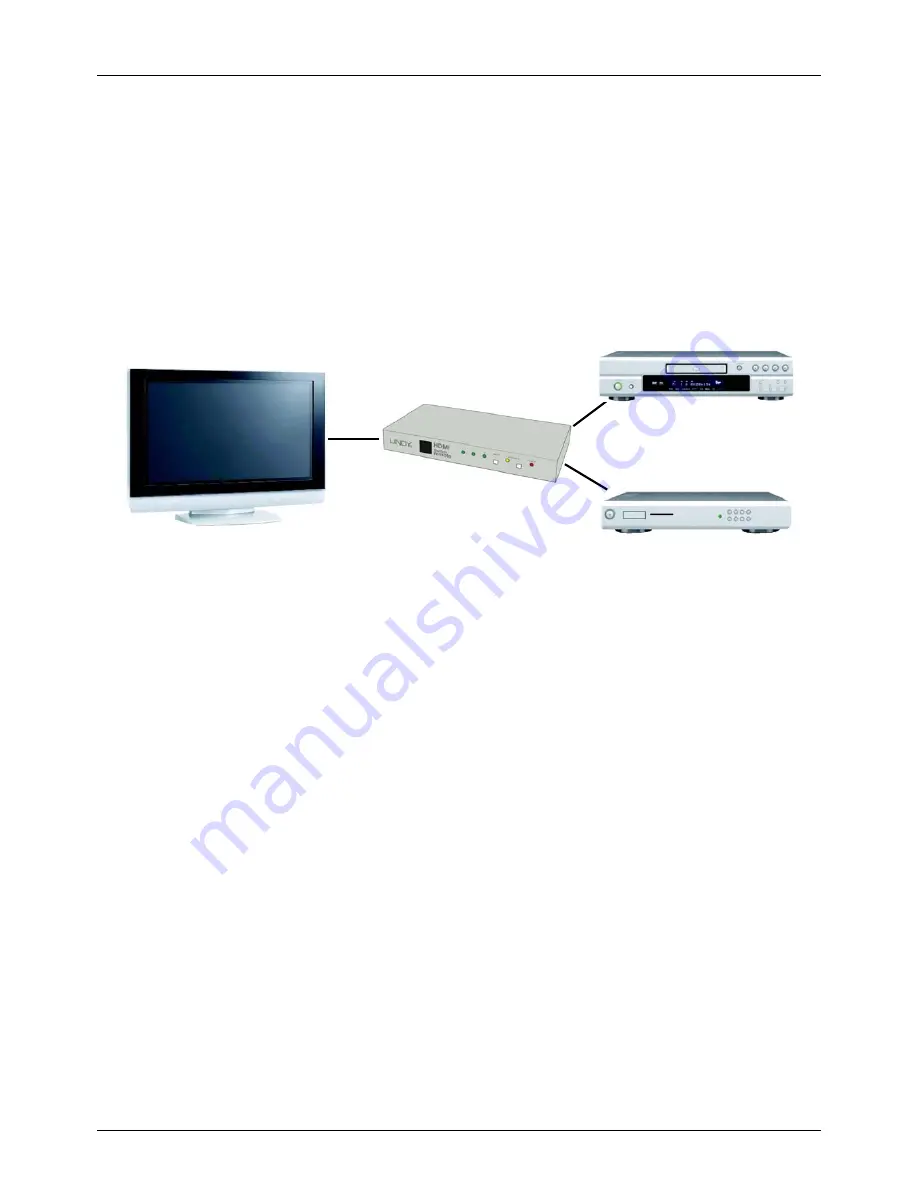
Installation typique du HDMI Switch Remote  

 
Contenu de l’emballage 


ƒ

  LINDY HDMI Switch Remote 

ƒ

  Contrôle infrarouge avec batterie (CR2025) 

ƒ

  Alimentation 5V DC, 2.6A   

ƒ

 Le 

manuel


Caractéristiques 


ƒ

  Compatible HDMI 1.1, HDCP 1.1 et DVI 1.0 

ƒ

  Support des résolutions HDTV: 480i, 576i, 480p, 576p, 720p, 1080i et 1080p 

ƒ

  Lorsque utilisé avec un ordinateur, résolution DVI-D jusqu’à 1600 x 1200 

ƒ

  Supporte l’audio multi canal 

ƒ

  Entrée: 3 x HDMI Femelle 

ƒ

  Sortie: 1x HDMI Femelle 

ƒ

  Sélection du périphérique par bouton en façade ou contrôle infrarouge 

ƒ

  LEDs pour l’indication de la sélection de canal, alimentation et signal d’entrée  


Amplificateur 

Lecteur DVD 

Affichage 

HDMI Switch  

Remote 

Summary of Contents for 32592

Page 1: ...LECTRONICS LIMITED LINDY ELEKTRONIK GMBH FIRST EDITION APRIL 2006 HDMI Switch Remote User Manual English Benutzerhandbuch Deutsch Manuel Utilisateur Français Manuale d uso Italiano LINDY No 32592 www lindy com ...

Page 2: ...User Manual Page 2 Benutzerhandbuch Page 5 Manuel Utilisateur Page 8 Manuale d uso Page 11 ...

Page 3: ...l enhancement feature allows signal quality to be improved over longer transmission distances Typical HDMI Switch Remote application Package Contents LINDY HDMI Switch Remote Infra red remote control with battery CR2025 5V DC 2 6A power supply This manual Features HDMI 1 1 HDCP 1 1 and DVI 1 0 compliant Supports HDTV resolutions 480i 576i 480p 576p 720p 1080i and 1080p When used with computers sup...

Page 4: ...source devices to the three HDMI IN inputs 3 Power input Connect the supplied 5V DC power supply Front Panel Operation and Indicators 4 Remote control sensor 5 Input select Press the INPUT button to cycle through the different input channels The appropriate LED will illuminate to indicate the selected channel 6 Signal enhance Press the ENHANCE button to improve signal quality over longer transmiss...

Page 5: ...e HDMI Switch Remote does not respond to any commands from the remote control If present remove the plastic tab labelled Remove this tab that ships with the remote control Make sure you are in line of sight of the HDMI Switch Remote Make sure that there are no obstructions which may be blocking the infra red signal from the remote control Try switching channels using the push button to verify corr...

Page 6: ...flösungen bis 1080p Das Umschalten zwischen den Signalquellen erfolgt entweder über die beiliegende Fernbedienung oder auch über die Taste am Umschalter Integrierte Signalverstärker unterstützen auch größere Kabeldistanzen Typische HDMI Switch Remote Anwendung Lieferumfang LINDY HDMI Switch Remote Infrarot Fernbedienung mit Batterie CR2025 5V DC 2 6A Netzteil Dies Handbuch Eigenschaften HDMI 1 1 H...
Page 7: ...e ein HDMI HDMI oder HDMI DVI D Kabel 2 HDMI Eingänge Schließen Sie hier bis zu 3 Signalquellen an Verwenden Sie HDMI HDMI oder HDMI DVI D Kabel 3 DC Versorgungsspannung Schließen Sie hier das beiliegende 5V DC Netzteil an Vorderseite 4 IR Sensor Fernbedienung 5 Kanalumschalter Drücken den INPUT Schalter so oft bis die grüne LED des gewünschten Kanals aufleuchtet 6 Signalverstärkung Drücken Sie de...

Page 8: ...Signalen kompatibel Der HDMI Switch Remote reagiert nicht auf Kommandos der Fernbedienung Entfernen Sie bei Inbetriebnahme der Fernbedienung die Kunststofffolie mit dem Aufdruck Remove this tab aus der Fernbedienung durch herausziehen Sie benötigen zwischen Fernbedienung und dem IR Sensor am Switch 4 eine direkte nicht blockierte Sichtverbindung Wechseln Sie die Kanäle mit der Wahltaste direkt am ...

Page 9: ...lioration de la qualité du signal permet de connecter l installation même sur de grandes distances Installation typique du HDMI Switch Remote Contenu de l emballage LINDY HDMI Switch Remote Contrôle infrarouge avec batterie CR2025 Alimentation 5V DC 2 6A Le manuel Caractéristiques Compatible HDMI 1 1 HDCP 1 1 et DVI 1 0 Support des résolutions HDTV 480i 576i 480p 576p 720p 1080i et 1080p Lorsque u...

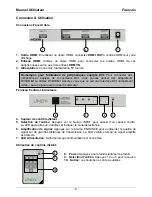
Page 10: ...source aux trois entrées HDMI IN 3 Alimentation Connectez l alimentation 5V fournie Panneau frontal et indicateurs 4 Capteur de contrôle distant 5 Sélection de l entrée Appuyez sur le bouton INPUT pour passer d un canal à l autre La LED appropriée va s allumer et indiquer le canal sélectionné 6 Amplification de signal Appuyez sur le bouton ENHANCE pour augmenter la qualité du signal sur de grandes...

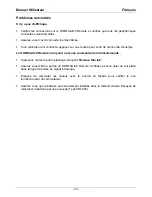
Page 11: ...énergie Le HDMI Switch Remote né répond à aucune commande de la télécommande Si présent retirez la partie plastique indiquant Remove this tab Assurez vous d être à portée du HDMI Switch Remote Vérifiez qu aucun objet ne soit placé dans la ligne de portée du signal infrarouge Essayez de commuter les canaux avec le bouton en façade pour vérifier le bon fonctionnement du commutateur Assurez vous que ...

Page 12: ... su lunghe distanze Applicazione tipica dello Switch Remoto HDMI La fornitura comprende Switch Remoto HDMI Telecomando a infrarossi con batterie CR2025 Alimentatore 5V DC 2 6A Questo manuale Caratteristiche Compatibile con gli standard HDMI 1 1 HDCP 1 1 e DVI 1 0 Risoluzioni HDTV supportate 480i 576i 480p 576p 720p 1080i e 1080p Se si usa con computer supporta risoluzioni DVI D fino a 1600 x 1200 ...

Page 13: ...orte HDMI IN sullo switch 3 Ingresso alimentatore collegare l alimentatore da 5V DC in dotazione Indicatori sul pannello frontale 4 Sensore del telecomando 5 Segnali in Input schiacciare il tasto INPUT per selezionare i diversi canali Il relativo LED si illuminerà a seconda del canale selezionato 6 Amplificazione del segnale schiacciare il tasto ENHANCE per migliorare la qualità del segnale su lun...

Page 14: ...disattivare la modalità standby Il telecomando non riesce a comunicare con lo Switch Se presente rimuovere la linguetta con scritto Remove this tab sul telecomando Assicurarsi che il telecomando sia direzionato verso il ricevitore dello switch e che non ci siano ostacoli che potrebbero bloccare il segnale a infrarossi del telecomando Provare a commutare tramite il tasto sullo switch per verificarn...

Page 15: ... particular installation If this equipment does cause harmful interference to radio or television reception which can be determined by turning the equipment off and on the user is encouraged to try to correct the interference by one or more of the following measures Reorient or relocate the receiving antenna Increase the separation between the equipment and receiver Connect the equipment into an o...

Page 16: ...h alten Elektro und Elektronikgeräten über die Hausmülltonne Diese Geräte müssen den lokalen Sammelsystemen bzw örtlichen Sammelstellen zugeführt werden Dort werden sie kostenlos entgegen genommen Die Kosten für den weiteren Recyclingprozess übernimmt die Gesamtheit der Gerätehersteller France En 2006 l union Européenne a introduit la nouvelle réglementation WEEE pour le recyclage de tout équipeme...

Reviews: