background image

Manual


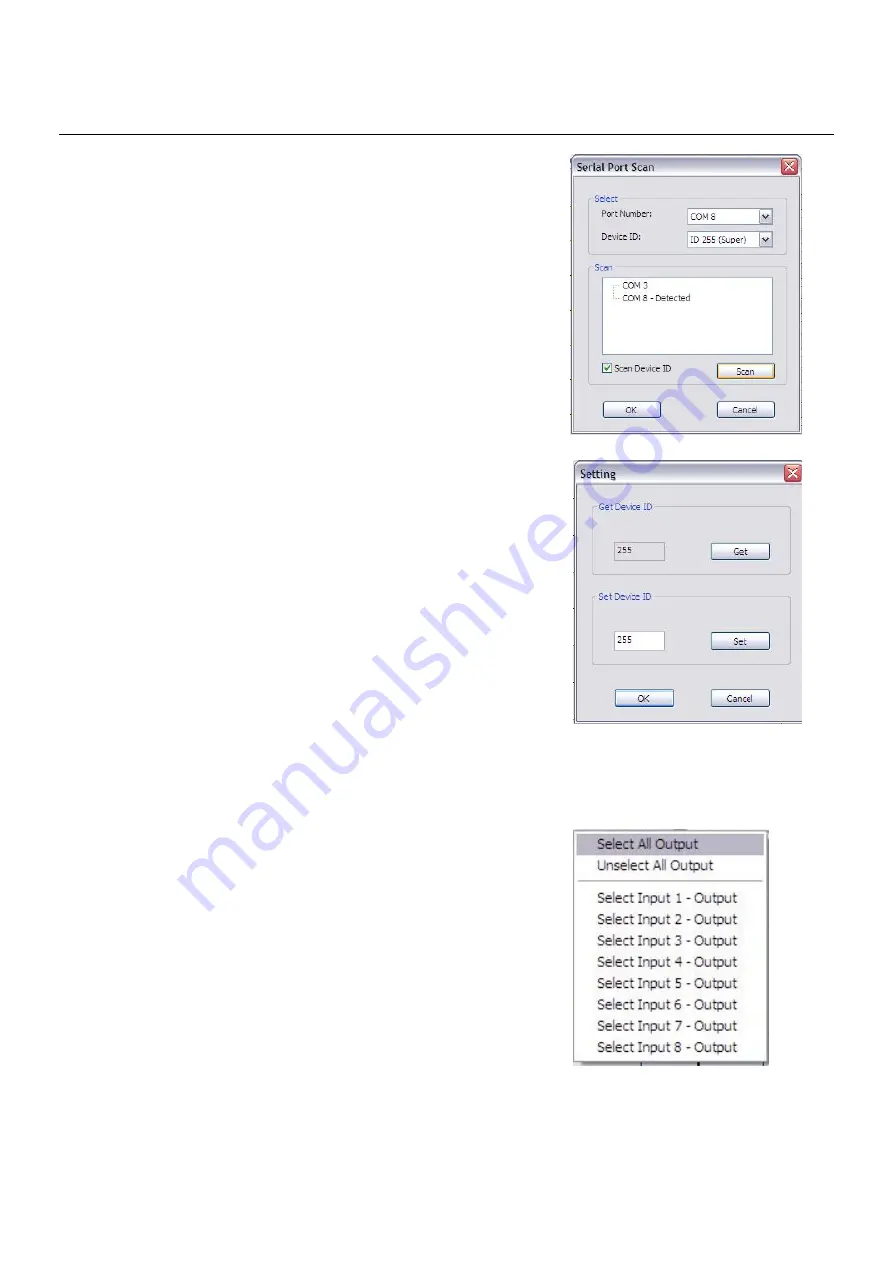
5.  Scan: Press the “scan” button, select “scan”, then select the 

detected port and click OK. 


6.  Setting: Press the “setting” button then press the “get” button to read 

back the device ID. Press the “set” button to write the device ID. 


7.  Linkage: Press the “linkage” button to read back all the status ID’s. 
 
8.  Open/Close: Press either the “open” or “close” button to open or close the COM port. 


9.  Mapping:  
 

Select All Output: Click on “Select All Output” then  
select the source on the main menu. This quickly 
sets all the outputs to the same source. 
 
Unselect All Output: This releases all the outputs 
 
Select Input 1~8 Output: Select the input source,  
then select the output port icon.  
Example: click on “Select Input 1 – Output”, then  
select output port 1 & 2. The video and audio will  
be sent to port 1 & 2. 


Summary of Contents for 38088

Page 1: ... LINDY ELECTRONICS LIMITED LINDY ELEKTRONIK GMBH FIRST EDITION January 2012 8x8 DVI Matrix Manual English LINDY No 38088 www lindy com ...

Page 2: ......

Page 3: ...nction Switch channels using RS 232 USB or IR remote control Single link 165MHz 4 95Gbps Front Panel 1 Power switch 2 Seven segment LED indicator 3 Input Output indicators Press the or switch on the input output buttons to select the source and display desired 4 IR receiver Rear Panel 1 AC power input 100 240V 2 RS 232 Communication port 3 USB control port 4 Main dip switches 5 DVI output ports 6 ...

Page 4: ...he on position for firmware update mode d Set Pins 2 3 to the respective positions to assign which block is to be updated e Power on your Matrix and the firmware update program should begin the update sequence automatically If the program does not start check the cable connections f Once the firmware update sequence has completed the screen will display OK at this point turn off the Matrix g When ...

Page 5: ...tatus ID s 8 Open Close Press either the open or close button to open or close the COM port 9 Mapping Select All Output Click on Select All Output then select the source on the main menu This quickly sets all the outputs to the same source Unselect All Output This releases all the outputs Select Input 1 8 Output Select the input source then select the output port icon Example click on Select Input...

Page 6: ...6 D4 Output D select Input 4 G2 Output G select Input 2 A7 Output A select Input 7 D5 Output D select Input 5 G3 Output G select Input 3 A8 Output A select Input 8 D6 Output D select Input 6 G4 Output G select Input 4 B1 Output B select Input 1 D7 Output D select Input 7 G5 Output G select Input 5 B2 Output B select Input 2 D8 Output D select Input 8 G6 Output G select Input 6 B3 Output B select I...

Page 7: ...re cautioned that changes or modification not expressly approved by the party responsible for compliance could void your This device complies with part 15 of the FCC Rules subject to the following two conditions This device may not cause harmful interference and This device must accept any interference received including interference that may cause undesired operation WEEE Waste of Electrical and ...

Reviews: