Radio Frequency Energy, Certifications
Shielded cables must be used with this equipment to maintain
compliance with radio frequency energy emission regulations and
ensure a suitably high level of immunity to electromagnetic
disturbances.
FCC Warning
This equipment has been tested and found to comply with the
limits for a Class B Digital device, pursuant to part 15 of the FCC
Rules. These limits are designed to provide reasonable protection
against harmful interference in a residential installation. This
equipment generates, uses, and can radiate radio frequency
energy and, if not installed and used in accordance with the
instructions, may cause harmful interference to radio
communications. However, there is no guarantee that interference
will not occur in a particular installation. If this equipment does
cause harmful interference to radio or television reception, which
can be determined by turning the equipment off and on, the user is
encouraged to try to correct the interference by one or more of the
following measures:
Reorient or relocate the receiving antenna
Increase the separation between the equipment and receiver
Connect the equipment into an outlet on a circuit different from
that to which the receiver is connected
Consult the dealer or an experienced technician for help
You are cautioned that changes or modifications not expressly
approved by the party responsible for compliance could void your
authority to operate the equipment.
This device complies with part 15 of the FCC Rules.
Operation is subject to the following two conditions:
1.
This device may not cause harmful interference, and
2.
This device must accept any interference received, including
interference that may cause undesired operation
LINDY No. 42950
©
LINDY ELECTRONICS LIMITED & LINDY-ELEKTRONIK GMBH - First Edition - (Aug-2004)
Manuel Utilisateur
Manuale d’uso
Installation du pilote
Veuillez tout d’abord installer le pilote fourni avant de connecter la
camera à votre ordinateur. Insérez le CD dans votre lecteur CD-ROM.
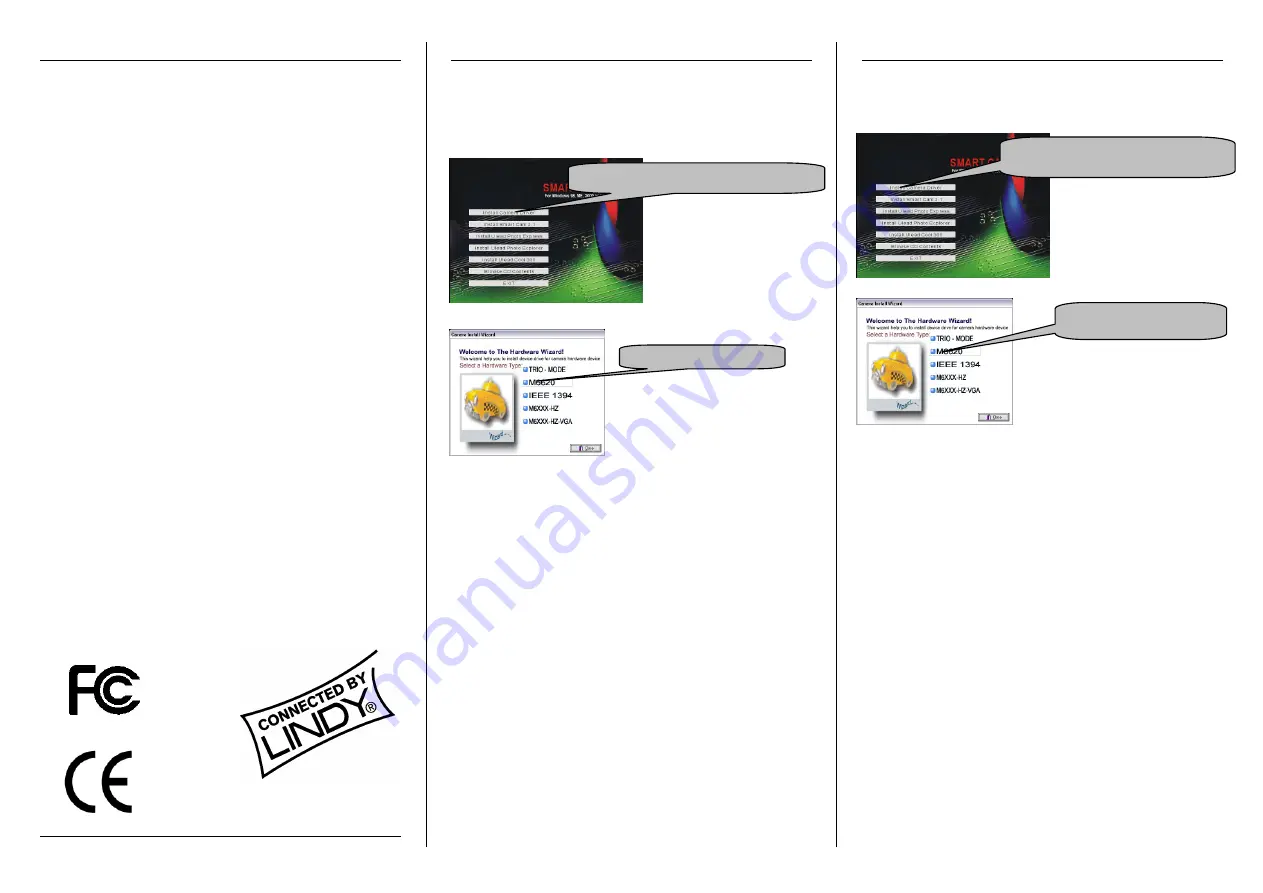
Le programme d’installation va automatiquement se lancer et afficher le
menu suivant:
La menu de selection de materiel suivant s’affichera ensuite:
L’ordinateur va détecter la nouvelle caméra (‘SmartCam’) et vous
indiquera que le logiciel de gestion de la caméra peut être installé.
Logiciels
Le CD contient des logiciels d’édition et d’enregistrement ULEAD.
Pour installer les logiciels, cliquez sur le nom du logiciel respectif dans
le premier menu et suivez les instructions. Les applications sont:
Amcap:
Un programme de capture facile à utiliser qui vous permet
d’enregistrer des séquences vidéo au format AVI.
Video Mail:
Créez des clips vidéos et envoyez les par email.
Video Monitor:
Capturez et enregistrez des images fixes, ou
contrôlez la séquence vidéo de la caméra
ULEAD Photo Express:
Logiciel d’édition photo
ULEAD Photo Explorer:
Outil pour visualiser, ajuster et organiser vos
images.
ULEAD Cool 360:
Outil pour générer des images panoramiques ou a
360 degrés
Spécifications Techniques
Type de capteur: CMOS Couleur
Résolution: 640 x 480 (VGA)
Interface:
USB 2.0
Focus:
3cm – infini
Fréqu. img: Jusqu’à 30 images/sec Bruit:
> 57dB
Alimentation: USB 5V DC
Support OS: Win 2000, XP
Installazione Driver
Collegare la camera con il computer soltanto dopo l`installazione
del driver. Inserire il CD nel drive del CD-ROM. Il seguente menu si
avvierà automaticamente:
individuerà il nuovo apparecchio (,SmartCam’
)
e Windows avviserà
che il software d`applicazione potrà ora essere installato
automaticamente oppure manualmente.
Software d`applicazione
Il CD contiene vari software di registrazione e ULEAD per gestire le
immagini. Per installare questi pacchetti software, cliccare sulle
rispettive icone e seguire le istruzioni dello schermo. Si possono
installare i seguenti software:
Amcap:
Programma per registrare delle sequenze video e per
salvare essi come file AVI. Questo programma fa parte del
pacchetto ,SmartCam’.
Video Mail:
Produce delle sequenze video che possono anche
essere mandati come email. Questo programma fa parte del
pacchetto ,SmartCam’.
Video Monitor:
Per registrare e salvare immagini singole oppure
per contemplare le sequenze video. Anche questo programma fa
parte del pacchetto ,SmartCam’.
ULEAD Photo Express:
Software per la gestione delle immagini
ULEAD Photo Explorer:
Strumento per organizzare e aggiustare le
immagini digitali.
ULEAD Coll 360:
Tool per generare delle immagini panoramiche a
360°.
Spezificazioni techniche:
Sensore: sensore CMOS a colori Risoluzione: 640 x 480 (VGA)
Interfaccia: USB 2.0
Fuoco: 3 cm-infinito
Frame rate:fino a 30 frames/s
Noise ratio: > 57dB
Voltaggio: USB 5 V DC Sistema operativo: Win2000,XP
Tested to comply with
FCC Standards.
For commercial use
Si le menu ne se charge pas
automatiquement,
veuillez
lancer
le
programme
‘Install.exe’ qui est situé sur la
racine du CD. Sélectionnez la
première option du menu qui
s’affiche alors.
Sélectionnez
la
seconde
entrée
(M6620)
pour
continuer.
Le
programme d’installation va démarrer.
Cliquez ‘Suivant’ sur chaque fenêtre
qui s’ouvrira, connectez ensuite la
camera USB.
2.0 port on your PC.
Sélectionnez cette option pour l’installation
Sélectionnez cet objet
Selezionare questa icona per
installare il driver della camera.
Selezionare questa icona
Se il menu non apparisce,
lanciare il programma
,Install.exe’ nell`elenco Autorun
del CD. Selezionare la prima
icona nel menu per iniziare la
installazione del driver.
Successivamente apparirà il
menu seguente:
Selezionare qui la seconda icona
(M6620). Partirà l`,InstallShieldWizard’.
Cliccare su ,continua’ in ogni finestra
fino alla fine dell`installazione. Collegare
ora la camera a una porta libera USB
2.0 del vostro computer. Il sistema


