English Manual
LINDY KVM Extender C5 Pro Installation and Use
page 32
6.3 Reconfigure the LOCAL connections and begin
1
On the computer from which you will run the upgrade, ensure that its BIOS settings will allow it to boot
from the floppy disk drive, rather than booting immediately from the hard drive.
2
Switch off the computer and disconnect the twisted pair cable from the LOCAL module.
3
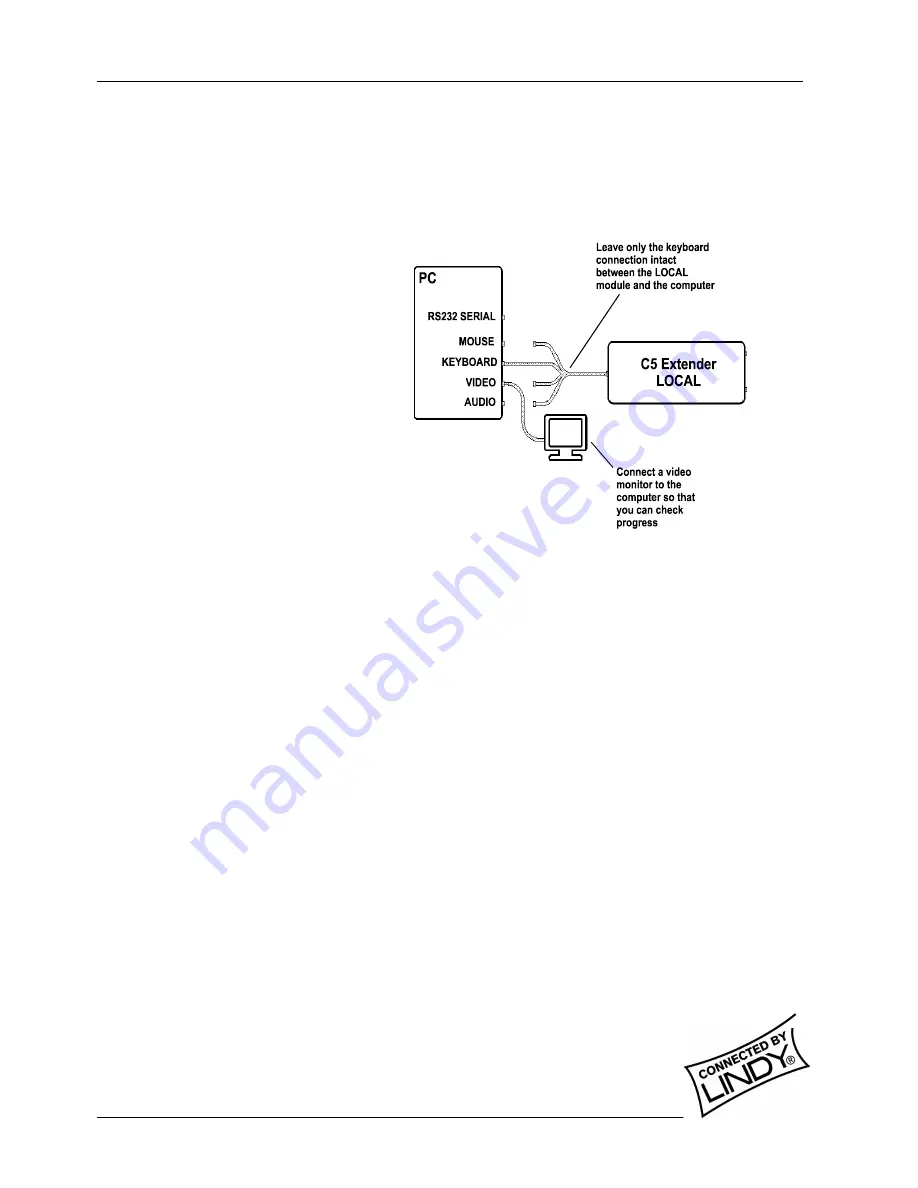
On the KVM+A multi-cable, leave the
keyboard connector attached to the
keyboard port of the computer.
Disconnect the KVM+A multi-cable
video and mouse connectors from the
ports on the computer.
4
So that you can check the upgrade
progress, connect a monitor directly to
the video port of the computer.
5
On the LOCAL module, change switch
1 to the ON position. Ensure that the
upgrade disk is in the floppy disk drive
of the computer.
6
Switch on the computer. The upgrade
process will start automatically and
confirmation will be given on screen.
7
Switch off the computer and disconnect the KVM+A multi-cable. Leave the monitor connected and the
upgrade disk in the floppy disk drive.


