Troubleshooting
10
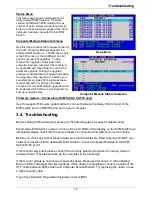
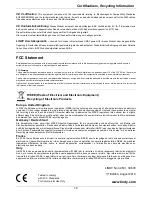
Status Menu
This status page shows information for all
daisy chained KVM Switches: Firmware
version, KVM Switch PCB model and max.
number of ports. Select one bank and press
Enter to access the status pages of the Cat.5
computer modules connected to that KVM
Switch.
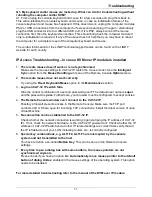
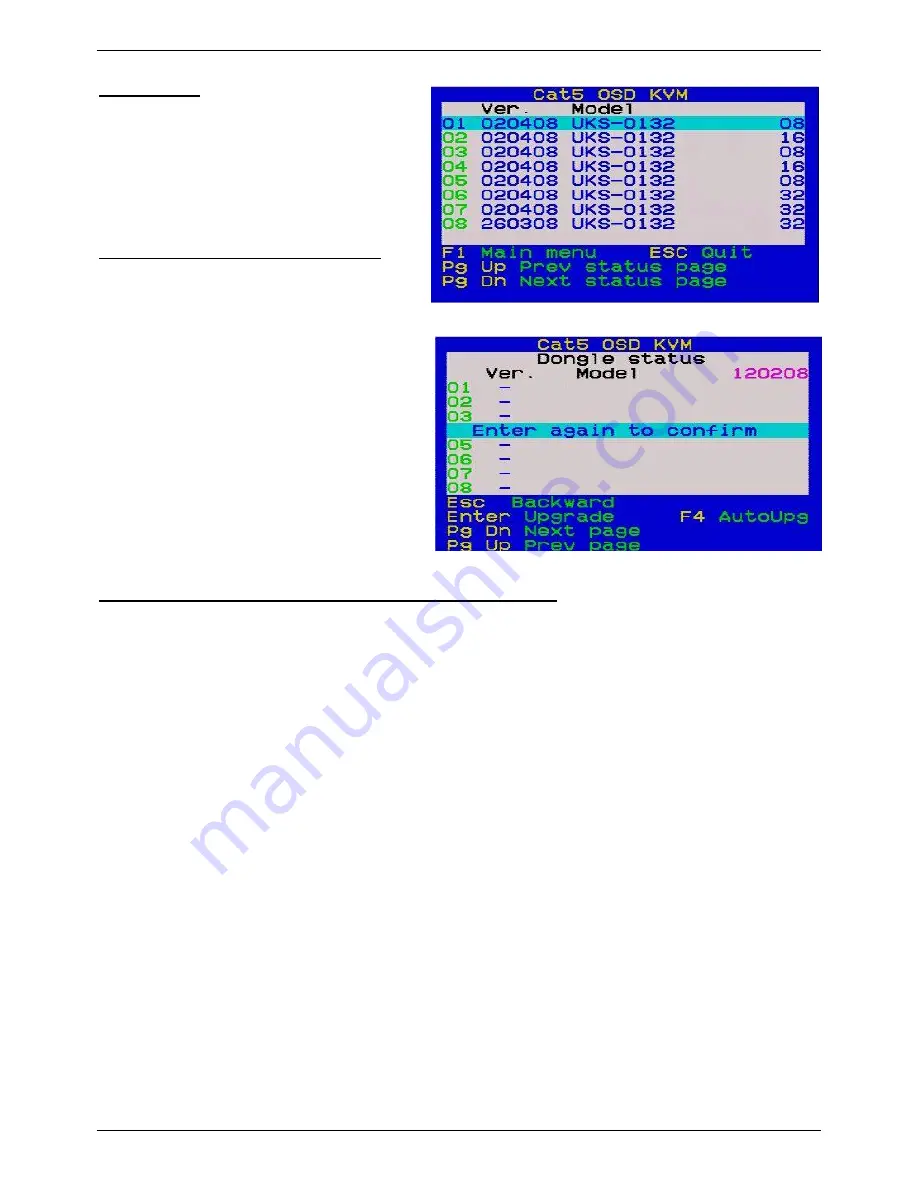
Computer Module Status Submenu
Use this page to check the firmware version of
the Cat.5 Computer Modules attached to a
selected KVM Switch (i.e. 120208 shown here
is the FW version of the KVM Switch), and
perform manual FW upgrades. To do a
manual FW upgrade of individual Cat.5
computer modules, just select the module to
be upgraded and press Enter to confirm the
automatic upgrade. During the upgrade
process a download bar will appear indicating
the progress of the upgrade. In addition you
can alternatively press F4 to toggle between
manual and auto (for all Cat.5 modules
connected to this KVM Switch) upgrade mode.
More detailed information is provided with the
Firmware upgrade files.
Firmware Update
– Stand-alone KVM Switch CAT32 only!
Use the supplied Firmware update cable to connect between the Daisy Chain In port of the
KVM switch and the DB9 RS-232 port on your computer.
3.4. Troubleshooting
Before calling technical support, please try the following steps for easy troubleshooting.
Stand-alone KVM Switch version: If none of the port LEDs or the display on the KVM Switch are
illuminated please check that the power adapter is connected and switched on at the mains.
Before you check any further please make sure that all cables are fitted correctly! Do NOT use
network connections but a dedicated RJ45 cable to connect Computer Modules to the KVM
Switch RJ45 ports!
If the monitor stays dark please check if the currently selected computer is in sleep mode or
powered down. If so please wake up the computer in the usual way.
If the monitor picture is not sharp or shows shadows: Please see Section 3.3. Video Setting
Menu in OSD and adjust the video settings. If this does not help please check the quality of the
UTP cable between KVM switch and Computer Access Module. Try replacing the cable, or use
a higher quality cable.
If you have forgotten the password please contact LINDY.
Status Menu
Computer Module Status Submenu


