background image


Troubleshooting


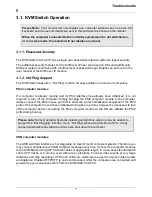
3.1.3. Computer / Port Selection 


You can select the computer you want to access in one of two different ways:  
 

  Keyboard hotkey selection 

  On screen display menu selection


3.1.4. Illuminated front display, Stand-alone KVM Switch CAT32 only! 
 

The front display has a two digit display to show the number of the KVM switch in the cascade: 
01: Master, 02: first slave, 03: second slave. In addition one LED per Port shows the status of 
the connected port: 

GREEN (solid): 

the computer on this port is powered (switched on or soft off with 5V active)


GREEN (blinking/flickering): 

this port is currently selected, displayed on the monitor, and 

keyboard/mouse commands are sent to the computer attached to this port.


Dark: 

No computer connected or computer not powered up / no 5V signal active


One red Power LED near the bank display shows if the KVM Switch is powered up. 


3.2. Keyboard Hotkey Selection and OSD Commands 


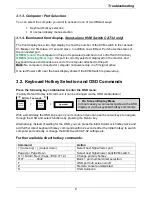
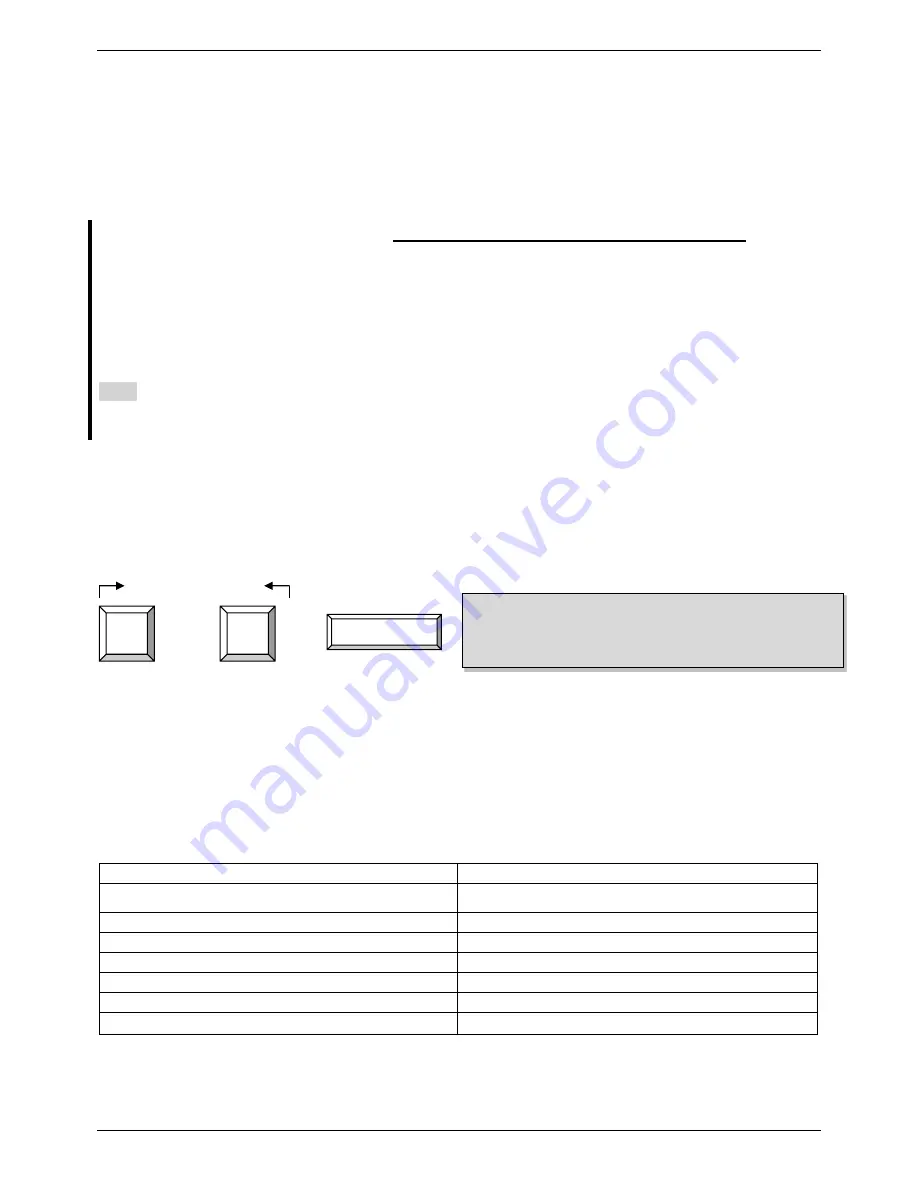
Press the following key combination to enter the OSD menu: 

(Factory Default Hotkey is Scroll Lock; it can be changed via the OSD configuration) 


         Within 2 seconds 


With a small delay the OSD pops up on your monitor and you can use the cursor keys to navigate 
through the OSD and select functions by pressing the Return key.  

Alternatively, instead of waiting for the OSD, you can press the initial Scroll Lock hotkey twice and 
add further direct keyboard hotkey commands within 2 seconds after the initial hotkey to switch 
computer ports directly or change the KVM Switch CAT-32 settings etc.  

 
Further available direct hotkey commands: 


Command 

Action 


(Cursor up) / 

 (Cursor down)


Select next higher/lower port 

Page Up / Page Down 

Select next higher/lower bank/KVM switch 

H + { Scroll / Num / Caps / ESC / F12 } 

Change primary hotkey  

0

101 ………… 0832 

Bank + port number direct selection 

OSD port info screen on/off 

Remote console on/disabled 

Start Autoscan 


=   

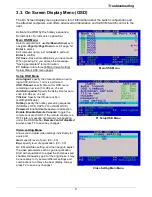
On Screen Display Menu


In most cases you can select ports via the OSD 
display or via the keyboard hotkey commands 

Space bar 

Scroll 

Lock


Scroll 

Lock


Summary of Contents for CAT-32 IP

Page 1: ... GMBH 3rd EDITION AUG 2014 KVM Switch CAT 32 IP with KVM over IP module slot User Manual English KVM Switch CAT 32 IP No 39631 KVM Switch Module for LCD Terminals No 39635 www lindy com Tested to comply with FCC Standards For Commercial Use Only ...

Page 2: ...rs multiple switches can be used They can be either equipped with a KVM over IP module each or they can easily be daisy chained with an IP module located in the master KVM switch only A dedicated daisy chain port allows a total number of 8 KVM Switches to be connected daisy chained together to control up to 256 computers Using this daisy chain port method ensures that none of the computer ports ar...

Page 3: ... because the software runs on its embedded processors only so there s no interference with computer operation or impact on network performance 1 3 KVM compatibility with other series KVM switches The KVM Switch CAT 32 is compatible with most other brands of KVM switches using a port cascaded installation To prevent any hotkey conflicts please ensure that the KVM hotkeys of the other KVM switches u...

Page 4: ... in the On Screen Display Menu Password log in protection for access to the KVM Switch auto log out option SSL security and additional password protection for IP access users Auto Scan Mode with an adjustable scan time from 5 104 seconds for monitoring computers Keyboard status automatically restored when switching between computers Front panel LED indicators for easy status monitoring Stand alone...

Page 5: ...ers Cat 5 6 Computer module PS 2 VGA LINDY No 39633 For USB computers Cat 5 6 Computer module USB VGA LINDY No 39634 A Cat 5e or 6 UTP cable of appropriate length max 100m is required to connect the KVM Switch to the computer modules These cables are available from LINDY in several different colors and lengths from 0 3m up to 100m We don t recommend using shielded FTP STP cables Please find a smal...

Page 6: ... of the information labels supplied with the KVM over IP module to the back or the front of the KVM Switch LCD Terminal so that you can easily locate the IP modules MAC address Cascading Daisy chaining of multiple KVM Switches You can integrate up to 8 KVM Switches in one KVM daisy chained installation with up to a maximum of 256 attached computers To connect an additional slave KVM Switch to the ...

Page 7: ...S 2 ports during boot up Please note Some Operating Systems including certain Unix versions may be unable to support the Hot Plugging function If you Hot Plug when using this kind of O S it may cause unpredictable operation and may even shut down the computer USB computer modules The USB and VGA interface is hot pluggable on most OS and computer systems Therefore you may connect and disconnect USB...

Page 8: ... and OSD Commands Press the following key combination to enter the OSD menu Factory Default Hotkey is Scroll Lock it can be changed via the OSD configuration Within 2 seconds With a small delay the OSD pops up on your monitor and you can use the cursor keys to navigate through the OSD and select functions by pressing the Return key Alternatively instead of waiting for the OSD you can press the ini...

Page 9: ...ng on screen 00 99 sec 5 sec AutoScan period Specify the delay time for auto scan 00 99 sec 5 sec Title bar Specify the title bar position Left Right Disable Hotkey specify the hotkey preceding sequence SCROLL LOCK CAPS F12 or NUM LOCK Password Enable Disable password protection Enable Disable Remote Console Toggle the remote console On Off If the remote console is in OFF state a message will remi...

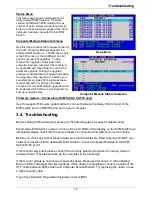
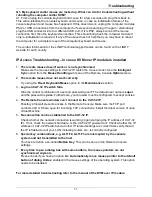
Page 10: ...itch CAT32 only Use the supplied Firmware update cable to connect between the Daisy Chain In port of the KVM switch and the DB9 RS 232 port on your computer 3 4 Troubleshooting Before calling technical support please try the following steps for easy troubleshooting Stand alone KVM Switch version If none of the port LEDs or the display on the KVM Switch are illuminated please check that the power a...

Page 11: ...ing the Reset Keyboard Mouse option in the Maintenance section 3 Login on CAT 32 IP switch fails Was the correct combination of user and password given The default user name is super and the password is pass Furthermore your browser must be configured to accept cookies 4 The Remote Console window can t connect to the CAT 32 IP Possibly a firewall prevents access to the Remote Console Make sure the...

Page 12: ...nic Products Europe United Kingdom In 2006 the European Union introduced regulations WEEE for the collection and recycling of all waste electrical and electronic equipment It is no longer allowable to simply throw away electrical and electronic equipment Instead these products must enter the recycling process Each individual EU member state has implemented the WEEE regulations into national law in...

Reviews: