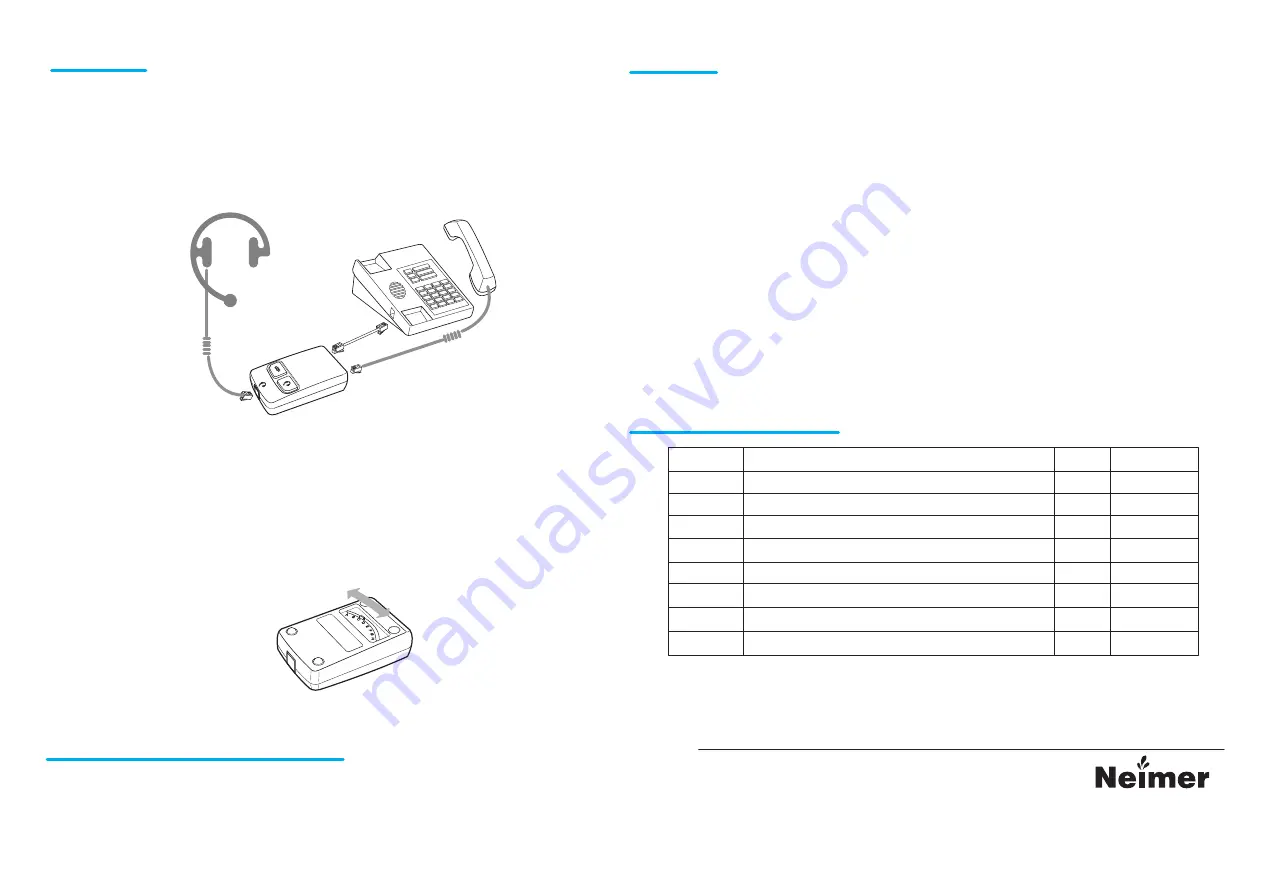
2. Set the Configuration Switch
- Remove the handset from the cradle.
- If you do't hear clear dialtone with the default Configuration Switch(4) setting,
move the Configuration Switch(4) through the Eight available positions until you do.
3. Make a Test Call
- Remove the handset from the cradle and place a call to a friend or colleague.
- If your friend cannot hear your voice, or if you hear buzzing,
try changing the Configuration Switch(4) setting.
3
Setting
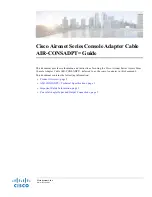
1. Make Connections(Refer to Figure A.)
- Unplug the handset cord from the base of your telephone
and insert it into the Handset Port(5) on the Switch Box.
- Connect the short cord(7) from the telephone base to the Telephone Port(6) on the Switch Box.
- Connect the curly cord of your headset to the Headset Port(3) on the Switch Box.
Figure A.
4
Using
Receiving calls
- When your telephone rings, press the call answer button on your telephone or remove the handset
from the cradle to begin speaking.
- If you are using the headset then the Headset Button(1) should be in the down position.
- If you are using the telephone handset then the Headset Button(1) should be in the up position.
- To end call simply press the end call button on the phone or replace the handset.
Making Calls
- To make a call using the headset, remove the handset from the cradle and ensure
that the Headset Button(1) is the down position.
- When you hear dialtone, dial the number of the party you wish to call.
- If you want to use the telephone handset instead of the headset then the Headset Button(1)
should be in the up position.
Muting during a call
- To mute the call, simply press the Mute Button(2) in down position. When you wish mute to finish,
simply release the Mute Button(2) by pressing it once more to be in up position.
5
Switch Configuration
6
Warning and Safety Information
* Read all instructions before using.
-. It should not be used for any other purpose.
-. Modification of the product will void the warranty.
SW position Matching Telephone Mic Amp Wiring
A Standard No M- R+ R- M+
B Cisco IP phones 79xx series No R+ M- M+ R-
C Ascom office and Philips phones No R- M+ M- R+
D Japanese phones, NEC, Nitsuko No M+ R+ R- M-
E Plantronics Vista Base No R- R+ M+ M-
F Panasonic phones and modular plug Yes M+ R- R+ M-
G Nortel digital phones and Avaya IP phones Yes M- R+ R- M+
H Avaya Callmaster V and VI, Cisco IP phones 79xx series Yes R+ M- M+ R-
Line Tech Co., Ltd.
Suite 902, IT 301, 397 Seokcheon-ro (Ssangyong 3rd, Bucheon Techno Park)
Bucheon City, Gyeonggi Do, 14449 Republic of KOREA
TEL : +82-32-624-4581~2 FAX : +82-32-624-4580
Web Site : www.line-tech.net www.neimer.com
e-mail : linetech@line-tech.net
TM