DO7315M
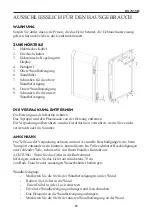
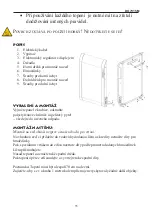
COMPONENTS
1.
Electricity cable
2. On/off switch
3. Electronic regulator with display
4. Handle
5. Upper wall mount
6. Wall plugs
7. Screws for upper wall mount
8. Lower wall mount
9. Screws for lower wall mount
REMOVE PACkAGING
Remove the heater from the box.
Remove the polystyrene and the
plastic from the heater.
Save the packaging to store the device during the summer or whenever it is not being
used.
INSTALLATION
Remove all components from their packaging and check that they have not been
damaged during transport. If components are damaged or missing, contact your
supplier immediately.
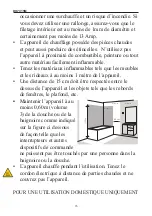
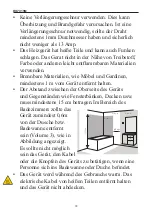
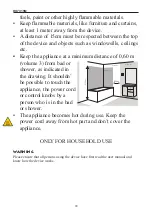
ATTENTION: if you want to fix the heater in the bathroom, please make sure to fix
the heater at least 70cm from bath tub, shower or other water holding objects.
Wall mounting:
- Mark the position of the wall mounts on the wall.
- Drill holes in the wall.
- Insert a plug into each hole.
- Place the upper wall mount and screw it in place.
- Then place the heater against the wall mount.
- Mark the position of the lower wall mount on the wall.
- Remove the heater from the wall once again.
- Drill holes in the wall and insert the plugs.
- Replace the heater on the wall.
- Screw the lower wall mount in place.
Note: The heater must be at least 70cm off the ground.
Ensure that there are no other objects within a radius of 1 metre around the
device.
29


