45
DO9248J
www.domo-elektro.be
ES
9
fruits or vegetables drop into the grinding head automatically. Do not load food too fast and
do not load too much food at a time.
Note:
Use the food pusher to remove the blockage if the jar lid is blocked by the materials.
5. Connect the appliance to the power source, and then press the power switch to
the“ON”position, the appliance starts to work. After a few minutes, the juice flow out.
Caution: Do not turn the power switch from "I" to "R" or from "R" to "I" directly at
any time during operation. If required, firstly press the power switch to “O” position and
make the appliance stop running completely and then turn the power switch from "I" to
"R" or from "R" to "I" .
Caution: Do not operate the unit before feeding food to avoid damaging the grinding
assembly (include grinding head and strainer).
Caution
:
Do not put your fingers or other foreign objects into the feeding opening while
it is in operation.
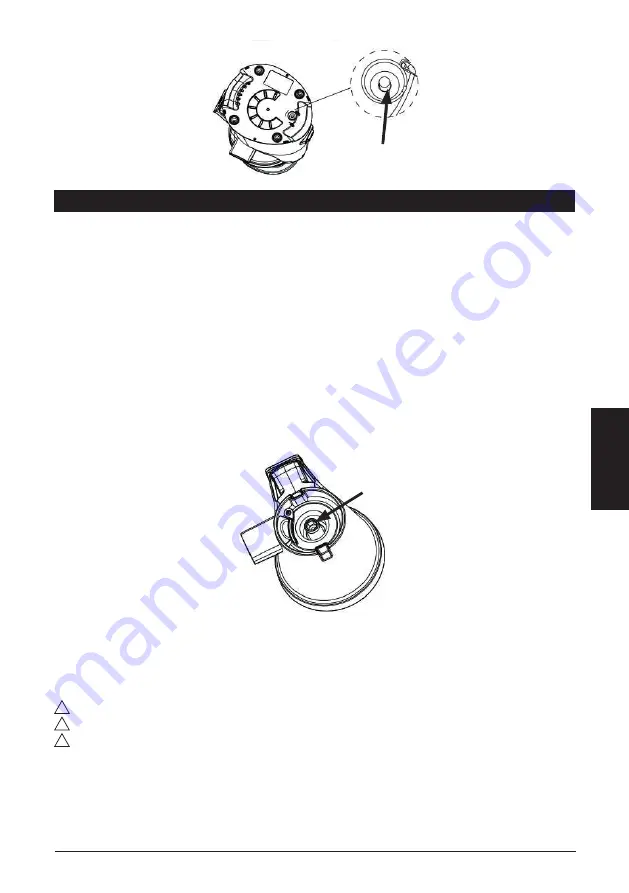
6. During operation, if the machine is stuck and
not operable, please firstly press the power
switch to “
O
” position and then press the reset
switch which is equipped at the bottom of
appliance (see Fig.6). After it, press and hold the power switch to the “
R
” position for few
seconds then try operating again. When reverse function cannot work, turn off the machine
and reassemble following the instructions given. After reassembly please try turning on the
machine.
7. When the juice container is full (the max capacity is 400ml) or the food has been
finished extracting, turn the power switch to the “
O
” position and empty the juice container
and residue container before continuing extracting.
Fig.6
LIMPIEZA Y MANTENIMIENTO
1.
Para facilitar el desmontaje del exprimidor lento, enchufe la exprimidora lenta y enciéndala sin carga
aproximadamente 30 segundos tras retirar los residuos. Si la tapa no se suelta con facilidad, siga y
repita dos o tres veces esta operación: inverso (R) – apagado (O) – encendido (I), y aguante y gire la
tapa simultáneamente para soltarla. Tras terminar de extraer el zumo, ponga un poco de agua en la
tolva para limpiarla y que sea más fácil soltarla.
2.
Saque el enchufe de la toma de corriente y deje que el aparato se enfríe completamente antes de
limpiarlo.
3.
Retire el empujador de alimentos del embudo de llenado y, a continuación, empuje la pinza hacia
atrás para liberar la tapa.
4.
Desenrosque la tapa del vaso y desmonte el resto de las piezas en orden inverso al montaje.
5.
Si le resulta difícil retirar el tornillo de prensado, coloque el recipiente sobre la superficie de trabajo.
Sujete el tornillo de prensado con una mano y, con la otra, empuje el eje del tornillo de prensado en
el fondo del recipiente, para empujar el tornillo de presión hacia fuera.
11
4. Detach the strainer and grinding head from the
jar. If it is difficult to detach the grinding head,
put the jar on the working table and hold the
grinding head with a hand, then push the axis of
grinding head (see Fig.7) at the jar bottom with
another hand to push the grinding head out of the jar.
5. Empty the residue container, and then clean the jar lid, grinding head, strainer, jar and
residue container under running water. When cleaning the strainer, only need to brush the
concave surface of the strainer under running water with the small cleaning brush for
several times, and then the whole strainer can be cleaned well.
Caution: Strainer is sharp, so handle carefully during cleaning
Caution: Do not use metal sponge to clean, it will damage the machine.
6. If you need to clean the residue outlet thoroughly, you shall firstly pull the buffer plate
out of the residue outlet and then clean it completely with the small cleaning brush.
7. Wipe the outside of motor unit with damp cloth. Never immerse the motor unit in water.
8. Dry all parts and assemble all parts well and then store the appliance in a dry place. The
juice container can be stored in the residue container.
Fig.7
Fig.7
6.
Vacíe los vasos medidores y, a continuación, limpie la tapa, el empujador, el filtro, el vaso, el tornillo
de presión y los vasos medidores con agua corriente. Utilice el cepillo de limpieza para limpiar el
filtro.
7.
Si necesita limpiar a fondo la salida de residuos, saque la placa separadora de la salida de residuos y
límpiela por completo con el cepillo de limpieza pequeño.
!
Atención: No use esponjas de metal, ya que estas pueden dañar la licuadora.
!
Tenga cuidado al limpiar el filtro. El filtro es afilado y puede ocasionar cortes.
!
Las piezas no se pueden lavar en el lavavajillas. Las altas temperaturas pueden dañar las piezas.
8.
Limpie el exterior de la unidad motora con un paño húmedo. ¡Nunca sumerja en agua el bloque
motor!
9.
Seque bien todas las piezas, vuelva a montar el aparato y guárdelo en un lugar seco.
Consejo: Enjuague todas las piezas inmediatamente después de su uso.


