VS-GSLG OPERATOR INSTALLATION GUIDE
- 2 -
TABLE OF CONTENTS
PRE-INSTALLATION INFORMATION
Gate Operator Classifi cations ........................................................................................................................................................................................................ 3
Safety Information and Warnings ................................................................................................................................................................................................... 3
Pre-Installation Information ............................................................................................................................................................................................................ 3
INSTALLATION
Unpacking and Inspection ............................................................................................................................................................................................................. 4
Pre-Installation Information ............................................................................................................................................................................................................ 4
Installation Instructions .................................................................................................................................................................................................................. 4
Electrical Instructions and LImit Switch Adjustments .................................................................................................................................................................... 5
Installation Instructions Drawing .................................................................................................................................................................................................... 6
Four Switch Rotary Limit Box Photo .............................................................................................................................................................................................. 7
Torque Limiter Adjustment ............................................................................................................................................................................................................. 8
Manual Disconnect ........................................................................................................................................................................................................................ 8
Maintenance .................................................................................................................................................................................................................................. 9
CONTROL BOARD ADJUSTMENTS and ACCESSORY CONNECTIONS
Control Board Adjustments .......................................................................................................................................................................................................... 10
Terminal Connection Descriptions ............................................................................................................................................................................................... 11
Current Sensing Adjustments ...................................................................................................................................................................................................... 12
Close Direction Current Sense Adjustment ................................................................................................................................................................................. 12
Open Direction Current Sense Adjustment.................................................................................................................................................................................. 12
Maximum Run Timer Adjustment................................................................................................................................................................................................. 12
Auto Close Timer Adjustment ...................................................................................................................................................................................................... 12
Master/Slave Connection ............................................................................................................................................................................................................. 12
Onboard L.E.D. Indicator Descriptions......................................................................................................................................................................................... 13
Important Notes for Installation of Master/Slave Applications ..................................................................................................................................................... 14
Surge Protector Instructions ........................................................................................................................................................................................................ 14
Control and Accessory Connection Illustrations .....................................................................................................................................................................15-18
ILLUSTRATIONS
Loop Layout Illustration ................................................................................................................................................................................................................ 19
Edge Layout Illustration #1 .......................................................................................................................................................................................................... 20
Edge Layout Illustration #2 .......................................................................................................................................................................................................... 21
Photo Eye Illustration ................................................................................................................................................................................................................... 22
Picket Gate Illustration ................................................................................................................................................................................................................. 23
Track Gate Illustration .................................................................................................................................................................................................................. 24
TROUBLESHOOTING
..................................................................................................................................................................................................................... 25
PARTS LISTS
How to Order Replacement Parts ................................................................................................................................................................................................ 25
Model VS-GSLG Mechanical Parts Exploded View ..................................................................................................................................................................... 26
Model VS-GSLG Mechanical Parts List ....................................................................................................................................................................................... 27
Model VS-GSLG Control Box Exploded View and Parts List - AC Tech ...................................................................................................................................... 28
Programming Instructions for Variable Speed Drive - AC Tech .................................................................................................................................................... 29
Model VS-GSLG Control Box Exploded View and Parts List - Hitachi ......................................................................................................................................... 30
Programming Instructions for Variable Speed Drive - Hitachi ...................................................................................................................................................... 31
Wiring Specifi cations ................................................................................................................................................................................................................... 32
PREVENTATIVE MAINTENANCE
................................................................................................................................................................................................... 34
GATE OPERATOR INSTALLATION CHECKLIST
........................................................................................................................................................................... 36
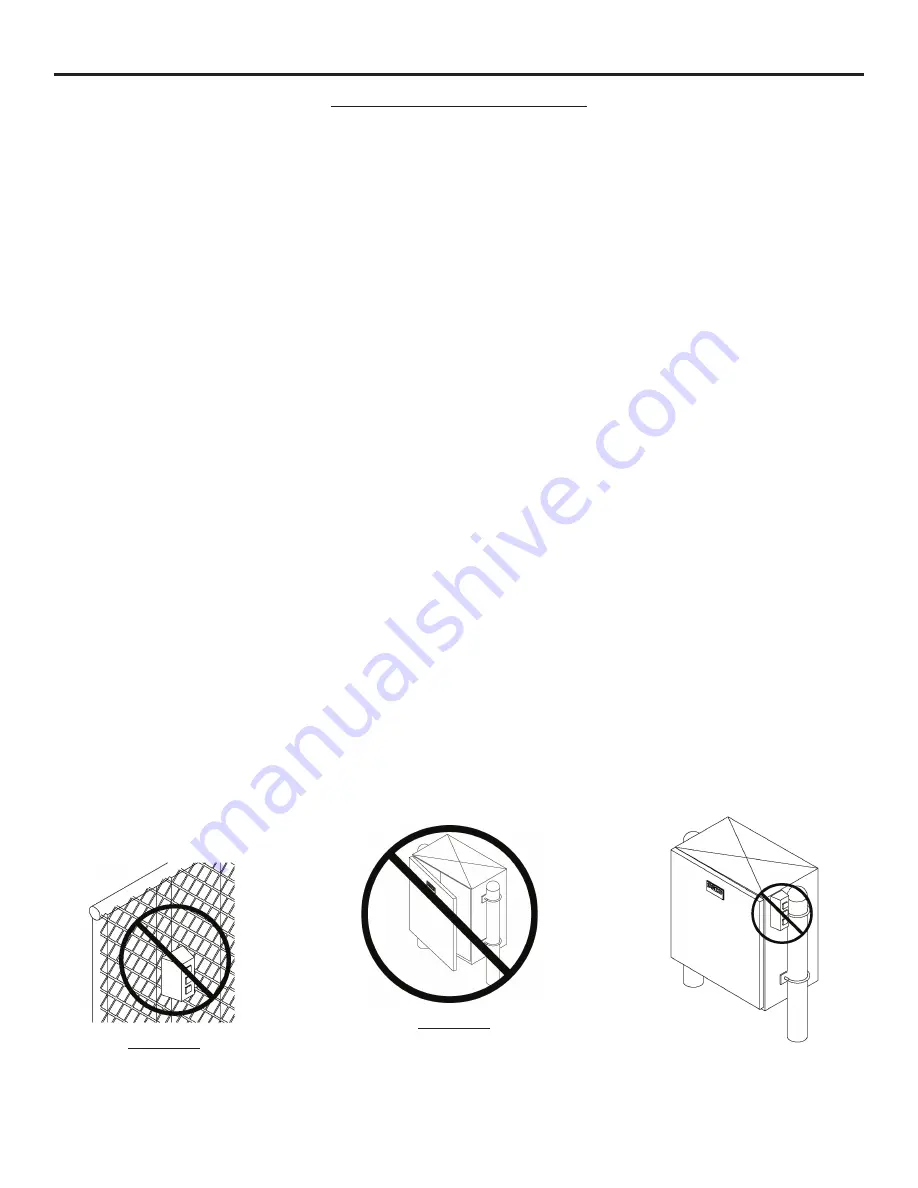
CAUTION!
DO NOT INSTALL
CONTROLS ON A
GATE OR FENCE LINE
CAUTION!
ONLY QUALIFIED SERVICE
TECHNICIANS SHOULD
WORK ON A LINEAR
SLIDE GATE OPERATOR
CAUTION!
DO NOT INSTALL
CONTROLS
ON THE OPERATOR
Summary of Contents for VS-GSLG
Page 6: ...VS GSLG OPERATOR INSTALLATION GUIDE 6...
Page 15: ...VS GSLG OPERATOR INSTALLATION GUIDE 15 CONTROL and ACCESSORY CONNECTION ILLUSTRATIONS...
Page 16: ...VS GSLG OPERATOR INSTALLATION GUIDE 16 CONTROL and ACCESSORY CONNECTION ILLUSTRATIONS...
Page 17: ...VS GSLG OPERATOR INSTALLATION GUIDE 17 CONTROL and ACCESSORY CONNECTION ILLUSTRATIONS...
Page 18: ...VS GSLG OPERATOR INSTALLATION GUIDE 18 CONTROL and ACCESSORY CONNECTION ILLUSTRATIONS...
Page 24: ...VS GSLG OPERATOR INSTALLATION GUIDE 24 TRACK GATE ILLUSTRATION...
Page 26: ...VS GSLG OPERATOR INSTALLATION GUIDE 26 MODEL VS GSLG MECHANICAL PARTS EXPLODED VIEW...
Page 33: ...VS GSLG OPERATOR INSTALLATION GUIDE 33 This page intentionally left blank...


