background image

9

2 Remote settings:

1, first the battery loaded correctly into random distribution remote control,

so the remote control can work properly;
2, the front end of remote control to IR port of the machine press the 0 key.
3,setting the signal source:

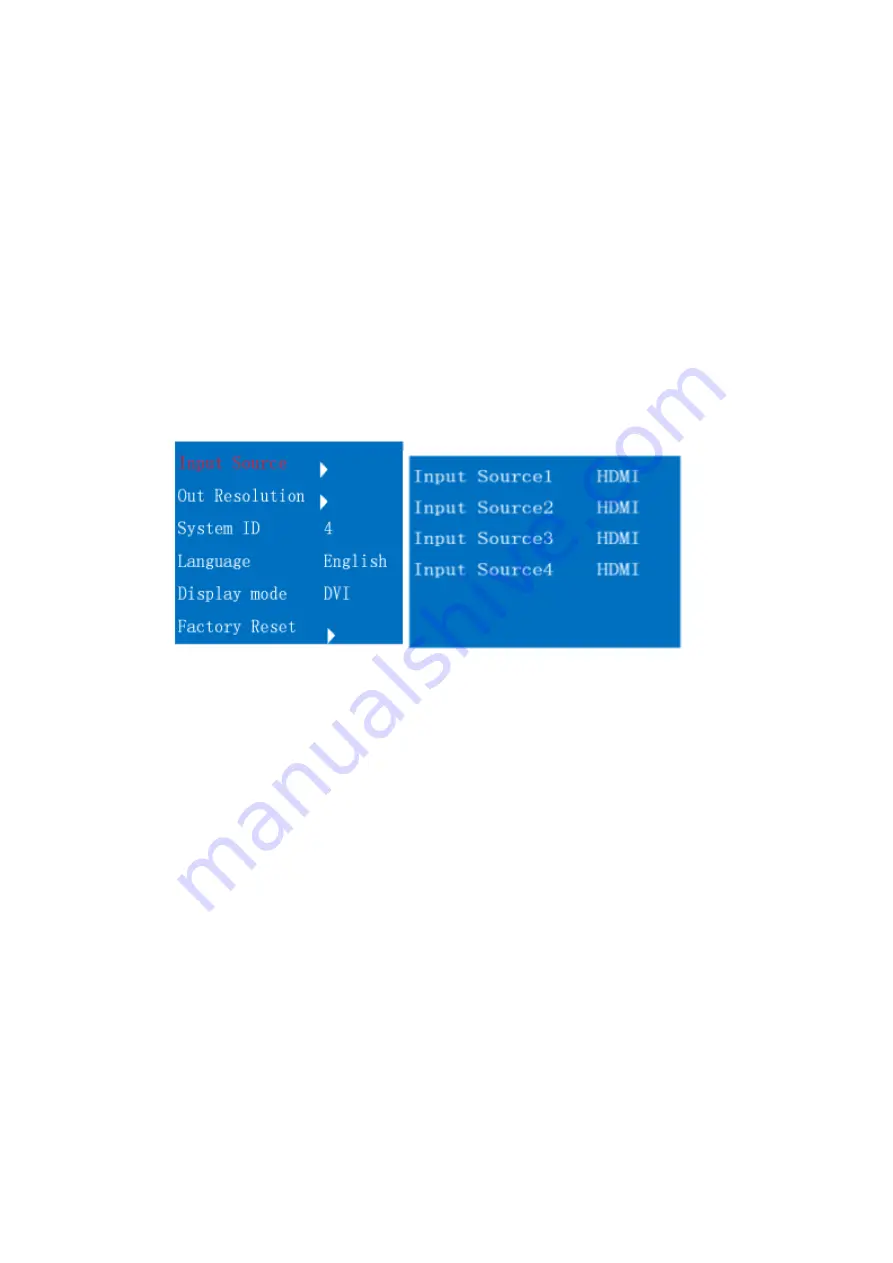
Press the MENU key so display unit pop-up the main menu as shown in Figure 1,

press the right navigation key then pop up sub-menu as shown in Figure 2, by

the left and right navigation keys to select the input signal, the input signal
contain HDMI, VGA and VIDEO ,after finishing

selecting access the type of

signal source of per channel ,press MENU key to save and exit to complete the

setup.the screen can display N images under N split mode. The input signal is

VGA, the screen may show the offset, color cast and display incomplete for the

first time access, , but can be corrected by remote control AUTO key.
Note: The menu operation mode and other settings are the same way as the signal
source, not

reproduced here!

figure 1

figure 2

4, Output resolution:

The factory setting output resolution

is 1920 * 1080 of device, if the

display unit less than 1920 x 1080 resolution and can not display properly, you
can reduce the resolution by the output resolution menu causing the display

unit to display properly, the device output resolution can be optional of 1920

* 1080,1024 * 768,1280 * 1024,1280 * 720.

5, System ID:
Reservation function, need not to be provided;
6, System Language:

Can be set to Chinese or English;

7, Display Mode:

The default setting is DVI mode, as if some of the display unit is HDMI

interface does not support DVI signal, you can change the DVI mode to HDMI mode;

8, Factory Reset:

Wrong mode of operation, some time will cause the device is not working

properly, you can factory reset so that the normal operation of the device;

Summary of Contents for LM-SH81

Page 1: ...HD Video Multiplexers LM SH81 User Manual ...

Page 2: ...1 Catalog 1 Installation Notes 2 2 Product Introduction 4 3 Machine installation 7 4 Remote Control Description 8 5 Key Instructions 10 6 Software Control 11 ...

Page 3: ...rusion to prevent the risk of leakage or short circuit 4 Connecting the signal line Inserting or pulling the signal line to the device the device needs outage so as not to damage the device Hot plug caused damage not covered under warranty 5 Vents The outer surface of the device may have openings for heat dissipation do not block these openings in order to avoid heat build up the risk of damage to...

Page 4: ...ces 10 properly organize the power cord to prevent breakage 11 the following conditions should unplug the device power cord handled by qualified service personnel 1 The power cord is damaged or frayed 2 When the liquid has been spilled into the device 3 The device is dropped or the cabinet damaged 4 This device malfunction or significant performance changes 5 Regularly check the fan whether is wor...

Page 5: ...imultaneously display multiple HD signals 2 The main function support a single display unit simultaneously display multiple high definition or analog signals 8 composite video 8 channel VGA 8 way HDMI in total 24 channel signal input 1 channel HDMI and 1 VGA output synchronously compatible with various input signal resolution supports 1920 1080 ultra high resolution output signal support PIP POP w...

Page 6: ...5 3 System topology ...

Page 7: ...6 4 Machines pictures LM SH91 LM SH161 ...

Page 8: ...sional control sofeware voltage AC 90 260V dimension 440mm L 177mm H 403mm W Weight 8 2kg plus or minus five percent Power No more than 15w Third Chapter Machine installation 1 Unpacking Check the host and accessories Including the host CD power cable remote control warranty card manual 2 Install the machine Setting display unit HD video multiplexers support 1 VGA and 1 HDMI output synchronization...

Page 9: ...ntrol Description After completion of the above hardware connection and turn on the power switch the display unit may also display no image then we can through the control software or an infrared remote control debug and settings If you need a small numbers display mode we can set up the machine by remote control this chapter we first explain our remote control 1 Remote Button Function ...

Page 10: ...first time access but can be corrected by remote control AUTO key Note The menu operation mode and other settings are the same way as the signal source not reproduced here figure 1 figure 2 4 Output resolution The factory setting output resolution is 1920 1080 of device if the display unit less than 1920 x 1080 resolution and can not display properly you can reduce the resolution by the output res...

Page 11: ... software to save a good custom mode PIP mode etc Chapter Five Key Instructions Through the chassis button you can easily call in quick mode the remote controller corresponds to chassis key the image and each button function call as follows Key 0 4 split screen display mode Default Mode Key Press the key the indicator lights press the number keys on the right can make the corresponding signal full...

Page 12: ... RS232 serial cable to connect the computer and HD video multiplexers as there is no RS 232 serial in computer you need a USB to RS 232 adapter cable and install the relevant driver 2 check the computer settings View computer equipment s COM port is normal to see these steps Right click the desktop My Computer Properties Device Manager as shown below COM Port number 3 run the software The random d...

Page 13: ...confirmation click OK the following chart is settings interface 5 Communication Connections Click the top left corner of the control software Connect the computer can communicate with the HD video multiplexers and multifunction control 6 Profiles Profiles are divided into default scenario and the custom scene The default scene the factory default settings cured can not be changed ...

Page 14: ...ugh the remote control buttons or click on the software you can call out the 5 mode 6 3 Transparency adjustment by adjusting the transparency you can see the bottom screen through the superimposed images 7 polling After the user finishing setting a good number of split screen mode by setting the polling a plurality of screen display mode is automatically switched at regular intervals of time Click...

Page 15: ...ur split screen display 10 Enable settings By enabling setting video multiplexers output resolution And selection of DVI or HDMI mode 11 Custom split mode settings 11 1 by the mouse dragging Window position resize the window or right click to close or new window signal switching channel settings such as aliases 11 2 Multiple display modes can be set freely and by CTRL plus the number keys to save ...

Page 16: ...ly pinpoint the exact location and the window screen to adjust the screen size as shown 11 4 You can set picture mode for example By controlling the software can be set to various split mode such as PIP POP window superimposed multiple roaming a largescreen and other three small etc various patterns Here are some common arrangement SHENZHEN LINK MI TECHNOLOGY CO LTD WWW LINK MI COM E mail sales li...

Reviews: