Chapter 2
Configuration
4
USB Ethernet Adapter
Chapter 2:
Driver Installation
This chapter will take you through all the steps necessary
to install the driver for the USB 2.0 Ethernet Adapter. After
physically connecting the Adapter to your computer’s
USB port or hub, follow these instructions to install the
hardware device driver. The installation procedures for
the hardware device driver vary depending on your
computer’s operating system, so make sure to follow the
instructions for your operating system. The instructions
also may vary slightly depending on your current
operating system’s configuration. If at any time during the
installation you encounter problems, refer to
.
NOTE:
Throughout this user guide, it is assumed
that “D” is the letter of your CD-ROM drive.
Driver Installation for Windows XP and
Windows 2000
NOTE:
Do not click
Cancel
at any time during
the installation process. Doing so will prevent
your driver from being properly installed on
your computer.
If you have not yet done so, start your computer.
1.
Connect the Adapter to your computer. Refer to
2.
Installing the Adapter
,
page 3
.
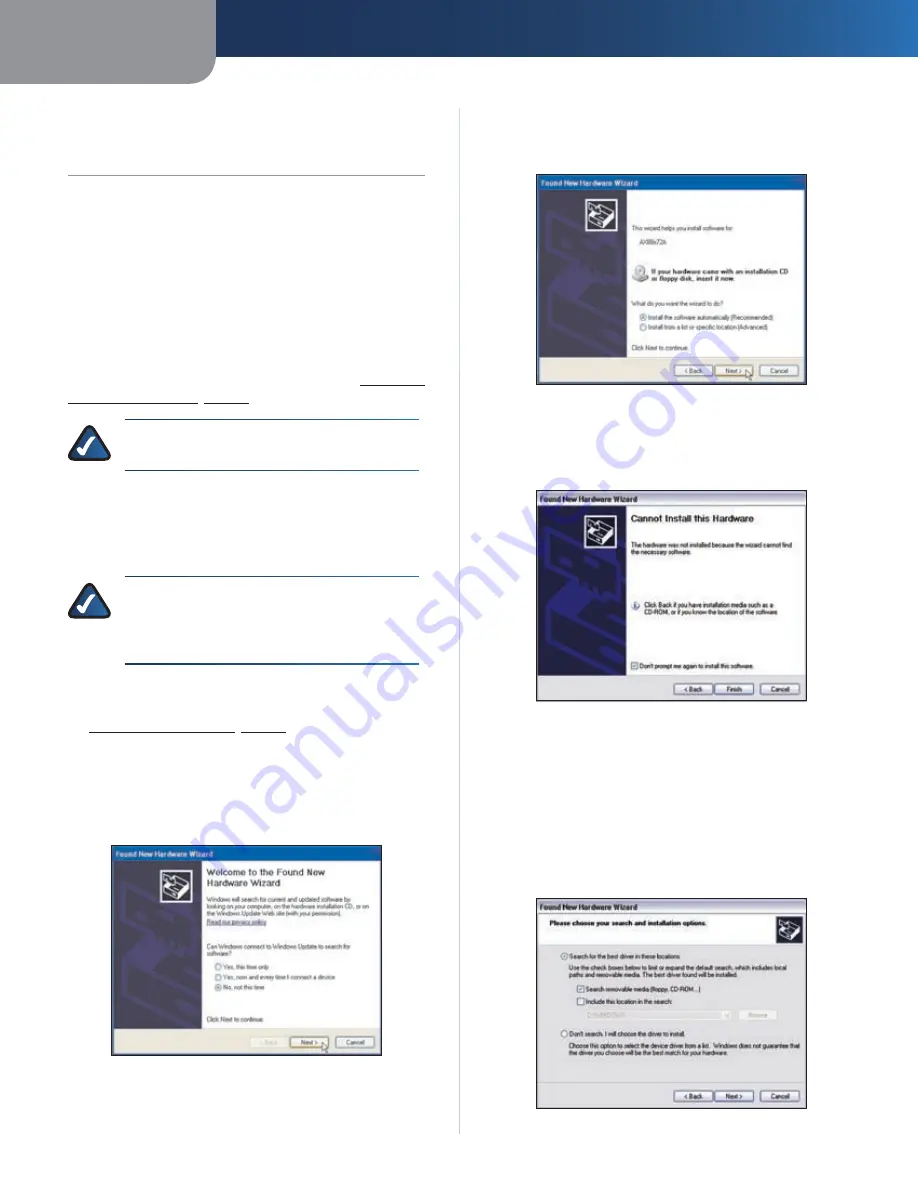
The operating system will automatically detect the
3.
Adapter and display the
Welcome to the Found New
Hardware Wizard
screen. Select
No, not this time
when asked to connect to Windows Update. Then click
Next
.
Welcome to the Found New Hardware Wizard
Insert the Installation CD into your computer’s CD-ROM
4.
drive and select
Install the software automatically
(Recommended)
. Then click
Next
.
Insert the Installation CD
If the
5.
Cannot Install this Hardware
screen appears,
perform steps 5a through 5c below. Otherwise,
continue directly to step 6.
Cannot Install this Hardware
Click
a.
Back
to return to the previous screen (refer
to step 4).
Select
b.
Install from a list or specific location
(Advanced)
, and then click
Next
.
Select
c.
Search for the best driver in these
locations
and
Search removable media (floppy,
CD-ROM...)
, and then click
Next
.
Choose your search and installation options


