background image

11

10

2. The Power LED should light up

when the Adapter is plugged in.
(Make sure your PC is powered on.)

3. Raise the antenna. Make sure the antenna is

positioned straight up into the air, at a 90º angle
from the Adapter (see Figure 5-5). This will
ensure optimum wireless operating range and
performance.

If your PC is running Windows XP, proceed to “Chapter 6: Driver

Installation and Configuration for Windows XP.”

If your PC is running Windows 98SE, Me, or 2000, the installation of the

Wireless-B USB Network Adapter is complete. If you want to check the

link information, search for available wireless networks, or make addi-
tional configuration changes, proceed to “Chapter 7: Using the WLAN

Monitor for Windows 98SE, Me, and 2000.”

The Adapter’s Wall Mount (see Figure 5-6) allows you to easily attach the
Adapter onto your wall for better reception and more convenient placement.

Figure 5-4

Chapter 5: Hardware Installation

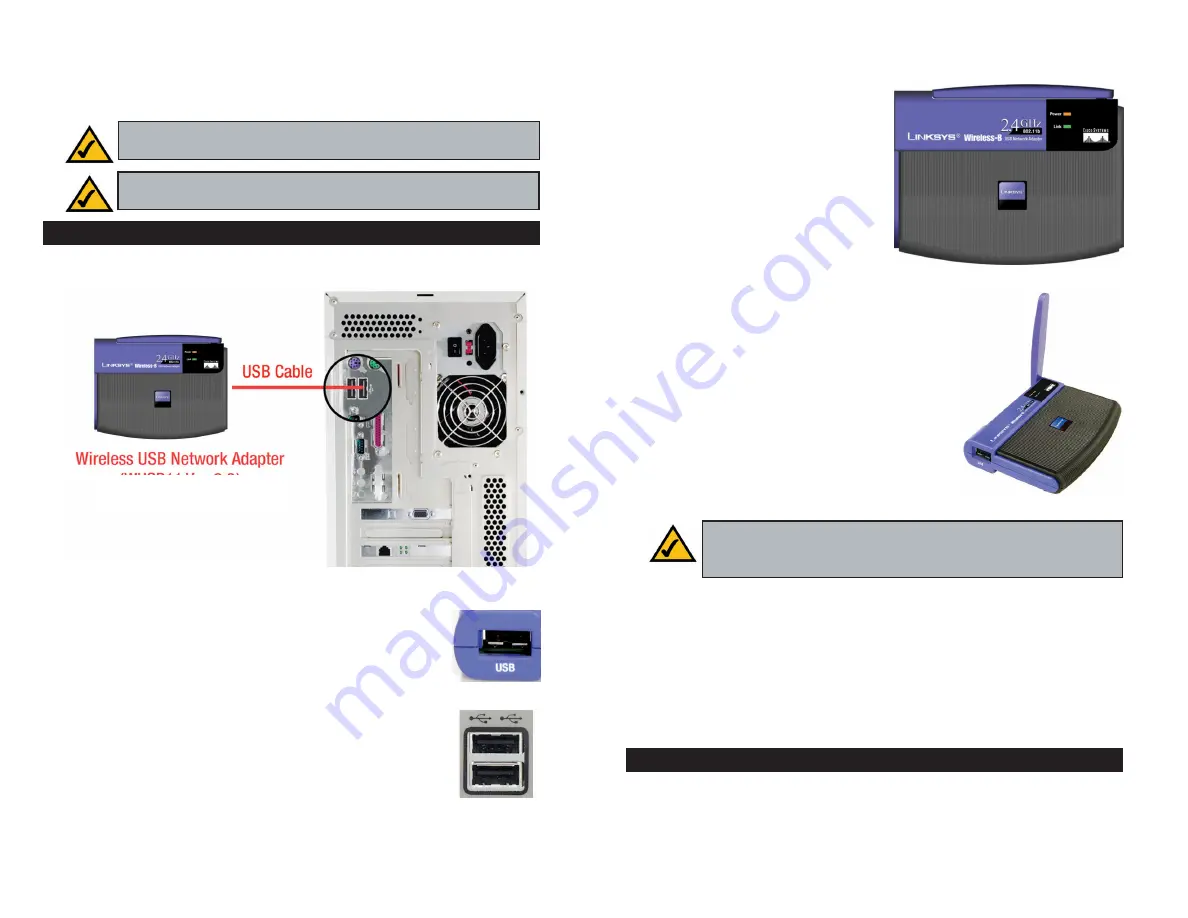
1. The Adapter comes with the USB cable you will use to connect the Adapter

to your PC. (See Figure 5-1.) 

Connect one end of the USB cable to the USB port of the
Adapter (see Figure 5-2).

Connect the other end of the USB cable to one of the USB
ports on your computer (see Figure 5-3).

Important for Windows 98SE, Me, and 2000 users:

You must run

the Setup Wizard to install the software before installing the hardware.

Important for Windows XP users:

You must install the Adapter’s

hardware before installing the software.

Figure 5-1

Figure 5-2

Figure 5-3

Figure 5-5

Using the Adapter’s Wall Mount

Connecting the Adapter

Note:

If you want to attach the Adapter onto your wall, go to the next

section, “Using the Adapter’s Wall Mount,” before proceeding to the
appropriate chapter for your PC’s operating system.

Wireless-B USB 

Network Adapter

Summary of Contents for WUSB11 ver. 2.6

Page 1: ...Wireless B USB Network Adapter Use this guide to install WUSB11 User Guide...

Page 2: ...ons for a Class B digital device pursuant to Part 15 of the FCC Rules These limits are designed to provide reasonable protection against harmful interference in a residential installation This equipme...

Page 3: ...timent au dessus d un espace public aucun enregistrement n est n cessaire pour une distance de moins de 300m Pour une distance sup rieure 300m un enregistrement aupr s de l IBPT est requise Pour une...

Page 4: ...ith friends and share files and other resources such as printers and hard disk storage space with other computers on the network So don t hassle with running cables through your house get connected th...

Page 5: ...reless networks have two different modes in which they may be set up infrastructure and ad hoc An infrastructure configura tion is a WLAN and wired LAN communicating to each other through an access po...

Page 6: ...CD ROM drive Note for Windows 98SE Me and 2000 users You must run the Setup Wizard to install the software before installing the hardware Figure 4 1 Note for Windows XP users Do NOT run the Wireless B...

Page 7: ...r all devices in the network The default setting is linksys all lowercase Click the Next button Figure 4 3 On the Welcome screen you have the following choices Install Click the Install button to begi...

Page 8: ...p 5 now If you chose Ad Hoc Mode select the correct operating channel for your network The channel you choose should match the channel set on the other devices in your wire less network Then click the...

Page 9: ...u to easily attach the Adapter onto your wall for better reception and more convenient placement Figure 5 4 Chapter 5 Hardware Installation 1 The Adapter comes with the USB cable you will use to conne...

Page 10: ...ter is complete If you want to check the link information search for available wireless networks or make addi tional configuration changes proceed to Chapter 7 Using the WLAN Monitor for Windows 98SE...

Reviews: