background image

General Safety Instructions

1.

Read instructions. Read the safety and operating instructions before operating the appliance.

2.

Retain instructions. Retain the safety and operating instructions for future reference.

3.

Heed warnings. Observe all warnings on the appliance and in the operating instructions.

4.

Follow instructions. Follow all operating and use instructions.

5.

Water and moisture. Do not use the appliance near water, for example near a bathtub, washbowl, kitchen sink, laundry tub, in a 

wet basement, or near a swimming pool and the like.

6.

Carts and stands. Use only with a cart or stand that is recommended by the manufacturer.

6a. An appliance and cart combination should be used with care. Quick stops, excessive force, and uneven surfaces may cause the 

appliance and cart combination to overturn.

7.

Wall or ceiling mounting. Mount to a wall or ceiling only as recommended by the manufacturer.

8.

Ventilation. Site the appliance so that its location or position does not interfere with its proper ventilation. For example, the 

appliance should not be situated on a bed, sofa, rug, or similar surface that may block the ventilation openings, or placed in a built-

in installation such as a bookcase or cabinet that may impede the flow of air through the ventilation openings.

9.

Heat. Site the appliance away from heat sources such as radiators, heaters, stoves, or other appliances (including amplifiers) that 

produce heat.

10. Power sources. Connect the appliance to a power supply only of the type described in the operating instructions or marked on 

the appliance.

11. Grounding or polarisation. Do not defeat the safety purpose of the polarised or grounding type plug. A polarised plug has two 

blades with one wider than the other. A grounding type plug has two blades and a third grounding prong. The wide blade or the 

third prong is provided for your safety. When the provided plug does not fit into your outlet, consult an electrician for replacement 

of the obsolete outlet.

12. Power cord protection. Route power cords so that they are not likely to be walked on or pinched by items placed upon or against

them, paying particular attention to cords at plugs, power sockets, and at the point where they exit from the appliance.

13. Protective attachment plug. As a safety feature the product is equipped with an attachment plug containing overload 

protection. See the instruction manual about resetting or replacing the plug. Should the plug need replacing ensure that a 

replacement is used which has the same overload protection as the original.

14. Cleaning. The product should be cleaned only as recommended by the manufacturer.

15. Power lines. An outdoor antenna should be located away from power lines.

16. Outdoor antenna grounding. If an outdoor antenna is connected to the tuner/receiver, ensure that the antenna system is 

grounded to provide some protection against voltage surges and static build up. In the USA see article 810 of the National 

Electrical Code ANSI/NFPA 70 concerning installation requirements.

17. Lightning storms. Unplug this apparatus during lightning storms or when unused for long periods of time.

18. Objects and liquid entry. Do not let objects or liquids fall into the product. Do not expose the product to dripping or splashing.

Do not place a vessel containing liquid on top of the product.

19. Damage requiring service. The product should be serviced by qualified personnel if:

a) The power cord or plug has been damaged.

b) Objects or liquid have fallen into the product.

c) The product has been exposed to rain.

d) The product does not appear to operate normally or exhibits a marked change in operation.

e) The product has been dropped or the enclosure damaged.

20. Servicing. Do not attempt to service the product beyond that described in the operating instructions. All other servicing should 

be referred to qualified service personnel.

21

Important Safety Information

Summary of Contents for Klimax Kontrol

Page 1: ...K l i m a x Ko n t r o l O w n e r s M a n u a l E n g l i s h...

Page 2: ...g recording or otherwise without the prior written consent of the publisher Printed in the United Kingdom KLIMAX KONTROL Linn and the Linn logo are trade marks of Linn Products Limited The information...

Page 3: ...5 Front Panel 6 Handset 7 Source Setup 8 Operation 12 Product Lock 13 User Options 14 Technical Specification 17 Guarantee and Service 18 Important Safety Information 20 General safety instructions 2...

Page 4: ...2 KLIMAX KONTROL...

Page 5: ...s to protect and stabilise the internal electronics as well as forming the heat exchanger to dissipate any heat generated by the preamplifier circuitry All KLIMAX products have been designed to be int...

Page 6: ...ernal mains voltage switch This switch operates on all worldwide mains voltages from 100V to 240V Manual adjustment on the product for setting the input mains voltage is not possible This unit must be...

Page 7: ...Y DETAILS RIGHT OUT BALANCED LEFT OUT LEFT IN 1 BALANCED RC5 OUT 2 3 4 5 6 7 8 9 10 11 12 1 13 14 17 16 15 18 PUSH RIGHT IN 4 unbalanced input RIGHT IN 3 unbalanced input RIGHT IN 2 unbalanced input R...

Page 8: ...6 Front Panel L I N N K L I M A X K O N T R O L SOURCE STANDBY VOLUME MUTE 3 1 4 5 2 Front panel display STANDBY SOURCE VOLUME MUTE 1 2 3 4 5...

Page 9: ...7 Handset STANDBY CD PH 1 PH 2 TUN TAPE 1 TAPE 2 AUX 1 Source selection keys BAL L BAL R Balance adjustment VOLUME VOLUME RECORD See Product Lock page 13 MONO MUTE 1 2 3 4 5 6 7 1 2 7 6 5 3 4...

Page 10: ......

Page 11: ...e types for setup 5 are KNEKT NONE 5 Change the name for the source You are able to give the source a name which will be shown on the display when that source is selected Press SOURCE on the front pan...

Page 12: ...st setting to 10 highest setting in 40 x 0 5 steps with no volume offset being 0 7 Change the balance offset for the source Balance offset is for adjusting the balance of a source in comparison to oth...

Page 13: ...or the volume level from your KLIMAX KONTROL will be very high non adjustable and could damage your loudspeakers Press SOURCE or BAL L again The display shows whether unity gain for the currently sele...

Page 14: ...vailable sources Front panel To switch source Repeatedly press or hold SOURCE SOURCE until the desired source is shown on the front panel display Volume To adjust the volume Repeatedly press or hold V...

Page 15: ...p To turn the product lock on Hold MUTE on the front panel or handset until the display shows LOCK While LOCK is displayed press RECORD on the handset The display changes to KEY LOCKED The product loc...

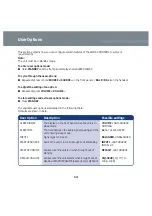
Page 16: ...lable user options are detailed in the following table Defaults are shown in bold User Option Description Possible settings SLEEP DISPLAY The display on the front panel when the unit is in VOLUME LOGO...

Page 17: ...ness of front panel display RS232 CONNECTION Enables or disables the RS232 circuitry DEVICE ADDRESS Which RC5 addresses the unit will respond to INSTALLER SETUP To reset the unit to the settings defin...

Page 18: ...16...

Page 19: ...0dBV maximum Common mode rejection ratio 70dB 1kHz 0dBV Gain range Minimum to maximum 95 5dB to 9 5dB in 0 5dB steps Audio outputs Impedance unbalanced 300 Signal unbalanced 15dBV maximum 8V peak Impe...

Page 20: ...roduct and should be stamped by your retailer and returned to Linn as soon as possible WARNING Unauthorised servicing or dismantling of the product invalidates the manufacturer s warranty There are no...

Page 21: ...uk Linn Incorporated 8787 Perimeter Park Boulevard Jacksonville FL 32216 USA Phone 1 904 645 5242 Fax 1 904 645 7275 Helpline 888 671 LINN Email helpline linninc com Website http www linninc com Linn...

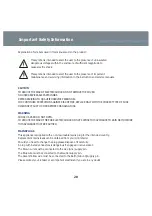
Page 22: ...USE DISCONNECT SUPPLY CORD BEFORE CHANGING FUSE WARNING SHOCK HAZARD DO NOT OPEN TO REDUCE THE RISK OF FIRE OR ELECTRIC SHOCK DO NOT EXPOSE THIS APPLIANCE TO RAIN OR MOISTURE THIS APPLIANCE MUST BE EA...

Page 23: ...your safety When the provided plug does not fit into your outlet consult an electrician for replacement of the obsolete outlet 12 Power cord protection Route power cords so that they are not likely to...

Page 24: ...s plug need replacing and you are competent to do this proceed as follows If you are in doubt contact your Linn retailer or a competent electrician a Disconnect the plug from the mains supply b Cut of...

Page 25: ...issue Test type EN55013 2001 Conducted emissions EN55013 2001 Absorbed emissions EN55020 2002 Immunity FCC Notice NOTE This equipment has been tested and found to comply with the limits for a Class B...

Reviews: