22
Hours Page
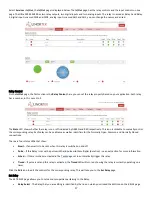
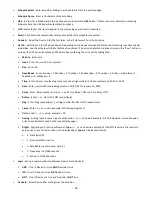
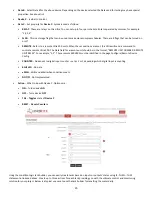
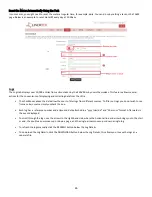
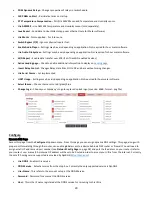
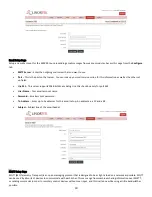
After wiring your SERVER into your equipment and setting your trigger, you now need to activate & configure the hour meter. To
reach the Hour Meter page, navigate to the
Services
dropdown menu and select
Hours
. On this page there are two identical
columns; one for each hour meter.
1.
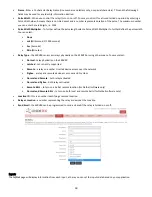
Use Meter
–
Hour counter will not run unless the "Use Meter" is checked.
2.
Trigger
–
The trigger selects the condition to start and stop the counter meter. You can select an
INPUT
or a
RELAY
. If those
conditions are met such that the device is ON, the meter will start running. You may additionally select to have the
INPUT
VOLTAGE
start the counter. For example, if the SERVER is powered the counter runs.
3.
Meter Name
–
Give the meter a name to identify what is being metered.
4.
Seconds/Tick
–
The ticks set the counting resolution. The smaller the number the faster the memory is used up. Usually set
to 2.
5.
Used Endurance
–
Because the number of memory writes is finite, the Endurance indicator gives an idea of the memories
condition. It will wear out. (Tick*512*100000 = memory endurance in seconds.)
6.
Voltage Threshold
–
The Voltage Threshold condition must be satisfied along with the trigger condition to make the meter
count. This is useful to stop the counter should the unit start to lose power. For example: by setting a threshold of 20 volts
on a 24-volt system, the Hour Meter will assume that the power is declining and shut off to prevent a counter memory
error.
7.
Send Email
–
Using the Email checkbox and the Count, the unit will send an email when this value is exceeded. To use the
email function, you have to setup the email first. Please refer to
for instruction.
8.
Email Count
–
Hour meter value to send email notification. This value may be entered in [seconds] or (hours).
9.
Relay Control
–
By using a Relay Number and a Count, the unit will activate a relay when the value is exceeded. This is
useful for turning on a maintenance light or buzzer on a machine that requires a look.
10.
Relay Count
–
Hour meter value to trigger relay. This value may be entered in [seconds] or (hours).
11.
Preset
–
The Preset is used to ZERO the meter or set it to any value you like. This value may be entered in [seconds] or
(hours).
12.
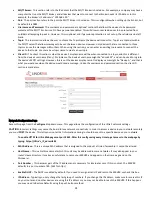
Push Report Interval
–
You can change how often to send the hour report out to the HourCollector App, it’s set for 1
minute by default. If you want to change the frequency, you can enter the number here (by minutes).
Summary of Contents for iTrixx-Ultra 300
Page 2: ...2 ...


