background image

IOT-G65 LoRaWAN Gateway

Quick Start Guide

Hangzhou Linovision Co., Ltd.

Summary of Contents for IOT-G65

Page 1: ...IOT G65 LoRaWAN Gateway Quick Start Guide Hangzhou Linovision Co Ltd...

Page 2: ...o log in the web GUI to configure the device Declaration of Conformity IOT G65 is in conformity with the essential requirements and other relevant provisions of the CE FCC and RoHS For assistance plea...

Page 3: ...llation 6 3 3 Antenna Installation 7 3 4 Gateway Mounting 7 4 Access the Web GUI of IOT G65 9 4 1 Web Access via Ethernet Port 9 5 Connect IOT G65 to the Network 11 5 1 Configure the WAN Connection 11...

Page 4: ...entative 2 Hardware Introduction 2 1 Overview A Front Panel 1 IOT G65 1 Ethernet Cable 1 DC Jack Power Adapter 1 Mounting Bracket Bracket Fixing Screws Grounding Screw Wall Mounting Kits 1 Warranty Ca...

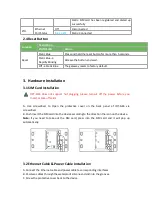
Page 5: ...off Blue Light Packet Forwarder mode is running well Wi Fi Wi Fi Status Off Wi Fi is disabled Blue Light Wi Fi is enabled LTE Cellular Status Off SIM card is registering or fails to register or there...

Page 6: ...T G65 does not support hot plugging please turncut off the power before you insert or take off cards A Use screwdriver to Open the protective cover on the back panel of IOT G65 via screwdriver B Push...

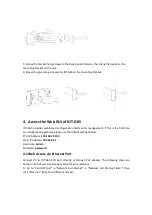
Page 7: ...configurations before installation 3 4 1 Wall Mounting Preparation mounting bracket bracket fixing screws grounding screw wall plugs wall mounting screws and other required tools 1 Before you start ma...

Page 8: ...3 4 2 Pole Mounting Preparation mounting bracket bracket fixing screws hose clamp and other required tools 1 Before you start make sure that your SIM card has been inserted your antennas have been att...

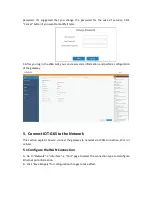
Page 9: ...ement If this is the first time you configure the gateway please use the default settings below ETH IP Address 192 168 23 150 Wi Fi IP Address 192 168 1 1 Username admin Password password 4 1 Web Acce...

Page 10: ...way C Open a Web browser on your PC Chrome is recommended and type in the IP address 192 168 1 1 to access the web GUI D Enter the username and password click Login If you enter the username or passwo...

Page 11: ...nformation and perform configuration of the gateway 5 Connect IOT G65 to the Network This section explains how to connect the gateway to network via WAN connection Wi Fi or cellular 5 1 Configure the...

Page 12: ...the web GUI via the newly assigned IP address and go to Status Network to check Ethernet port status 5 2 Configure the Wi Fi Connection A Go to Network Interface WLAN and select Client mode B Click Sc...

Page 13: ...C Type the correct key of Wi Fi E Go to Status WLAN to check Wi Fi status If it shows Connected it means gateway connects to Wi Fi successfully...

Page 14: ...n A Go to Network Interface Cellular Cellular Setting page to enable cellular settings B Choose relevant network type and fill in SIM card information like APN or PIN code C Click Save and Apply for c...

Page 15: ...keeps on green light statically it means SIM has dialed up successfully 6 Packet Forwarder Configuration IOT G65 has embedded multiple packet forwarders like TTN and Chirpstack This section explains...

Page 16: ...ot allow to enable C Go to Packet Forwarder Radio page to configure antenna transmission type center frequency and channels The channels of the gateway and network server need to be the same Note for...

Page 17: ...y TTN will show connection status E Go to Traffic page to view the data communication of IOT G65 7 Network Server Configuration IOT G65 can work as network server and transmit data to Cloud or other p...

Page 18: ...and channels The channels of the gateway and LoRaWAN nodes need to be the same Note For built in antenna models please select 2 Built in ANT for external antenna models please select Ext ANT TX RX Bui...

Page 19: ...D Go to Gateway page and click Add to add a gateway E The gateway is online 7 2 Connect IOT G65 to Other Platform A Go to Packet Forwarder General page to click enable...

Page 20: ...of the gateway and LoRaWAN nodes need to be the same Note for built in antenna models please select 2 Built in ANT for external antenna models please select Ext ANT TX RX Built in ANT RX C Go to Netw...

Page 21: ...can select HTTP HTTPS or MQTT protocol and fill in correspond server information to send data to another server E Go to Profiles page to add a new profile for the device F Go to Device page and click...

Page 22: ...d many LoRaWAN nodes all at once Click Template Download to download template file and add LoRaWAN device information to this file Application and device profile should be the same as you created on w...

Page 23: ...F Go to Packets page to check the packets from LoRaWAN node devices The type starts from Up means uplinks and Dn means downlinks Click Details to check the properties and payload contents of packets...

Reviews: