26
ADSL Dial-up and DDNS Set-up
It supports DDNS services for remote site users using fixed host name to connecting with your DVR, no
need to know the real IP address that you real been assigned.
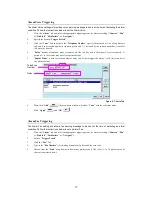
1.
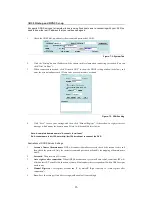
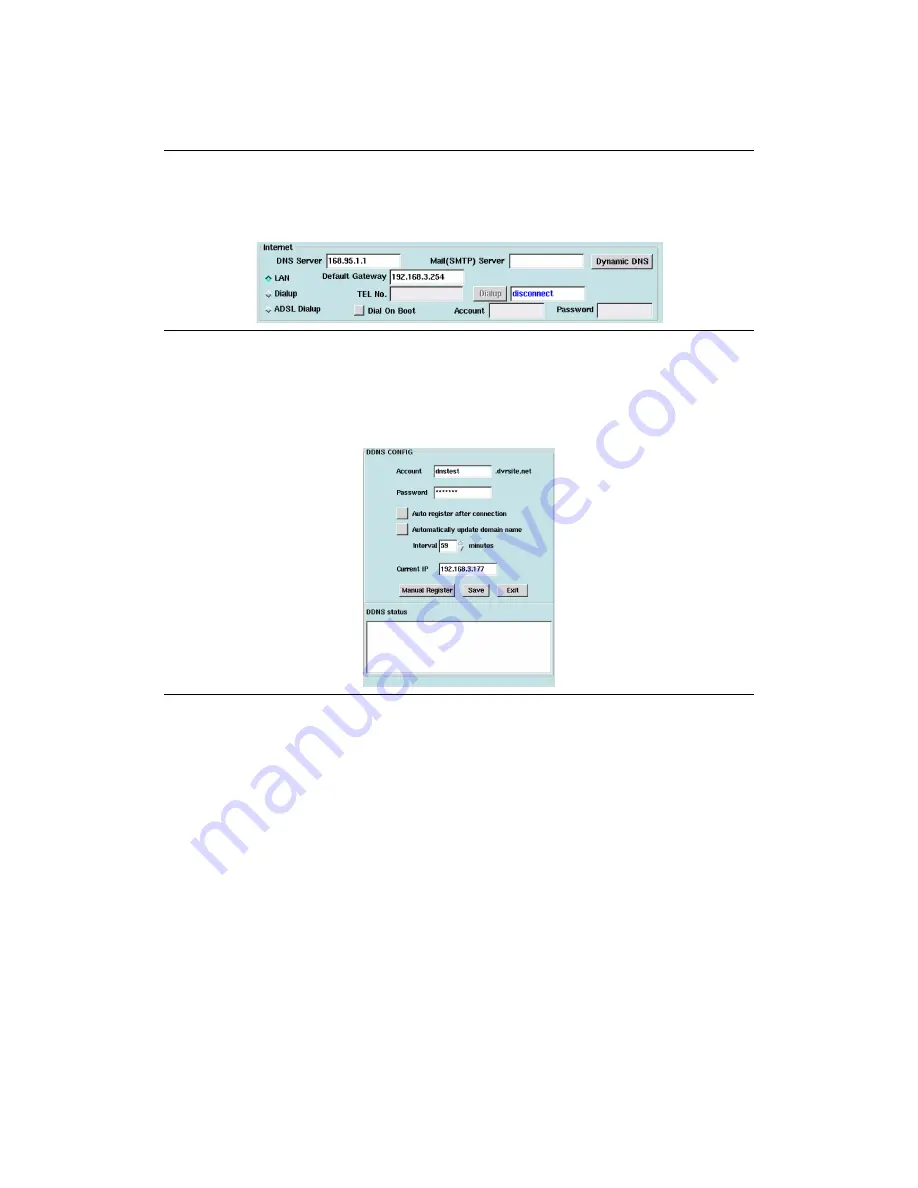
Check the ADSL dial-up, and enter the account and password of ADSL.
Figure: 7-2: System Tab
2.
Click the “Dialup” button. IP address will be shown in this column when connecting succeeded. (You can
click “Dial On Boot”)
3.
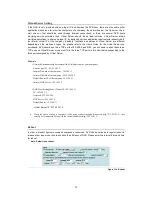
When connection succeeded, click “Dynamic DNS” to show the DDNS setting window (as below), and
enter the account and password. (Please enter a easy-to–memory account)
Figure: 7-3: DDNS setting
4.
Click “Save” to save your settings, and then click “Manual Register”, if there shows a register success
message, which means the domain name (*Note.) will be enabled after 3 mins.
Note: A complete domain name is “A .dvrsite.net”
Ex: Account name is dvr124, enter http://dvr124.dvrsite.net to connect the DVR.
Illustrations of DDNS Service Settings
1.
Account: Name of domain name.
DVR will connect to database server to check if the account exists, and
then check the password. Only the correct account and password will enable the mapping of domain name
and IP.
2.
Password:
The password of Account.
3.
Auto register after connection:
When ADSL disconnection, system will auto redial, sometimes ISP will
offer another IP. To enable this function, system will auto update the correspondent IP when ADSL assigns
another one.
4.
Manual Register:
User register account and IP by himself. (Right contrary to “Auto register after
connection”)
5.
Save:
Save the settings. (Only after saving would enable all your settings)


