background image


Misty Electronic Blindmask 

User’s Manual 

Version 1.2 | 19/04/19 


Page 9 


Switching on the Misty Instructor Unit 

-


Push the on/off button (1) for at least 2 seconds in order to switch the unit on.


A beep will be produced and the green on/off indicator will light up in confirmation. 
All the indicators will light up briefly one after the other (as a check), after which the Instructor Unit wil l 
automatically switch to the group last used. Immediately after starting up, the vision on the Student Units 
will always be unobstructed, and the unobstructed vision indicator (10) will light up in red.  


Setting the group  

-


Push down on the “group” switch (6) until the group indicator for the desired group (7) lights up. 

 
The group indicator (7) indicates which group the Misty Instructor Unit is working with. Student Units set 
to a group setting that does not correspond with the setting on a Misty Instructo r Unit will automatically 
have unobstructed vision. When the Misty Instructor Unit is switched on, the group last worked with is 
automatically chosen as the active group. 
 

Return to unobstructed vision  

-


Push the “unobstructed vision” switch (11) to return to completely unobstructed vision or to again 
limit the vision available. 

 
When the “unobstructed vision” option is switched on, the unobstructed vision indicator (10) lights up. 
When the “unobstructed vision” option is switched off, the unobstructed vision indicator (10) light will go 
out. 
In order to be able to adjust the degree of vision available on the Misty Student Units, this option must be 
switched off. 


Manually adjusting degree of vision 

-


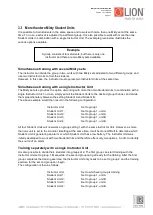
Push the “more vision” switch (12) in order to provide more vision on the Misty Student Units or 
push the “less vision” switch (13) to decrease the vision available on the Misty Student Units. 

 
The degree of vision can be adjusted in nine steps.  
The vision indicators indicate the degree of vision obstruction on the Student Units. 
If the indicator lights up on the extreme left, vision is completely obstructed. If it lights up on the extreme 
right, vision is completely unobstructed. 


Automatically adjusting degree of vision (Automated option) 

-


Push the “automated” switch (9) in order to switch the automated vision obstruction option on or 
off. 

 
This option controls the degree of vision obstruction fully automatically. The degree of vision is 
continuously increased or decreased in a random fashion without the instructor having to do anything. 
When the automated option is switched on, the automated indicator (8) lights up. 
When the automated option is switched off, the automated indicator (8) is dimmed.  
 

Low battery indicator Misty Instructor Unit 

When the battery of the Misty Instructor Unit is almost empty, the low battery indicator (2) lights up, and 
two short beeps will be heard every five seconds. Finish your training exercise and recharge the battery.  


Summary of Contents for 223.038

Page 1: ...Version 1 2 19 04 19 USER S MANUAL MISTY ELECTRONIC BLINDMASK ORIGINAL USER S MANUAL...

Page 2: ...ge 1 Contents General description 2 Technical specifications 3 Use 4 Misty Mask and Misty Student Unit 4 Misty Instructor Unit 8 More than two Misty Student Units 11 Inspection and maintenance 12 Prec...

Page 3: ...ifferent channels available so that a maximum of six groups can train in the same space The electronic vision restricting mask has been developed to be worn as a primary face mask but it can also be u...

Page 4: ...er 10 mW Battery life approx 10 hours with fully charged battery Dimensions 150 x 100 x 54 mm Weight 430 grams Misty Mask Material Frame Polyurethane hard Polyurethane soft Visor Polycarbonate Transpa...

Page 5: ...how the control elements and connections for the Misty Student Unit Figure 3 1 View from above of Misty Student Unit Figure 3 2 Front and bottom view of Misty Student Unit The Misty Student Unit comes...

Page 6: ...left of the battery see figure 3 2 The easiest way to set the switches is by using a ballpoint pen or a similar pointed object Important The Misty Student Unit must be SWITCHED OFF when adjusting grou...

Page 7: ...unit off and adjust the settings again for the correct group Using the unit Once you have correctly adjusted the settings the unit is ready for use Attach the Misty Student Unit around your waist usi...

Page 8: ...arger to the wall outlet Then connect one of the three charge cables on the Battery Charger to the battery charging connector 6 of the Misty Student Unit The Charging indicator 5 will blink quickly in...

Page 9: ...indicator 2 Battery indicator 3 On Off indicator 4 On Off switch 5 Charging indicator 6 Group switch 7 Group indicators 8 Automated indicator 9 Automated switch 10 Unobstructed vision indicator 11 Un...

Page 10: ...en the unobstructed vision option is switched off the unobstructed vision indicator 10 light will go out In order to be able to adjust the degree of vision available on the Misty Student Units this op...

Page 11: ...arm is also triggered if one of the cables of the Misty Masks is disconnected If this happens the alarm can be turned off via the procedure described above only after the cable has again been connecte...

Page 12: ...tudent Unit 1 Set to group 1 unit A Student Unit 2 Set to group 1 unit A Student Unit 3 Set to group 1 unit B Student Unit 4 Set to group 1 unit B All four Student Units will now work on group setting...

Page 13: ...t with a moist cloth using a mild all purpose household cleaning agent if necessary The casing is not resistant to chemicals such as alcohol thinner or acetone NEVER clean the system using a washing m...

Page 14: ...stem in which case any resulting damage will not be covered by the product guarantee Never use the system if the casing or cables are damaged possibly resulting in increased risk for the instructor or...

Page 15: ...y and switch it on again If you are not able to switch the unit off connect it to the battery charger for 30 seconds disconnect it and then switch the Instructor Unit on again Walkie talkies are also...

Page 16: ...1 2 19 04 19 Page 15 Version 1 2 19 04 19 LION Protects B V Industrieweg 5 5111 ND Baarle Nassau the Netherlands T 31 0 13 507 6800 F 31 0 13 507 6808 E infoEMEA lionprotects com WWW LIONPROTECTS COM...

Reviews: