Certificate
Project
Figure No.
Version A
5
INSTALLATION INSTRUCTIONS
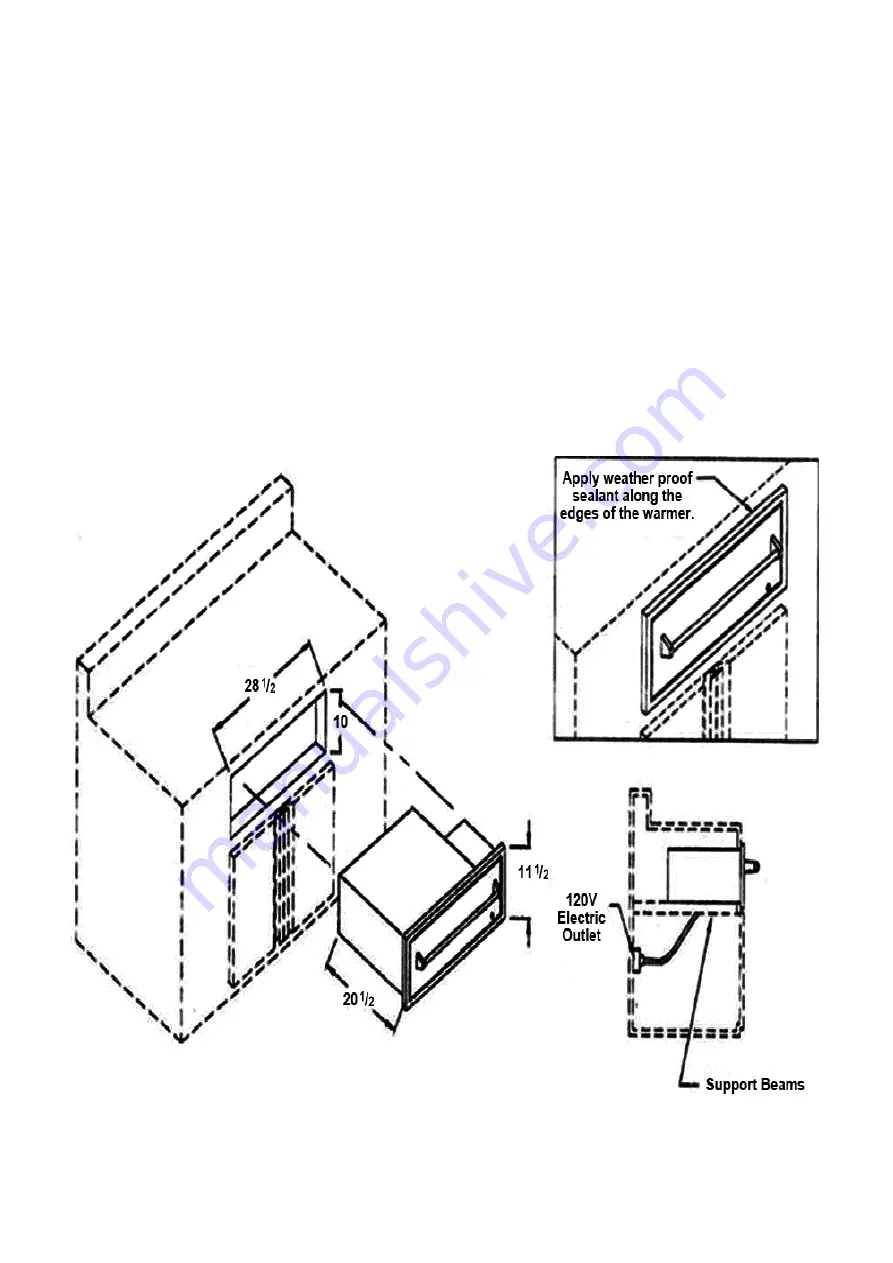
1. Provide a 10” x 28 1/2” cutout to the front of the island
2. Provide support beams using metal studs.
3. Pull the drawer out of the drawer casing to gain access on the mounting holder at the front of
the casing.
4. Insert the drawer casing into the island opening.
5. Secure the drawer casing with screws at the inside front top and bottom, using the pre-punched
mounting holes.
6. Re-assemble the drawer section into the drawer casing.
7. Apply weather proof sealant along the edges of the warmer.
8. Plug-in the warmer to a weather proof, and properly grounded, electrical outlet.
9. BBQ island must be made of non combustible materials, check local building codes.


