6
Creating your layout
Wiring your Transformer
W
hen connecting your transformer, make sure that all power connections are secure. Loose
connections can produce extremely high temperatures. For this reason, do not touch the
terminals or track connections during use. Also, do not locate scenery materials such as lichen
or ground foam near the terminals.
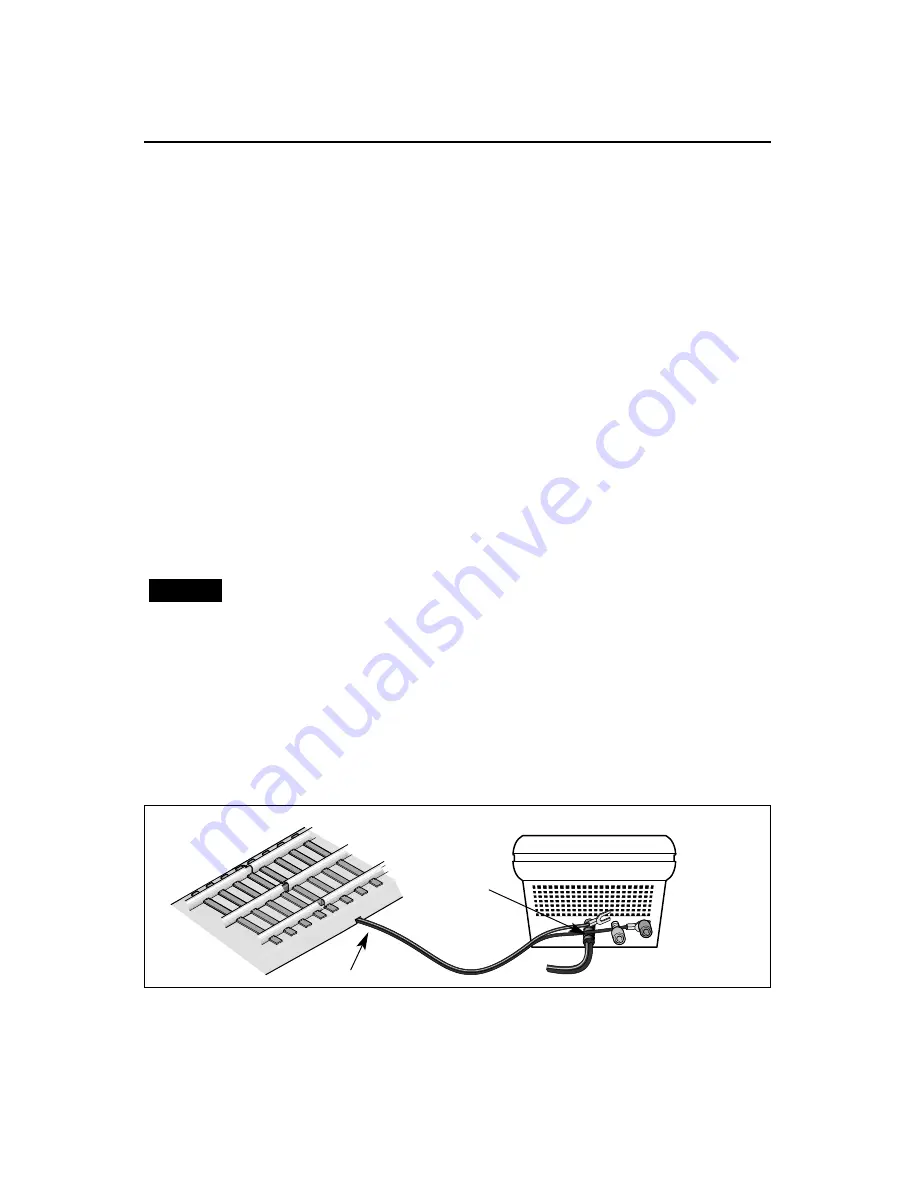
1. Feed the wires through the notch in the FasTrack terminal section.
Refer to
Figure 3.
2. Loosen the orange thumbscrew terminal, then slide the red spade-shaped
connector into position.
The thumbscrew post should be positioned between the
“blades” of the spade connector. Be sure that the blades are touching the metal post.
Tighten the thumbscrew to secure the connection.
3. Loosen the black thumbscrew terminal, then slide the black spade-shaped
connector into position.
Tighten the thumbscrew to secure the connection. The
thumbscrew post should be positioned between the “blades” of the spade connector. Be sure
that the blades are touching the metal post.
4. Plug the Transformer into the back of the Controller.
5. Plug the Transformer into your wall outlet (120 volts).
To prevent the excessive build up of heat, be sure to select the proper wire gauge
for your layout. Follow these guidelines:
• Track connections (or Lockon connections) must be made with 18-gauge wire
or heavier. Larger layouts require a minimum of 16-gauge wire.
• Use 24-gauge wire only when connecting single accessories that require lower
current.
• When wiring multiple accessories (two or more) or accessories that require
higher current, be sure to use 18- to 16-gauge wire.
Caution!
Figure 3. Controller connections
FasTrack terminal section
Notch
Spade-shaped
connector


