Installing and powering your lighthouse
P
lace your Lighthouse on any flat, level area on your layout, securing it to the layout by
driving screws through the holes in the base. Once the Lighthouse is in place, you are ready
to make these power connections for conventional operation. The Lighthouse operates best at
12-18 volts.
To make the proper connections, the ends of the wires must be stripped back 1/4”
to 3/8”. Use a pair of wire strippers or a sharp knife to strip the wires. Only an
adult should perform this task! Always use care when stripping wires.
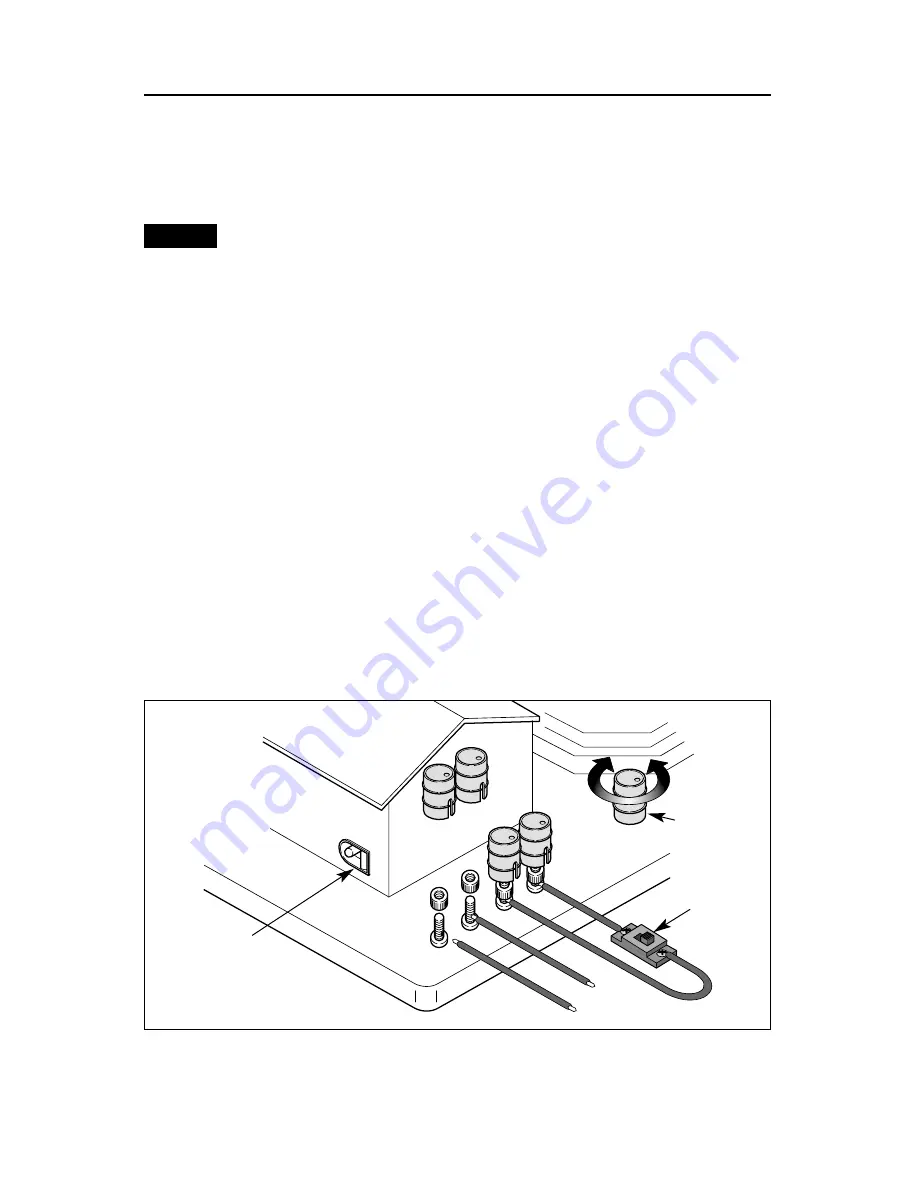
1. As illustrated in Figure 1, lift the barrel off of the left (outside) TRANSFORMER POST. Loosen
the thumbscrew to expose the hole in the terminal post. Insert the bare end of the wire into the
hole and tighten the thumbscrew to secure the wire. Connect it to the Power/A terminal on your
transformer OR to the #1 terminal on the Lock-On (available separately, part no. 6-62900).
OR
You may purchase an optional 12-18 volt (DC) wall pack power supply with a 2.5 mm barrel
jack end from a local electronics supply store. Simply plug in the wall pack and plug the
adapter end into the jack labeled in Figure 1. If you use a wall pack, skip step 2.
2. Attach another wire to the right TRANSFORMER POST and connect it to the
Common/Ground/U terminal on your transformer OR to the #2 terminal on the Lock-On.
3. Attach one wire to each of the SOUND POSTS and connect them to the separate control
button as illustrated in Figure 1.
4. Replace each barrel to conceal the posts, making sure that the wires are fed through the
slots in the barrels.
3
Caution!
TRANSFORMER
POSTS
SOUND
POSTS
U
A
Figure 1. Power connections
Volume
Control Knob
Control
Button
Jack


