CURTMFG.COM
•
PRODUCT SUPPORT: 877.287.8634
•
18088-INS-RA
•
07/06/2021
•
ECN7705
•
PAGE 3
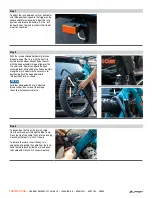
Step 2
Align and slide a tire / frame hook assembly
(#3) onto the arm of the tray assembly (#1)
as shown. Ensure the hook is facing inward
toward the tray and the release button
is facing upwards.
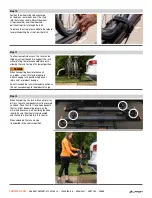
Thread an M6 button head cap screw (#9)
into the hole at the end of the tray assembly
arm as shown. Tighten firmly with
the provided T-27 Torx wrench.
Step 3
Align and slide a wheel strap sleeve (#6) over
the tray assembly (#1) wheel strap as shown.
Repeat steps 1 through 3
for the other tray assembly.
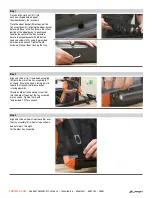
Step 1
Place an M8 nylock nut (#11) into
each hex-shaped hole on one of
the wheel baskets (#4) as shown.
Place the wheel basket (#4) onto one of the
tray assemblies (#1), aligning the wheel basket
holes with those in the tray. Ensure the tallest
portion of the wheel basket is positioned
towards the center of the tray assembly.
Secure the wheel basket with M8 button
head cap screws (#10) using the provided
5mm hex drive wrench. Tighten the M8
hardware firmly without crushing the tray.


