8
lci1.com
574-537-8900
Rev:05.11.21
CCD-0003934
Power Pro Max
™
(Portable Power Cleaner)
Installation and Owner’s Manual
(For Aftermarket Applications)
Disassembly
Prior to storing the portable power cleaner, do as follows;
1.
Remove water supply line from water source. Inspect
water filter for debris.
A.
If debris present, remove filter to clean out debris.
B.
Reinstall filter onto water supply hose.
2.
Remove water supply hose from nozzle.
A.
Look for arrows on water supply hose
quick disconnect.
B.
Squeeze arrows and slide quick disconnect downward
to disengage connector from water inlet nipple.
3.
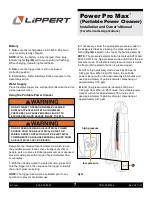
When viewing the portable power cleaner from the
orientation shown in figure 10, twist the additive bottle to
the right to disengage the bottle from the nozzle.
4.
Set portable power cleaner mode to Foam and pressure
to ECO (low).
5.
In a safe direction, press the trigger lock and squeeze
the trigger to cycle the portable power cleaner to purge
any remaining water and additive from the nozzle and
handle assembly.
6.
Release the trigger and trigger lock.
7.
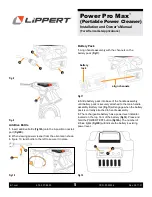
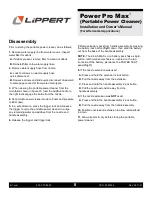
Remove battery pack from handle assembly by pressing
the battery lock button
(Fig.11)
down, then slide the battery
out from the base of the handle assembly.
NOTE:
The 2.6 Ah MAX Li-ion battery pack has a single-
button, latch release mechanism
—
located on the top,
front side of the battery, just above the POWER TEST
panel
(Fig.11)
.
8.
If the nozzle extension was used:
A.
Press and hold the extension’s lock button.
B.
Pull the nozzle away from the extension.
C.
Press and hold the handle assembly’s lock button.
D.
Pull the nozzle extension away from the
handle assembly.
9.
If the nozzle extension was
NOT
used:
A.
Press and hold the handle assembly’s lock button.
B.
Pull the nozzle away from the handle assembly.
10.
Position nozzles and extension to allow residual fluid
to drain.
11.
Allow all parts to dry before storing the portable
power cleaner.


