


safety
cable
safety
cable vice
safety
cable loop
nut
screw
5. Fan Assembly.
NOTE
: The important safety precautions and
instructions appearing in the manual are not
meant to cover all possible conditions and
situations that may occur. It must be
understood that common sense and caution
are necessary factors in the installation and
operation of this fan.
page 4
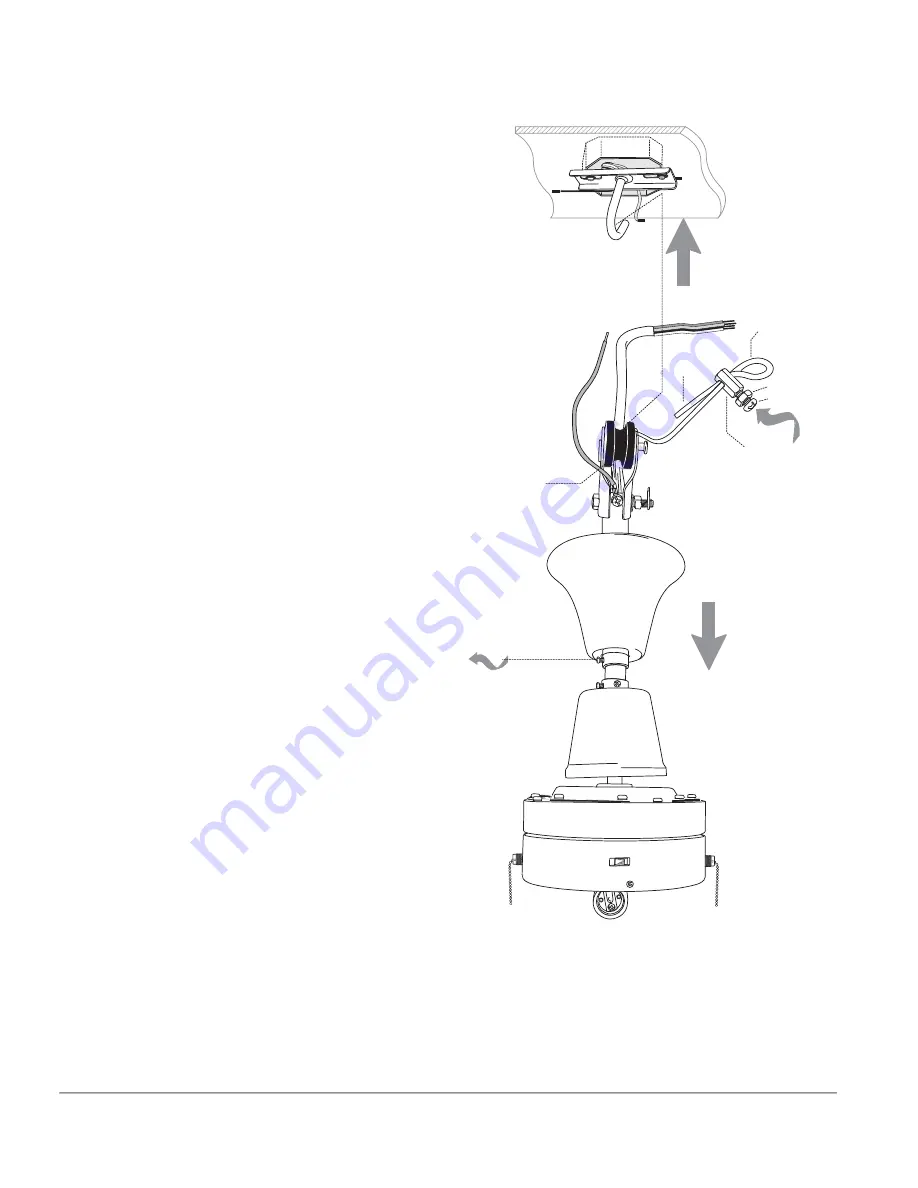
j-hook
hanging bracket
rubber bushing
canopy set screw
electrical wiring
hanging bar
canopy
Loosen canopy set screw and lower canopy
to expose hanging bar. Separate electrical
wiring and safety cable from rubber band.
Lift fan onto j-hook hanging bracket and
slide rubber bushing over hook.
Make the
wiring connections as shown in Section 6 on
the following page.
Important
: Find a secure attachment point
(wood ceiling joist highly recommended)
and secure safety cable--
refer to diagram on
the following page as well
. Use a heavy duty
wood screw, washer and lock washer (not
supplied) over safety cable loop.
Adjust safety cable length by loosening
screw and nut on safety cable vice. Adjust
slack to a hand's length and tighten nut on
vice securely. The loop at the end should just
fit over the threads on the wood screw. Test
cable by pulling on loose end with pliers. If
cable slips, then vice and nut must be set
tighter.
Extra cable slack can be left in ceiling area.


