Rev: 081718
© 2018 Littelfuse Commercial Vehicle Products
littelfuse.com
2 of 3
Installation Instructions
MiniFlec Series Power Distribution Module
Part Number: LFMX0007Z-01
Specifications, descriptions and illustrative material in this literature are as accurate as known at the time of publication,
but are subject to changes without notice. Visit littelfuse.com for the most up-to-date technical information.
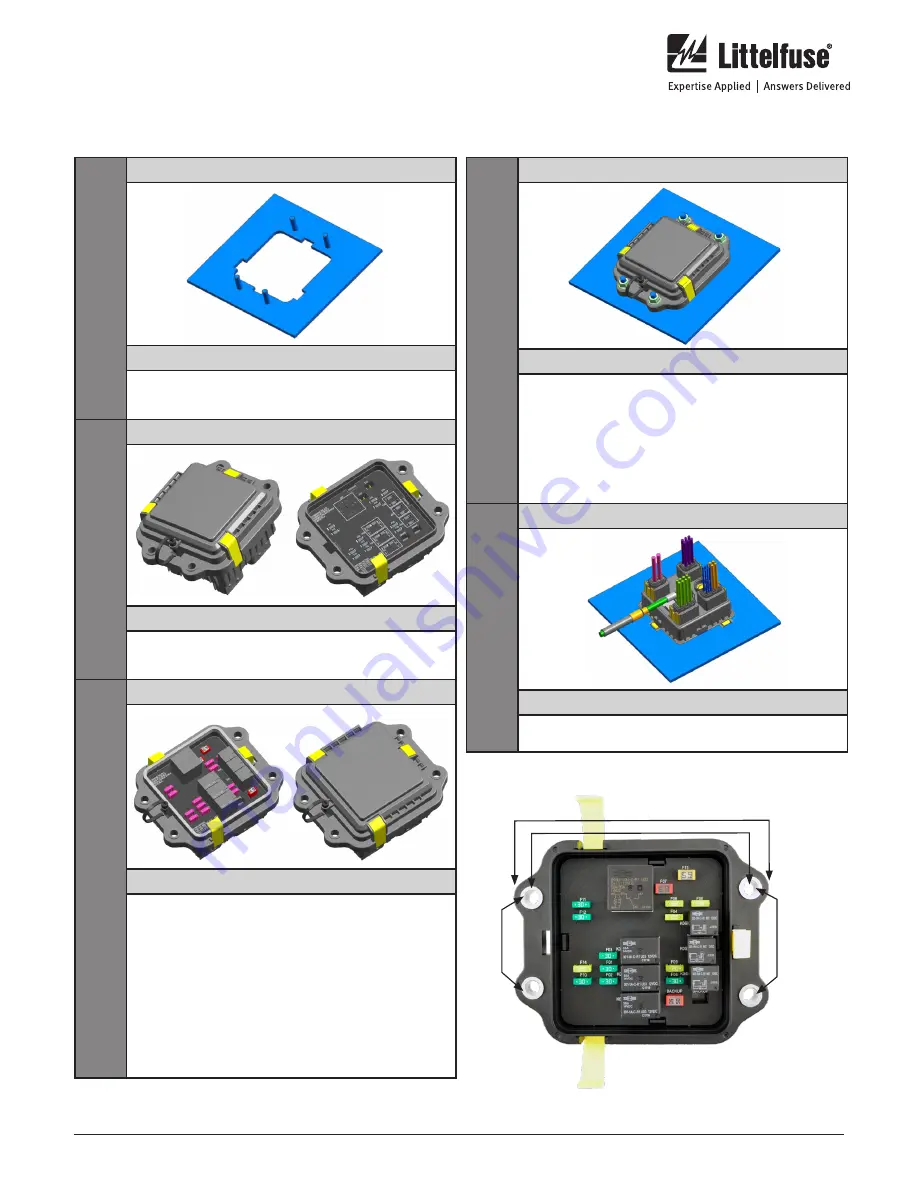
Figure 1 - Step by Step Installation
Mounting Pattern Diagram
65mm
55mm
133mm
157mm
STEP
1
IMAGE
DETAILS
Cut the panel per the mounting hole pattern and
place the mounting bolts into the locations on the
panel.
STEP
2
IMAGE
DETAILS
Take the unit out of the packaging. Snap open
the AssureLatch latches with a small flathead
screwdriver or other tool. Remove the cover.
STEP
3
IMAGE
DETAILS
Fill in all fuse locations with application specific
fuses make sure not to exceed the maximum value
for the fuse locations as listed in fuse table. Fill the
application specific relays using the recommended
types of relays. There is a location on the inside
cover to place a fuse identification label. We
recommend you add a label here to help with
maitenance and troubleshooting. Replace the cover
and snap on the AssureLatch latches. If you do not
get positive tactile and audible feedback that the
latches are fully seated, check the position of the
cover. The box is only seated correctly and sealed
when laches are properly snapped into place.
STEP
4
IMAGE
DETAILS
Bring the main power cable through the cutout
and attach the ring terminal to the main M8 power
stud. Run the harness with the connectors through
the mounting hole and attach the connectors to
the appropriate point. All the connectors are keyed
and cannot be assembled to an incorrect location.
Press the connectors into the mating connector
locations and make sure they are fully seated and
the secondary lock is closed.
STEP
5
IMAGE
DETAILS
Put the MiniFlec into the cut out and tighten the
mounting bolts to 12-15Nm.