13
GB
DANGER TO
LIFE BY ELECTRIC SHOCK!
Before performing any work, first
disconnect the product from the
mains power. Unplug the power
supply
3
from the socket.
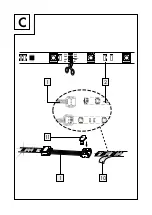
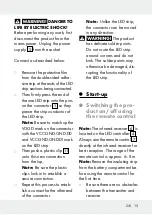
Connect as described below:
Remove the protective film
from the double-sided adhe-
sive strip at the ends of the LED
strip sections being connected.
Then firmly press the end of
the one LED strip onto the pins
on the connector
1
so they
pierce the strip conductor of
the LED strip.
Note:
Be sure to match up the
VGGD mark on the connector
with the VCC-GND-GND-D0
and VCC-GND-GND-DI mark
on the LED strip.
Then push a plastic clip
11
onto this new connection
from the top.
Note:
Be sure the plastic
clips lock in to establish a
secure connection.
Repeat this process to estab-
lish a contact for the other end
of the connector.
Note:
Unlike the LED strip,
the connector can be moved
in any direction:
The product
has delicate solder points.
Do not route the LED strip
around corners and do not
kink. The solder points may
otherwise be damaged, dis-
rupting the functionality of
the LED strip.
Start-up
Switching the pro-
duct on / off using
the remote control
Note:
The infrared receiver
6
is
located on the LED controller
4
.
Always aim the remote control
7
directly at the infrared receiver for
best reception. The range of the
remote control is approx. 6–8 m.
Note:
Remove the insulating strip
from the battery compartment be-
fore using the remote control for
the first time.
Be sure there are no obstacles
between the transmitter and
receiver.

