


14 GB/IE
Maintenance and Cleaning / Disposal / Information / Warranty
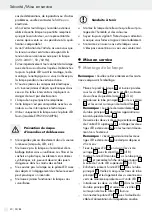
Safety / Start-up
Never open any of the components of the elec-
trical equipment or insert any objects into the
same components. This will pose a risk of fatal
injury from electric shock.
The light bulb is not replaceable.
This light is not suitable for dimmer or electronic
switches.
Only use the light with the included LED-Driver
(model EIP021V0240PSS).
Prevent fire and injury
hazards
Do not look directly into the light source (light
bulb, LED etc.).
Do not leave the light or packaging lie about
carelessly. Plastic film or bags, plastic parts etc.
can turn into dangerous toys for children.
Never cover the light or the LED driver with
objects. Excessive heat can result in fire.
Do not operate the lamp unattended.
Safe working
Mount the light so that it is protected from mois-
ture and dirt.
Always be attentive! Always pay attention to
what you are doing and proceed with caution
at all times.
Never assemble the lamp whilst unfocused or
feeling unwell.
Start-up
Mounting the light
Note:
Please remove all packaging material.
Set up the lamp base
8
and insert the correct
size socket head screws
9
into the openings
in the lamp base
8
from below (Fig. A).
Guide the main tube
5
over the socket head
screws
9
and tighten these with the hex key
10
.
Note:
The power cord
6
for the main tube
5
should face the edge of the lamp base
8
.
Loosen the two outer socket head set screws
11
for the upper LED unit
1
and arrange the two
outer LED strips
1 a
by turning them slightly out-
ward.
Note:
The maximum distance between the two
outer LED strips
1 a
should not exceed approx.
25 cm.
Secure the LED strips
1 a
by tightening the socket
head set screws
11
with the hex key
12
(Fig. B).
Guide the fully assembled LED unit
1
over the
main tube
5
and connect the connecting plug
for the main tube
14
and the connecting plug
for the upper LED unit
13
(Fig. C).
Now plug the LED unit
1
into the main tube
5
.
When doing so, ensure the bores on the main
tube
5
and the screw entries on the LED unit
1
are congruent.
Insert both socket head screws
2
into the bores
on the main tube
5
and tighten the socke head
screws
2
using the included hex key
3
.
Connect the LED driver
7
with the mains con-
nection socket on the gooseneck lamp.
Plug the LED driver
7
into a properly installed
mains socket.
Your light is now ready to use.
Switching the luminaire on / off
Switch the light on or off using the ON / OFF
switch
4
on the upper end of the main tube
5
.
You only need to press it with your finger (touch
switch).
Dimming the light
The light features a variable dimmer. Hold the
ON / OFF switch
4
to activate it. The light will
automatically dim to the max. or min. brightness.
After releasing the ON / OFF switch
4
, the
light will remain at the selected brightness.
Summary of Contents for 3000.063.080
Page 3: ...B A C 3 2 1 4 5 6 7 8 5 9 10 8 1 12 11 1a 1 13 14 4 max 25 cm ...
Page 15: ...16 ...
Page 33: ...34 ...


