12
ASSEMBLY
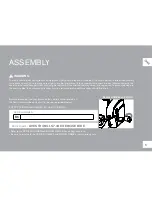
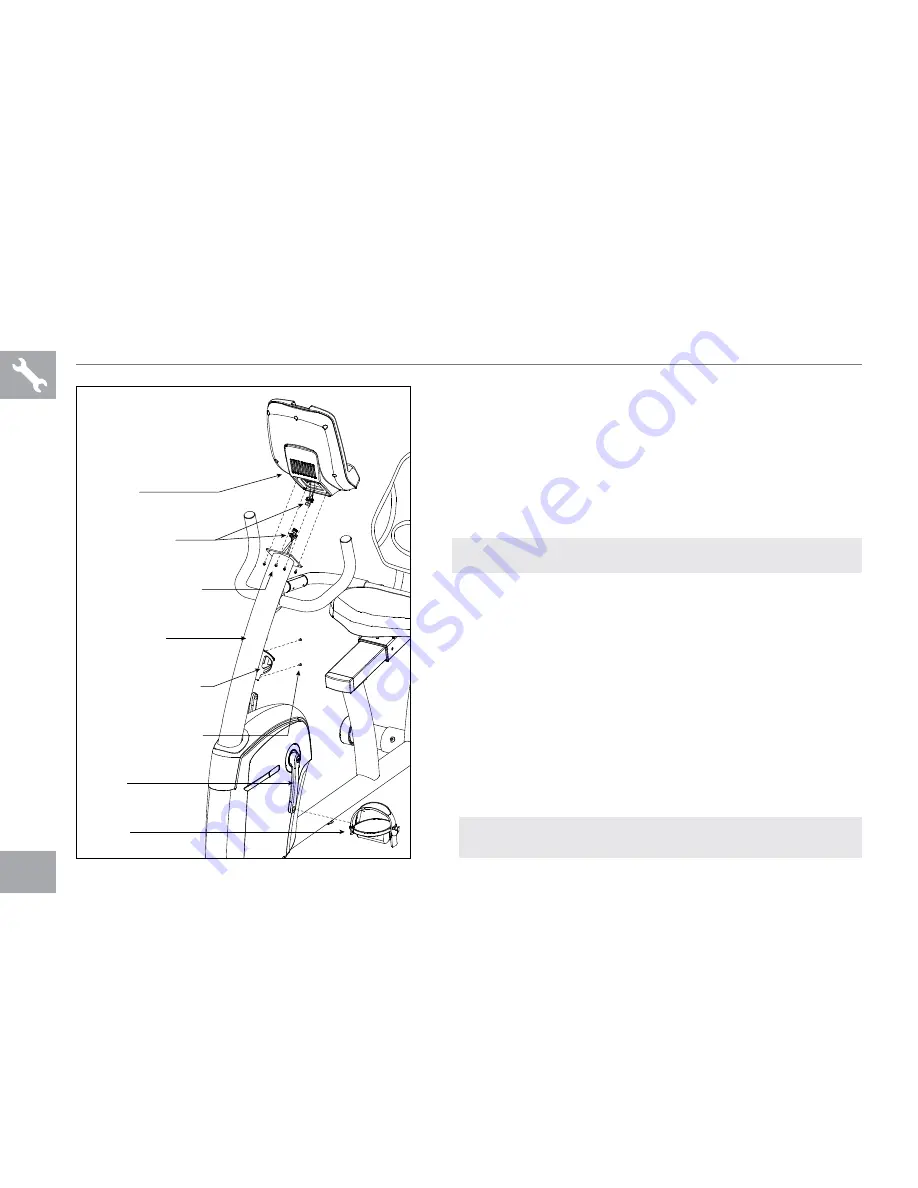
STEP 5
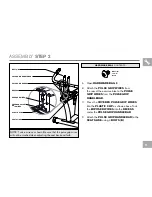
NOtE: there is no hardware bag for this step. All hardware is pre-
attached.
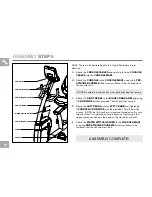
A Attach the
CONSOLE CAbLES
and carefully tuck the
CONSOLE
CAbLES
into the
CONSOLE mAST
.
B Attach the
CONSOLE
to the
CONSOLE mAST
using the 4
PRE-
ATTACHED SCREwS
(the screws will have to be removed from
the console first).
C Attach the
RIGHT
PEDAL
to the
RIGHT
CRANk
ARm
, tightening
it
CLOCkwISE
with the provided 13mm/15mm flat wrench.
d Attach the
LEfT
PEDAL
onto the
LEfT
CRANk
arm, tightening
it
COUNTER-CLOCkwISE
with the provided 13mm/15mm flat
wrench. (NOtE: the left crank arm is reversed threaded so it is very
important that it is tightened counter-clockwise. tightening it the
opposite way can damage the pedal or the crank arm or both.)
E Attach the
wATER bOTTLE HOLDER
to the
CONSOLE
mAST
using the
PRE-ATTACHED SCREwS
(screws will have to be
removed from the console mast first).
CONSOLE CABLES
CONSOLE
PRE-ATTACHED SCREWS
CONSOLE MAST
WATER BOTTLE HOLDER
CRANK
PEDALS
PRE-ATTACHED SCREWS
ASSEMBLY COMpLEtE!
NOtE: Be careful not to pinch any wires while attaching the console.
Summary of Contents for LS7.0B
Page 16: ...16 ...
Page 17: ...17 CONSOLE OPERATION ...
Page 29: ...29 TROUBLESHOOTING MAINTENANCE ...
Page 35: ...35 LIMITED HOME USE WARRANTY ...
Page 52: ...52 ...
Page 53: ...53 FONCTIONNEMENT DE LA CONSOLE ...
Page 65: ...65 DÉPANNAGE ET ENTRETIEN ...
Page 71: ...71 GARANTIE LIMITÉE USAGE DOMESTIQUE ...
Page 88: ...88 ...
Page 89: ...89 FUNCIONAMIENTO DE LA CONSOLA ...
Page 101: ...101 RESOLUCIÓN DE PROBLEMAS Y MANTENIMIENTO ...
Page 107: ...107 GARANTÍA LIMITADA PARA USO EN EL HOGAR ...
Page 110: ...110 ...
Page 111: ...111 ...


