LiveU Live Video Uplink System User Guide
60
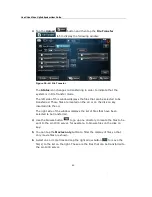
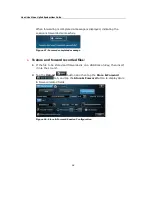
3 Tap the Upload
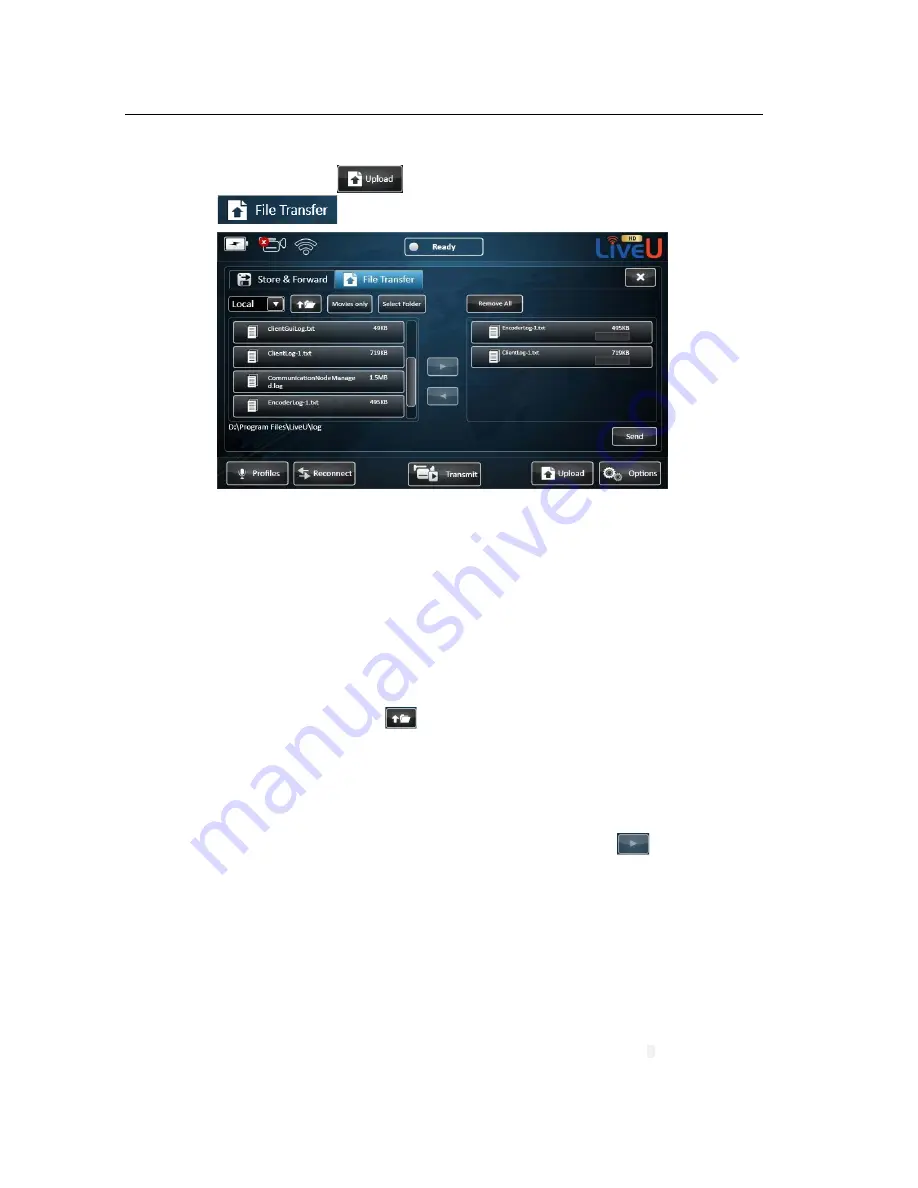
button and then tap the File Transfer
tab to display the following window:
Figure 36: LU File Transfer
The Status icon changes to transferring in order to indicate that the
system is in File Transfer mode.
The left side of this window displays the files that can be selected to be
transferred. These files are located on the LU or on the disk on key
inserted into the LU.
The right side of the window displays the list of files that have been
selected to be transferred.
4
Use the browse button
to go up one directory to locate the files to be
sent to the LU-1000 server, for example, to browse files on the disk on
key.
5 You can tap the Movies only button to filter the display of files so that
only movie files are shown.
6 Select one or more files and tap the right arrow button
to move the
file(s) to the list on the right. These are the files that can be transferred to
the LU-1000 server.
Summary of Contents for LU60
Page 1: ...LiveU Live Video Uplink System User Guide LU60 and LU70 Version 6 3 Part Number DOC00032...
Page 12: ...LiveU Live Video Uplink System User Guide 12 Blank page for double sided printing...
Page 18: ...LiveU Live Video Uplink System User Guide 18 Blank page for double sided printing...
Page 46: ...LiveU Live Video Uplink System User Guide 46 Blank page for double sided printing...
Page 62: ...LiveU Live Video Uplink System User Guide 62 Blank page for double sided printing...
Page 72: ...LiveU Live Video Uplink System User Guide 72 Blank page for double sided printing...
Page 124: ...LiveU Live Video Uplink System User Guide 124 Blank page for double sided printing...
Page 132: ...LiveU Live Video Uplink System User Guide 132 Blank page for double sided printing...
Page 138: ...LiveU Live Video Uplink System User Guide 138 Blank page for double sided printing...


