background image

7

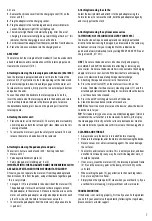
first use.

1.   Remove the silicone cover from the charging socket (13) on the 

motor unit (2).

2.  Plug the adapter into the charging socket.

3.  Plug the adapter into a functioning and easily accessible mains 

socket. The indicator light (10) will light up red.

4.   The indicator light flashes red while charging. After 5 hours of 

charging, the indicator lamp lights up red (NO longer flashes) - this 

indicates, that the charging process has finished.

5.   First disconnect the adapter from the mains, and then from the device.

6.  Place the silicone cover back into the charging socket.

ASSEMBLY  

The motor unit of the Livington Multi Scrubber (2) can be used as both 

a hand-held device and in combination with the telescopic pole and 

frame for the motor unit (6+8).

Attaching/removing the telescopic pole with handle (#2a +#2b):

Take the telescopic pole provided and insert it into the frame of the 

motor unit (6). Pay attention to the 2 side openings at the thinner end 

of the telescopic pole. Allow it to audibly engage with the motor unit. 

To release this connection, firmly press the two external push buttons 

and pull on the ends.

You can then attach the handle to the telescopic pole. To do this, 

insert the wider end of the telescopic pole into the handle, and rotate 

it so that the pin meets the hole in the telescopic pole. To remove 

the detachable handle, press down on the pin and pull it out of the 

telescopic pole. 

Attaching the motor unit:

•  Place the motor unit in the frame (6). The safety lock must audibly 

click into place on both the left and right sides. Make sure that it is 

securely attached.

•  To remove the motor unit, push the safety latch outward. This will 

release the motor unit and allow it to be removed.

Attaching/removing the pad adapter and pads:

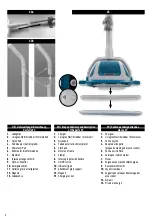
The correct structure can be found in #3 - from top to bottom:

•   Motor unit (2)

•   Pad adapter/attachment plate (4) 

•   Pad (nylon pad or microfibre pad - 3 or 5)

IMPORTANT INFO: THE PAD ADAPTER AND THE MICROFIBRE CLOTH 

ARE ALREADY ATTACHED TO THE MOTOR UNIT AT DELIVERY!

Of course, you can separate the motor unit from the pad adapter and 

then disconnect this from the pads, and put them back together again 

- this is very simple:

•  6 magnets (12) are attached to the underside of the motor unit (2). 

The pad adapter (4) must be attached to these magnets. Attach 

the pad adapter to the motor unit. Make sure that the arrows on the 

motor unit and the pad adapter are aligned and point towards each 

other. The side with the Velcro fastener faces outwards.

•  To remove the pad adapter from the motor unit, all you need to do 

is pull on it.

Attaching/removing the cloths:

Select the desired cloth and attach it to the pad adapter using the 

Velcro fastener. To remove the cloth, hold the pad adapter and gently 

and slowly pull on the cloth.

Attaching/removing the optional accessories  

(ATTENTION: NOT INCLUDED IN DELIVERY CONTENTS)

The brushes do not require an adapter and can simply be attached 

directly to the device using the magnets, and removed in the same way. 

Suitable accessories for your Livington Multi Scrubber can be 

purchased at www.mediashop.tv or by calling 0800 900 88 90 (free of 

charge from DE, AT + CH).

USE | Do not use the device unless it has been fully and properly 

assembled. Switch off the device before attaching or removing any 

accessories. Do not use the device while it is connected to the charging 

adapter or mains socket. Switch off the device after each cleaning 

process to maximize the operating time per battery charge.

1.  Attaching the required accessories to the motor unit 

2.  Press the on/off switch (9) on the motor unit to switch on the 

device. The holder for the accessory mounting plates (11) and the 

attached pads/attachments then begins to vibrate. Move the device 

over the surface to be cleaned.

3.  Press the on/off switch again to switch off the device.

4.  Clean the device and accessories after each use.

NOTE: Don't exert too much pressure on the device - allow the device 

to do the work for you.

TIP: For stubborn dirt, you can also use a mild cleaning agent (which is 

suitable for the surface that is to be cleaned). To do this, either spray 

the cleaning agent directly onto the surface to be cleaned or moisten 

the selected cloth of your device with it to increase the cleaning effect.

CLEANING AND STORAGE

•  Always make sure the device is turned off before cleaning.

•  Make sure that no liquids enter the motor unit when cleaning the device.

•  Never use caustic or abrasive cleaning agents. These can damage 

the surfaces.

•  The cloths can discolour over time. This is entirely normal, and does 

not affect functionality in any way. If a cloth is damaged or worn, it 

should be replaced.

•  If necessary, clean the motor unit (2), the telescopic pole and frame 

(6+8) and the accessory pads with a damp, soft cloth. Dry with a 

soft cloth.

•  When washing the pads (5), pay attention to their washing labels. 

Do not use any fabric softener.

•  Simply shake the nylon pads (3) clean when you use them dry. If you 

use them for wet cleaning, simply wash them with warm water.

TROUBLESHOOTING

If the device is not working properly, first see if you can fix the problem 

yourself. If you cannot solve the problem by following the steps below, 

please contact customer support.

Summary of Contents for MultiScrubber

Page 1: ...7 6 CH MediaShop Schweiz AG Leuholz 14 8855 Wangen Switzerland EU MediaShop GmbH Schneiderstraße 1 Top 1 2620 Neunkirchen Austria TR MediaShop Dayanıklı Tüketim Malları Pazarlama A S Bayer Cd Gülbahar Sk Perdemsac Plaza No 17 43 Kozyatağı İstanbul info tr mediashop group com DE AT CH 0800 376 36 06 Kostenlose Servicehotline ROW 43 1 267 69 67 CZ 420 234 261 900 SK 421 220 990 800 RO 40 318 114 000...

Page 2: ...or unit 3 Nylon pad 4 Pad adapter attachment plate 5 Cloth pad 6 Motor unit frame 7 Clamps 8 Telescopic pole with handle 9 On Off switch 10 Indicator lights 11 Attachment plate support 12 Magnets 13 Charging socket FR Contenuetdésignationdes pièces 1 1 Chargeur 2 Livington Multi Scrubber Bloc moteur 3 Patin en nylon 4 Adaptateur de patin plaque de montage des accessoires 5 Patin en microfibre 6 Ca...

Page 3: ...ti Scrubber motorová jednotka 3 Nylonová utěrka 4 Adaptér utěrky nástavná deska 5 Utěrka z mikrovlákna 6 Rám pro motorovou jednotku 7 Svorky 8 Teleskopická tyč s rukojetí 9 Spínač Zap Vyp 10 Kontrolky 11 Držák pro nástavné desky 12 Magnety 13 Nabíjecí zásuvka SK Rozsahdodávkyaopisčastíč 1 1 Nabíjačka 2 LivingtonMultiScrubber jednotkamotora 3 Nylónová poduška 4 Adaptér podušky nadstavovacia doštičk...

Page 4: ...dose StellenSiebeimWechselndesZubehörsundbeimAufladen desGerätessicher dassdasGerätausgeschaltetist LadenSiedenAkkunichtauf wenndieLufttemperaturunter5 oderüber40 Cliegt AchtenSiedarauf Haare loseKleidungsstückesowie KörperteilevondenbeweglichenTeilenfernzuhalten DasKabeldesGerätsausstecken fallsesnichtbenutztwird odergereinigtwerdenmuss VERWENDUNGSZWECK Dieses Gerät eignet sich zur Reinigung von ...

Page 5: ...ten benötigen keinen Adapter und können einfach direkt an dem Gerät mittels der Magnete aufgesetzt und abgenommen werden Passendes Zubehör für Ihren Livington Multi Scrubber kann unter www mediashop tv oder unter 0800 900 88 90 kostenlos aus DE AT CH erworben werden ANWENDUNG Verwenden Sie das Gerät nur wenn es vollständig und ordnungsgemäß zusammengebaut wurde Schalten Sie das Gerät aus bevor Sie...

Page 6: ... thedeviceshouldalwaysbeswitchedoffand disconnectedfromthepowersupply Neverimmersethedeviceorthechargingadapterinwater orotherliquids andensurethattheydonotfallintowateror getwet Donotattempttodismantlethedevice Donotattempttomake adaptationstothedevice Alwayshandlethecablewithcare Whenmovingthecharger donotcarryordragitusingthecable Whendisconnecting fromthesocket grasptheplugandpullonit Keepthe ...

Page 7: ...r from the motor unit all you need to do is pull on it Attaching removing the cloths Select the desired cloth and attach it to the pad adapter using the Velcro fastener To remove the cloth hold the pad adapter and gently and slowly pull on the cloth Attaching removing the optional accessories ATTENTION NOT INCLUDED IN DELIVERY CONTENTS The brushes do not require an adapter and can simply be attach...

Page 8: ...sourced alimentationélectrique Neplongezjamaisl appareiloul adaptateurdechargedans l eauoudansd autresliquidesetassurez vousqu ilsne tombentpasdansl eauounesontpasmouillés L appareilnedoitpasêtredémonté Aucunemodificationne doitêtreapportéeàl appareil Manipuleztoujourslecâbleavecprécaution Lorsquevous transportezlechargeur neletenezpasparlecâbleetnetirez pasdessus Lorsdudébranchementdelaprise sais...

Page 9: ...r c est très simple 6 aimants 12 sont fixés sur la face inférieure du bloc moteur 2 L adaptateur de patin 4 doit être attaché à ces aimants Fixez l adaptateur de patin au bloc moteur Assurez vous que les flèches sur le bloc moteur et l adaptateur de patin sont alignées et pointent l une vers l autre Le côté avec la fermeture velcro est tourné vers l extérieur Pour retirer l adaptateur de patin du ...

Page 10: ...sereutilizzatodabambinidietà pariosuperiorea8anni odapersoneconridottecapacità fisiche sensorialiomentaliochenonhannolenecessarie esperienzee oconoscenzesolosottosupervisioneosolose istruitisull usosicurodell apparecchioenehannocompresoi rischiderivanti Ibambininonsonoautorizzatiagiocareconil presenteapparecchio Lapuliziaelamanutenzionedell utente nondevonoessereeffettuatedabambini amenochenon abb...

Page 11: ...a illustrata in 3 dall alto verso il basso Unità motore 2 Adattatore pad piastra di supporto 4 Pad pad in nylon o in microfibra 3 o 5 INFORMAZIONE IMPORTANTE L ADATTATORE DEL PAD E IL PANNO IN MICROFIBRA SONO GIÀ ATTACCATI ALL UNITÀ MOTORE QUANDO LO RICEVETE Naturalmente si può scollegare l unità motore dall adattatore del pad e poi scollegarlo dai pad e ricollegarli questo funziona abbastanza fac...

Page 12: ...hetgebruikvan elektrischeapparatenomhetrisicoopbrand elektrocutieenpersoonlijkletselteverminderen Ditomvatdevolgendemaatregelen Leesvoordatuhetapparaatvoordeeerstekeergebruiktde volledigegebruiksaanwijzingzorgvuldigdoorenbewaardeze voortoekomstiggebruik Probeerhetproductniettegebruiken voordatudegebruiksaanwijzinghebtgelezenenvolledig begrijpt Ditproductisgeenspeelgoed Alshetapparaatindebuurtvan o...

Page 13: ...e uiteinden Vervolgens kunt u het handvat aan de telescoopsteel bevestigen Steek hiervoor het bredere uiteinde van de telescoopsteel in het handvat en draai deze zodanig dat de pen het gat in de telescoopsteel klikt Om het afneembare handvat te verwijderen drukt u op de pen en trekt u deze uit de telescoopsteel Motor bevestigen Plaats de motorunit in het frame 6 Het veiligheidsslot moet zowel link...

Page 14: ... meldingslampje brandt niet wanneer de motorunit aan de netstroom wordt aangesloten De adapter is niet goed aangesloten op de motorunit of het stopcontact Zorg ervoor dat zowel de stekker als de adapter correct zijn aangebracht Het stopcontact is defect Probeer het apparaat op een ander stopcontact aan te sluiten Het stopcontact heeft geen stroom Controleer de zekering van de stroomaansluiting De ...

Page 15: ...tart 1 Távolítsa el a szilikonsapkát a motoregységen 2 található kapcsolóhüvelyről 13 2 Az adaptert dugja a kapcsolóhüvelybe 3 Az adaptert csatlakoztassa egy rendeltetésszerűen elhelyezett és egyszerűen hozzáférhető fali dugaszolóaljzathoz A kijelzőlámpa 10 vörösen világít 4 A jelzőfény töltés közben pirosan villog 5 órás töltés után az ellenőrző lámpa pirosan világít a továbbiakban nem villog ez ...

Page 16: ...képességére Ha egy kendő megsérül vagy elhasználódik ki kell cserélni A motoregységet 2 a teleszkópos nyelet és a keretet 6 8 valamint a tartozékpárnákat szükség esetén nedves puha kendővel tisztítsa meg Az eszközt puha kendővel törölje szárazra A párnák mosásakor ügyeljen a párnákon lévő mosási tudnivalókat tartalmazó címkékre 5 Ne használjon öblítőt A műanyag párnákat egyszerűen ütögesse rázza k...

Page 17: ...NABÍJEJTE nepřetržitě déle než 12 hodin To by mohlo zkrátit dobu životnosti baterie INFORMACE Poprvé trvá proces nabíjení asi 8 až 10 hodin 1 Odstraňte silikonový kryt z navíjecí zásuvky 13 na motorové jednotce 2 2 Zapojte adaptér do nabíjecí zásuvky 3 Zapojte adaptér do řádně nainstalované a snadno přístupné nástěnné zásuvky Rozsvítí se červená kontrolka 10 4 Během nabíjení bliká červená kontrolk...

Page 18: ...ovou jednotku 2 teleskopickou tyč včet rámu 6 8 a příslušenství pro utěrky očistěte vlhkou měkkou utěrkou Osušte měkkou utěrkou Při praní utěrek se řiďte pokyny pro praní na etiketách utěrek 5 Nepoužívejte aviváž Pokudpoužívátenylonovéutěrkyzasucha jednodušejevyklepejte 3 Přičištěnívlhkýmiutěrkamijejednoduševypertepouzevteplévodě ŘEŠENÍ PROBLÉMU Pokud přístroj nefunguje správně prověřte zda problé...

Page 19: ...IA Prvé nabíjanie bude trvať asi 8 až 10 hodín 1 Odstráňte silikónový kryt z nabíjacej zásuvky 13 na jednotke motora 2 2 Zapojte adaptér do nabíjacej zásuvky 3 Zapojte adaptér do správne nainštalovanej a ľahko prístupnej zásuvky v stene Kontrolka 10 sa rozsvieti načerveno 4 Počas nabíjania bliká červená kontrolka Po 5 hodinách nabíjania sa kontrolka rozsvieti načerveno už nebliká NO to znamená že ...

Page 20: ...lne a nijako to neovplyvňuje funkčnosť Ak je handrička poškodená alebo opotrebovaná musí sa vymeniť V prípade potreby očistite jednotku motora 2 teleskopickú tyč vrátane rámu 6 8 a podušky príslušenstva vlhkou mäkkou handričkou Očistite dosucha mäkkou handričkou Pri umývaní podušiek dodržiavajte štítky s pokynmi na umývanie na poduškách 5 Nepoužívajte aviváž Keď nylonové podušky používate suché je...

Page 21: ...podelele sau suprafețele pe care doriți să le curățați ÎNCĂRCAREA ACUMULATORULUI Pericol de scurtcircuit Nu introduceți obiecte conductoare de curent de ex șurubelniță în mufa de încărcare Scoateți adaptorul din priză dacă aparatul nu este încărcat Acumulatorul trebuie să fie încărcat complet înainte de pornire pentru a putea fi atinsă capacitatea maximă de încărcare NU încărcați mai mult de 12 or...

Page 22: ...aparatul și accesoriile utilizate după fiecare utilizare INDICAȚIE Nu exercitați prea multă presiune asupra aparatului lăsați aparatul să lucreze pentru sine SFAT În cazul urmelor de murdărie dificile puteți folosi suplimentar o soluție de curățat moale potrivită pentru suprafața care urmează să fie curățată Pulverizați soluție de curățat fie direct pe suprafața care urmează să fie curățată fie um...

Page 23: ...urządzeniaupewnić się żeurządzeniejestwyłączone Nieładowaćakumulatora gdytemperaturapowietrzajest niższaniż5lubwyższaniż40 C Zwrócićuwagęnato żebywłosy luźneubrania atakżeczęści ciała trzymaćzdalaodruchomychczęści CEL STOSOWANIA Urządzenie to nadaje się do czyszczenia podłóg i innych twardych powierzchni takich jak terakota parkiet kamień itp Urządzenie jest przeznaczone do użytku domowego nie do ...

Page 24: ...ę przytrzymaj mocno adapter podkładki i pociągnij za ścierkę Szczotki nie wymagają adaptera i można je łatwo mocować i zdejmować bezpośrednio na urządzeniu za pomocą magnesów Odpowiednie akcesoria do Twojego urządzenia Livington Multi Scrubber można zakupić na stronie www mediashop tv lub pod numerem tel 0800 900 88 90 bezpłatnie z obszaru DE AT CH ZASTOSOWANIE Urządzenie można stosować tylko wted...

Page 25: ...umulator Wskaźnik świetlny nie zapala się po podłączeniu zespołu silnika do sieci zasilającej Zasilacz nie jest prawidłowo podłączony do zespołu silnika lub gniazdka Upewnij się że zarówno wtyczka jak i zasilacz są prawidłowo włożone Gniazdko jest uszkodzone Spróbuj podłączyć urządzenie do innego gniazdka elektrycznego Gniazdko nie ma zasilania Sprawdź bezpiecznik obwodu zasilania Akumulator jest ...

Page 26: ...apter model number TYGSDC0600200 Input 100 240 V 50 60 Hz 0 25 A Output 6V DC 200mA IT Dati tecnici Alimentazione elettrica Ni MH Battey 3 6V 800mAh Power 10W max Batteria Tempo di caricamento ca 5h Tempo di funzionamento ca 40 min quando la batteria è completamente carica Numero modello adattatore TYGSDC0600200 Ingresso 100 240 V 50 60 Hz 0 25 A Uscita 6V DC 200mA HU Műszaki adatok Áramellátás Ni...

Page 27: ...b károsanyag tartalmú elemek a következő jelzésekkel vannak ellátva Cd kadmium Hg higany Pb ólom A felhasználók maguk felelnek azért hogy személyes adataikat eltávolítsák a készülékről CZ Tento symbol znamená že elektrické a ektronické přístroje resp baterie a akumulátory nesmí být likvidovány společně s běžným domovním odpadem Ze zákona jste povinni je po skončení jejich životnosti bezplatně odev...

Page 28: ...draví osob takzvaná poškození zdraví materiální nebo nemateriální povahy které byly způsobeny využitím nebo nevyužitím poskytnutých informací resp využitímchybnýchaneúplnýchinformacízestranytřetíchsubjektů jsouzásadněvyloučeny pokudzestranyfirmyMediashopnedošlokprůkazněúmyslnémuzaviněnínebokzavinění z hrubé nedbalosti SK Nároky na zodpovednosť voči spoločnosti Mediashop ktoré sa týkajú škôd okrem ...

Reviews: