background image

Be sure to read the following Important Safety Instructions carefully and make sure that you

    understand them thoroughly before using this machine.

ᴾᴾᾀᵌᵲᶆᶃᴾᵿᶇᶐᴾᶎᶐᶃᶑᶑᶓᶐᶃᴾᶑᶆᶍᶓᶊᶂᴾᶀᶃᴾᶉᶃᶎᶒᴾᶕᶇᶒᶆᶇᶌᴾᶒᶆᶃᴾᶐᵿᶌᶅᶃᴾᶍᶄᴾᵎᵌᵓᴾᶒᶍᴾᵎᵌᵔᴾᵫᵮᵿᵌ


If an air pressure which is greater than this is used, the machine may become damaged, 

    and injury or damage to property may result.

ᴾᴾᾁᵌᵟᶊᶕᵿᶗᶑᴾᶕᶃᵿᶐᴾᶎᶐᶍᶒᶃᶁᶒᶇᶔᶃᴾᶅᶍᶅᶅᶊᶃᶑᴾᶕᶆᶇᶊᶃᴾᶗᶍᶓᴾᶓᶑᶃᴾᶒᶆᶃᴾᶋᵿᶁᶆᶇᶌᶃᵌ

ᴾᴾ


The rivets may jump out by accident and cause injuries (e.g. blindness).       


Use a dust mask, safety shoes, hard hat and hearing protector appropriately to prevent 

    accidents and injuries. 

ᴾᴾᾂᵌᵫᵿᶉᶃᴾᶑᶓᶐᶃᴾᶒᶆᵿᶒᴾᶒᶆᶃᴾᶋᵿᶁᶆᶇᶌᶃᴾᵿᶌᶂᴾᶒᶆᶃᴾᵿᶇᶐᴾᶑᶍᶓᶐᶁᶃᵊᴾᶎᶍᶕᶃᶐᴾᶁᵿᶀᶊᶃᴾᵿᶐᶃᴾᶁᶍᶌᶌᶃᶁᶒᶃᶂᴾᶑᶃᶁᶓᶐᶃᶊᶗᵌ


Insert the air tube into the inner side of the air joint of the air supply port securely before   

    use, or the air tube may become disconnected during use, leading to injuries.


Use hose bands to securely connect the air hose joint and air hose. If they are not securely

    connected, the air hose may become disconnected during use and injury may result.

ᴾᴾᾃᵌᵲᶓᶐᶌᴾᶍᶄᶄᴾᶒᶆᶃᴾᵿᶇᶐᴾᶑᶓᶎᶎᶊᶗᴾᶀᶃᶄᶍᶐᶃᴾᶂᶇᶑᶁᶍᶌᶌᶃᶁᶒᶇᶌᶅᴾᶒᶆᶃᴾᶋᵿᶁᶆᶇᶌᶃᴾᶄᶐᶍᶋᴾᶒᶆᶃᴾᵿᶇᶐᴾᶑᶍᶓᶐᶁᶃᵌ


Compressed air may cause the air hose to whip around and injury may result.

ᴾᴾᾄᵌᵮᶐᶇᶍᶐᴾᶒᶍᴾᶓᶑᶃᵊᴾᶁᶆᶃᶁᶉᴾᶄᶍᶐᴾᶂᵿᶋᵿᶅᶃᴾᶒᶍᴾᶐᶃᶑᶎᶃᶁᶒᶇᶔᶃᴾᶎᵿᶐᶒᶑᵊᴾᵿᶌᶂᴾᶃᶌᶑᶓᶐᶃᴾᶒᶆᵿᶒᴾᵿᶊᶊᴾᶎᵿᶐᶒᶑᴾᵿᶐᶃᴾᵿᶀᶊᶃᴾᶒᶍᴾᶍᶎᶃᶐᵿᶒᶃᴾ

ẅᴾᴾᶌᶍᶐᶋᵿᶊᶊᶗᴾᵿᶌᶂᴾᶎᶐᶍᶔᶇᶂᶃᴾᶒᶆᶃᴾᶄᶓᶌᶁᶒᶇᶍᶌᶑᴾᶑᶎᶃᶁᶇᶄᶇᶃᶂᵌᴾᵧᶄᴾᶒᶆᶃᶗᴾᵿᶐᶃᴾᶓᶌᵿᶀᶊᶃᴾᶒᶍᴾᶍᶎᶃᶐᵿᶒᶃᴾᶌᶍᶐᶋᵿᶊᶊᶗᴾᶍᶐᴾᶎᶐᶍᶔᶇᶂᶃᴾᴾᴾᴾ
ᴾᴾᴾᴾᶒᶆᶃᴾᶄᶓᶌᶁᶒᶇᶍᶌᶑᴾᶑᶎᶃᶁᶇᶄᶇᶃᶂᵊᴾᶂᶍᴾᶌᶍᶒᴾᶓᶑᶃᴾᶒᶆᶃᶋᵊᴾᶀᶓᶒᴾᵿᶐᶐᵿᶌᶅᶃᴾᶄᶍᶐᴾᵿᴾᶐᶃᶎᵿᶇᶐᴾᶀᶗᴾᵿᴾᶁᶍᶋᶎᶃᶒᶃᶌᶒᴾᶎᶃᶐᶑᶍᶌᵌᴾᴾᴾ


If the machine is used while any parts are damaged, injury may result.


If the machine is damaged by objects being dropped onto it, the damaged part may break  

    and accident or injury may result.


When replacing or cleaning parts, observe the instructions in the instruction manual. 

    If you cannot fi nd the relevant instructions in the manual, arrange to have the repair carried    

    out by the supplier you purchased the product from, or by Lobtex.


If there is no power to the equipment even though the power switch is turned on, or the  

    machine cannot be started when the start button is pressed, do not use the machine. 
    Otherwise, it may operate abnormally, causing injuries.

Do not put your hands in the machine or close to the moving parts while you are using the

    machine. Otherwise your hand may be caught and injury may result.

ᒍᛖ὾ᾔ

ᾛᾘ

⅐ ※‿⁂⁁⁄⁆″⁀⁆‒⁅″‸‷⁆⁋‒※⁀⁅⁆⁄⁇‵⁆※⁁⁀⁅

Af t er reading this manual, keep it in a safe place where it is easily accessible to 

machine

 users.

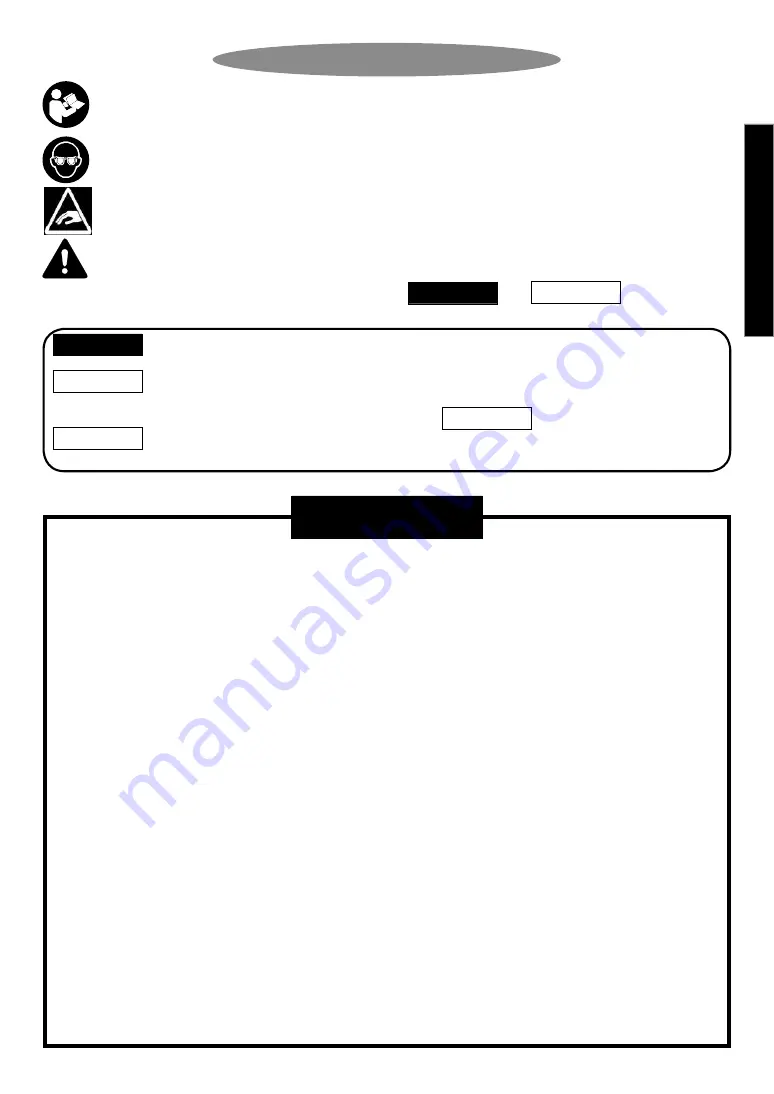
This is the safety alert symbol. It is used to alert you to potential personal injury hazards.

  Obey all safety messages that follow this symbol to avoid possible injury or death.

Always wear protective goggles while using the machine. 

    The rivets may jump out by accident and cause injuries.

ᵵᵟᵰᵬᵧᵬᵥ

These Important Safety Instructions are divided into                       and                       .

    The diff erences between these two levels are described below.

ᵵᵟᵰᵬᵧᵬᵥ

ᵡᵟᵳᵲᵧᵭᵬ

                     : Indicates a potentially hazardous situation which, if ignored, may result in death

                          or serious injury to the operator.

                        : Indicates a potentially hazardous situation which, if ignored, may result in moderate 

                          injury to the operator or physical damage.

 Moreover, failure to follow the instructions marked with the                       symbol or cautions without a
                        symbol which appear in the text of this manual may also have serious results in some

cases. Always be sure to observe the instructions given in the lmportant Safety Instructions.

ᵡᵟᵳᵲᵧᵭᵬ

ᵡᵟᵳᵲᵧᵭᵬ

ᵡᵟᵳᵲᵧᵭᵬ

ᵵᵟᵰᵬᵧᵬᵥ

Summary of Contents for ARF-800P

Page 1: ...䠍䠓 ORDERING PARTS䈈䈈䈈䈈䈈䠍䠓䚷 TROUBLESHOOTING䈈䈈䈈䈈䠍䠔 PARTS TABLE㻌䈈䈈䈈䈈䈈䈈䈈䠍䠕 IMPORTANT SAFETY I N S T R U C T I O N S OPERATING THE AUTO RIVET FEEDER PROCEDURES FOR CHANGING RIVETS AND RIVETER Thank you very much for purchasing LOBSTER auto rivet feeder To ensure correct operation please carefully read this instruction manual and keep it in a safe place for later reference This is Original instructions O...

Page 2: ... and failures caused by use of parts other than our 䚷recommendation 䠍 ᒍᛖ ᾔᾝᾖᾛᾘᾢᾗ IMPORTANT NOTICES INDEMNIFICATION 䞉 Read this manual carefully before using this machine Follow instructions in this manual for 䚷handling this machine replacing accessories or replacing parts as needed 䞉 If you have any questions about this manual check the model㻌㻔type㻕 and contact the LOBSTER dealer where you purchas...

Page 3: ... objects being dropped onto it the damaged part may break and accident or injury may result 䞉 When replacing or cleaning parts observe the instructions in the instruction manual If you cannot find the relevant instructions in the manual arrange to have the repair carried out by the supplier you purchased the product from or by Lobtex 䞉 If there is no power to the equipment even though the power swi...

Page 4: ...ᵌᵵᶆᶃᶌᴾᶐᶃᶎᶊᵿᶁᶇᶌᶅᴾᶎᵿᶐᶒᶑᴾᶍᶐᴾᵿᶁᶁᶃᶑᶑᶍᶐᶇᶃᶑᵊᴾᶄᶍᶊᶊᶍᶕᴾᶒᶆᶃᴾᶑᶒᶃᶎᶑᴾᶑᶎᶃᶁᶇᶄᶇᶃᶂᵌ ᾀᾀᵌᵠᶃᴾᶑᶓᶐᶃᴾᶒᶍᴾᶓᶑᶃᴾᶒᶆᶃᴾᶎᶐᶍᶔᶇᶂᶃᶂᴾᵟᵡᴾᵿᶂᵿᶎᶒᶃᶐᴾᶄᶍᶐᴾᶒᶆᶃᴾᶎᶍᶕᶃᶐᴾᶑᶓᶎᶎᶊᶗᵌ ᾀᾁᵌᵵᶃᵿᶐᴾᶁᶊᶍᶒᶆᶃᶑᴾᵿᶎᶎᶐᶍᶎᶐᶇᵿᶒᶃᴾᶄᶍᶐᴾᶕᶍᶐᶉᵌᴾᵡᶍᶔᶃᶐᴾᶊᶍᶌᶅᴾᶆᵿᶇᶐᴾᶕᶇᶒᶆᴾᵿᴾᶁᵿᶎᴾᶍᶐᴾᶆᵿᶇᶐᴾᶁᶍᶔᶃᶐᵌᴾ ẅẅᵢᶍᴾᶌᶍᶒᴾᶕᶃᵿᶐᴾᶊᶍᶍᶑᶃᴾᶁᶊᶍᶒᶆᶃᶑᴾᶍᶐᴾᵿᶁᶁᶃᶑᶑᶍᶐᶇᶃᶑᴾᶇᶌᶁᶊᶓᶂᶇᶌᶅᴾᶌᶃᶁᶉᶊᵿᶁᶃᶑᵌ 䞉 Otherwise your hair clothes or accessories may be caught in the machine ᾀᾂᵌᵢᶍᴾᶌᶍᶒᴾᶓᶑᶃᴾᶒᶆᶃᴾᶋᵿᶁᶆᶇᶌᶃᴾᶇᶄᴾᶇᶒᴾᶁᵿᶌᶌᶍᶒᴾᶀᶃᴾᶑᶒᵿᶐᶒᶃᶂᴾᶍ...

Page 5: ...idents or injuries caused by abnormal operation may occur ᾀᾀᵌᵵᶆᶃᶌᴾᶂᶇᶑᶎᶍᶑᶇᶌᶅᴾᶍᶄᴾᶒᶆᶃᴾᶋᵿᶁᶆᶇᶌᶃᴾᶍᶐᴾᶎᵿᶁᶉᶇᶌᶅᴾᶋᵿᶒᶃᶐᶇᵿᶊᶑᵊᴾᶍᶀᶑᶃᶐᶔᶃᴾᶊᶍᶁᵿᶊᴾᶊᵿᶕᶑᴾᵿᶌᶂᴾᶁᶍᶂᶃᶑᴾᶍᶌᴾᶕᵿᶑᶒᶃᴾᶂᶇᶑᶎᶍᶑᵿᶊᵌ ᾀᾁᵌᵲᶆᶃᴾᶗᶃᵿᶐᴾᵿᶌᶂᴾᶋᶍᶌᶒᶆᴾᶍᶄᴾᶎᶐᶍᶂᶓᶁᶒᶇᶍᶌᴾᶍᶄᴾᶒᶆᶃᴾᶋᵿᶁᶆᶇᶌᶃᴾᶇᶑᴾᶇᶌᶂᶇᶁᵿᶒᶃᶂᴾᶀᶗᴾᵿᴾᶁᶍᶂᶃᴾᵿᶌᶂᴾᶄᶍᶓᶐᵋᶂᶇᶅᶇᶒᴾᶌᶓᶋᶀᶃᶐᴾᴾ ᴾᴾᴾᴾᶍᶌᴾᶒᶆᶃᴾᶕᵿᶐᶌᶇᶌᶅᴾᶑᶃᵿᶊᵌᴾᵆᵱᶃᶃᴾᶎᵿᶅᶃᴾᵔᴾᵿᶌᶂᴾᵖᵇ ᾀᾂᵌᵵᵿᶐᶌᶇᶌᶅᴾᶊᵿᶀᶃᶊᶑᴾᶇᶌᶁᶊᶓᶂᶃᴾᶇᶋᶎᶍᶐᶒᵿᶌᶒᴾᶇᶌᶄᶍᶐᶋᵿᶒᶇᶍᶌᴾᵿᶌᶂᴾᶒᶇᶎᶑᴾᶍᶌᴾᶓᶑᶇᶌᶅᴾᶒᶆᶃᴾᶋᵿᶁᶆᶇᶌᶃᵌᴾᵧᶄᴾᶒᶆᶃᴾᶊᵿᶀᶃᶊᶑᴾᶀᶃᶁᶍ...

Page 6: ... to use and ensure that the machine operates normally and the specified functions can be provided 䞉 When replacing or cleaning parts observe the instructions in the instruction manual If you cannot find them in the manual arrange to have a repair carried out by the supplier you purchased the product from or by Lobtex 䞉 If there is no power to the equipment even though the power switch is turned on o...

Page 7: ...ivet loading port Power supply jack port Air supply port Air cock Warning seal Warning seal Rivet feeding unit ᒍᛖ ᾔᾝᾖᾛᾘᾢᾗ 㻖 For details refer to the separate sheet Power switch Start button Slide switch cover Height adjuster screw Frame head holder Indicator LED Stopper bolt Instruction seal ...

Page 8: ...9 mm B 21 mm C 23 mm R i v e t d i a m e t e r 24 2 4 mm Type3 32 3 2 mm Type4 40 4 0 mm Type5 Power supply V AC䚷100 䡚 240䚷 50 䡚 60Hz Operating voltage V DC䚷12䚷 Current consumption A 1 or less Operating air pressure䚷 MPa 0 5 䡚 0 6 Dimensions䚷 Length Height Width 㻌㻌 mm Maximum㻌dimensions at shipment 355 305 185 Base machine mass kg 10 9 Air consumption per rivet㻌㻌㻌 䉭 3 1 Air consumption L min 䚷䠆䐟䚷 ...

Page 9: ...r than riveters whose size is appropriate for the frame head holder A year month of manufacture 1 2 3 4 5 6 7 8 9 10 11 12 An English character A B M N K W T Y U O L Z year㻦㻌2016㻌㻌month㻦㻌1㻌䊻 WA 䕿䕿䕿䕿 W A Example 䊼 Serial No 䊼 䊼 Frame head holder notation Riveter A 19 mm AR2000SV B 21 mm AR2000MV 䞉 R1A1 䠆 C 23 mm ARV011M 䞉 ARV015MX 䞉 ARV022M 䞉 ARV025M Rivet size Round head rivet Countersunk head riv...

Page 10: ...sted to three different angles from directly above 0 30 and 60 It is set at 0 in the factory default settings 䐠 Loosen 2 pan head screws M4 by about 5 mm with a Phillips head screwdriver to raise the acrylic cover and remove the front urethane cover ᒍᛖ ᾔᾝᾖᾛᾘᾢᾗ Suction nozzle visible Ḵ Suction nozzle Rotating shaft Turn in direction of the arrow㻚 㻖㻌The rotating shaft is free to move can be rotated u...

Page 11: ...rn in this direction by hand Suction nozzle Rotating shaft Ḷ Height adjuster screw Hex key wrench Rivet feeding unit ă Height adjuster screw Rivet feeding unit Move in this direction Suction nozzle Rivet feeding unit Rivet feeding unit ᒍᛖ ᾔᾝᾖᾛᾘᾢᾗ 0 30 60 Angle adjuster plate 0 30 60 㻖㻌Tighten pan head screws M4 making sure not over tighten and crack the acrylic cover 䐣 Set the front urethane cover...

Page 12: ...he frame head holder can be viewed vertically Hex key wrench Stopper bolt Rivet feeding unit 䐡 Loosen the stopper bolt ᒍᛖ ᾔᾝᾖᾛᾘᾢᾗ Adjust the feeding height appropriately to the length of the rivet mandrel 䐢 Move the rivet feeding unit until it is aligned then align the suction nozzle visually with the feeder unit 䐠 Insert the rivet to suction nozzle and adjust the gap between the tip of the mandre...

Page 13: ...be sure to install an air filter air regulator and air lubricator 3 device set between the compressor and the machine Use the air regulator to adjust the operating air pressure to 0 5 䡚 0 6 MPa Connect the AC adapter provided to the power supply jack port then connect the power plug to the receptacle outlet ᵵᵟᵰᵬᵧᵬᵥᴾᵏᵆᵮᵌᵐᵇ Connect an air tube with an outer diameter of 䃥 6 to the air supply port ATT...

Page 14: ...he indicator LED lights up in green insert the riveter into the inner side of the frame head holder 㻖㻌Do not pull the trigger of the riveter at this time 䐠 After feeding is finished the riveter is pushed back Then pull it out A rivet is supplied to the tip of riveter 䖂 If no rivet is fed for 6 seconds the indicator LED flashes in red 㻌䖂 If no rivet is fed for 12 seconds the indicator LED lights up i...

Page 15: ... parts 䠍䠐 ᒍᛖ ᾔᾝᾖᾛᾘᾢᾗ Suction nozzle 䠄Type3䠅䚷䚷Code No 䠖 65287 Suction nozzle 䠄Type4䠅䚷䚷Code No 䠖 65288 Suction nozzle 䠄Type5䠅䚷䚷Code No 䠖 65289 ᾀ Change in diameter of rivet 㻖 If the rivets are remaining inside take off brush cylinder unit and remove the rivets Push in by hand Suction nozzle Clearance block When changing rivet diameter or riveter frame head diameter follow the procedures shown below W...

Page 16: ...wise it may cause malfunction Pickup plate Pull up the screw section 䠍䠑 Hex socket bolt Brush cylinder unit ᒍᛖ ᾔᾝᾖᾛᾘᾢᾗ 䐠 Loosen the hexagon socket head cap bolts from 4 locations on right and left sides 2 on each side with a hexagonal key wrench 3 mm opposite flats Pull the pickup plate upward to remove it At this time attach an M6 bolt as shown below for easier removal 䐡 Remove the brush cylinder ...

Page 17: ... M6 screw䚷Code No 䠖 65329 Pickup plate U Type4 䚷with M6 screw䚷Code No 䠖 65336 Pickup plate U Type5 䚷with M6 screw䚷Code No 䠖 65348 ᾁ Change in frame head diameter The side switch is set to the specified rivet diameter in advance by factory default setting 䠍 ᾃ 㻖㻌Adjusting the height may need to be verified to the corresponding rivet size See page 11 Replace with the pickup plate appropriate for the si...

Page 18: ...and inspection weekly Failure to do so may lead to faulty operation 䠍䠓 ᒍᛖ ᾔᾝᾖᾛᾘᾢᾗ Specify the model part name code number and the quantities of parts as shown below and place an order with the LOBSTER dealer where you purchased the machine 㻖㻌When parts are modified for improvement the older parts are kept in stock for a period of five years Cylinder cover Filter Loosen 䋒 Vacuum unit 䖃 Store in a p...

Page 19: ...tly oriented Close the air valve and turn the rotating shaft to remove them 10 Rivets will not feed from the basket unit Gently shake the feeder unit 11 Filter of Vacuum unit has been clogged rivet is inserted correctly to the nozzle Clean the filter Refer to page 17 ᵰᶇᶔᶃᶒᶑᴾᶕᶇᶊᶊᴾᶌᶍᶒᴾᶄᶃᶃᶂᴾᶒᶍᴾ ᶒᶆᶃᴾᶐᶇᶔᶃᶒᶃᶐᵌ 1 Alignment of feeding angle and rivet feeding unit is wrong Adjust the alignment Refer to page...

Page 20: ...ARF 800P main unit 䠍䠕 ᒍᛖ ᾔᾝᾖᾛᾘᾢᾗ 1 2 3 4 5 6 7 8 9 10 11 12 13 14 15 16 17 18 19 20 21 22 23 24 25 26 27 28 29 30 31 32 33 34 35 36 37 13 13 13 13 13 13 36 26 6 34 15 15 16 16 6 13 38 ...

Page 21: ... head screw M3 6 㻢㻟㻞㻡㻜 Steel 䠍䠓 Acrylic cover 㻢㻡㻟㻞㻤 Plastic 䠍䠔 Plain washer M4 㻞㻡㻡㻤㻡 Steel 䠍䠕 800P Substrate unit include 㻖㻝 㻢㻡㻟㻤㻥 Electronic device 䠎䠌 Cable rack 㻙㻙㻙 Steel 䠎䠍 Front urethane cover 㻙㻙㻙 Rubber 䠎䠎 Bottom unit 㻙㻙㻙 㻙㻙㻙 䠎䠏 Pickup unit 㻙㻙㻙 Refer to page 23 䠎䠐 Rivet feeding unit 㻙㻙㻙 Refer to page 24 䠎䠑 Rivet rotating unit 㻙㻙㻙 Refer to page 25 䠎䠒 Cross recessed flat head screw M4 8 㻞㻜㻥㻝㻣 St...

Page 22: ...al 㻢㻡㻟㻤㻢 Rubber 䠕 Handle 㻢㻡㻟㻤㻠 Aluminum 䠍䠌 Brush whirl stop 㻙㻙㻙 Steel 䠍䠍 Hex socket bolt M4 5 㻝㻞㻥㻜㻝 Steel 䠍䠎 Urethane cushion 㻢㻡㻟㻤㻡 Plastic 䠍䠏 Brush cylinder receipt 㻙㻙㻙 Steel 䠍䠐 Hex socket bolt M4 10 㻞㻞㻠㻞㻝 Steel 䠍䠑 Hex socket bolt M4 16 㻝㻢㻜㻡㻥 Steel 䠍䠒 Hexagon nut M4 㻝㻢㻜㻢㻟 Steel 䠍䠓 Urethane sheet angle 㻙㻙㻙 Steel 䠍䠔 Urethane sheet holder 㻙㻙㻙 Steel 䠍䠕 Spring washer M4 㻞㻜㻥㻟㻜 Steel 䠎䠌 Spring washer M5...

Page 23: ... Aluminum 䠓 Platform pipe 㻙㻙㻙 Steel 䠔 Pin A type 㻢㻡㻟㻠㻟 Steel 䠕 Compression spring 䃥 8 65 㻢㻡㻟㻠㻠 Steel 䠍䠌 Spring washer M5 㻞㻜㻥㻜㻣 Steel 䠍䠍 Hex socket bolt M5 10 㻢㻞㻜㻝㻝 Steel 䠍䠎 O ring S 10䚷䚷 㻝㻜㻝㻡㻝 Rubber 䠍䠏 Hexagon socket head cap set screw M3 4 㻠㻤㻣㻢㻝 Steel 䠍䠐 Throttle valve elbow 㻢㻡㻟㻢㻣 䐟 䠎䠎 Parts materials 䐟 Brass Rubber Stainless Plastic ᒍᛖ ᾔᾝᾖᾛᾘᾢᾗ 1 2 3 4 5 6 7 8 9 10 11 12 13 14 11 10 8 13 9 10 10...

Page 24: ...㻥㻝㻢 䐟 䠓 Angle plate base 㻙㻙㻙 Aluminum 䠔 Hex socket bolt M5 20 㻠㻥㻣㻡㻞 Steel 䠕 Cross recessed flat head screw M4 8 㻞㻜㻥㻝㻣 Steel 䠍䠌 Pickup side plate 㻢㻡㻟㻟㻝 Steel 䠍䠍 O ring S 10 㻝㻜㻝㻡㻝 Rubber 䠍䠎 Spring washer M5 㻞㻜㻥㻜㻣 Steel 䠍䠏 O ring P 10 㻝㻜㻞㻣㻠 Rubber 䠍䠐 Hexagon socket head cap set screw M3 8 㻢㻡㻟㻡㻟 Steel Pickup unit 䠎䠏 Parts materials 䐟 Brass Rubber Stainless Plastic ᒍᛖ ᾔᾝᾖᾛᾘᾢᾗ 1 2 3 4 5 6 7 8 9 10 11 12 ...

Page 25: ...ad holder 21 㻢㻡㻟㻠㻝 Plastic 䠍䠌䠉䠟 Frame head holder 23 㻢㻡㻞㻥㻝 Plastic 䠍䠍 Cross recessed flat head screw M3 8 㻢㻡㻟㻡㻠 Steel 䠍䠎 O ring S 30 㻞㻟㻢㻤㻡 Rubber 䠍䠏 O ring S 4 㻞㻥㻢㻢㻠 Rubber 䠍䠐 Cross recessed flat head screw M5 12 㻢㻡㻥㻝㻣 Steel 䠍䠑 Sensor guard 㻢㻡㻥㻜㻣 Rubber 䠍䠒 Metal collar 㻢㻡㻥㻜㻤 Stainless 䠍䠓 Plain washer M3 㻞㻝㻡㻟㻥 Steel 䠍䠔 Hex socket bolt M3 15 㻢㻝㻟㻟㻣 Steel 䠍䠕 Barb elbow for soft tube 㻢㻟㻞㻞㻢 Brass 䠎䠐 ᒍᛖ ᾔᾝ...

Page 26: ...zzle 4 㻢㻡㻞㻤㻤 Steel 䠐 Gear box 㻢㻡㻞㻣㻥 Aluminum 䠍䠐䠉䠟 Suction nozzle 5 㻢㻡㻞㻤㻥 Steel 䠑 Spur gear 㻙㻙㻙 Steel 䠍䠑 Clearance block R 㻙㻙㻙 Aluminum 䠒 Rackgear 㻙㻙㻙 Steel 䠍䠒 Clearance block L 㻙㻙㻙 Aluminum 䠓 Air cylinder 㻢㻡㻟㻢㻤 䐠 䠍䠓 Spring washer M5 㻞㻜㻥㻜㻣 Steel 䠔 Rack cylinder mounting plate 㻙㻙㻙 Steel 䠍䠔 O ring P 7 㻝㻜㻝㻠㻥 Rubber 䠕 Bush 䃥 16 L12 㻢㻡㻟㻡㻡 Copper 䠍䠕 Hex socket bolt M4 16 㻝㻢㻜㻡㻥 Steel 䠍䠌 Throttle valve elb...

Page 27: ...rked 䚷䚷 㻖It is also marked in Pickup plate 䐠 How to check the size of Frame head holder Check the mark of the following figure 䚷䚷䚷䚷 䐡 The model number can be checked as follows F r a m e h e a d holder diameter A 19 mm B 21 mm C 23 mm Rivet diameter 24 2 4 mm Type3 32 3 2 mm Type4 40 4 0 mm Type5 ᾐᾡᾕὼᾇ ᾟὼṳὼṳ 㻖For example the model number of above figure will be ARF 800P 40 C ...

Page 28: ...㻥 Frame head holder 19 㻌㻢㻡㻞㻥㻜 40B Pickup plate unit Type 5 㻢㻡㻟㻠㻤 Suction nozzle Type5 㻌㻢㻡㻞㻤㻥 Frame head holder 21 㻌㻢㻡㻟㻠㻝 40C Pickup plate unit Type 5 㻢㻡㻟㻠㻤 Suction nozzle Type5 㻌㻢㻡㻞㻤㻥 Remaining parts 32A 24A Pickup plate unit Type 3 㻢㻡㻟㻞㻥 Suction nozzle Type3 㻌㻢㻡㻞㻤㻣 Remaining parts 24B Pickup plate unit Type 3 㻢㻡㻟㻞㻥 Suction nozzle Type3 㻌㻢㻡㻞㻤㻣 Frame head holder 21 㻌㻢㻡㻟㻠㻝 24C Pickup plate unit Type...

Page 29: ...4C Pickup plate unit Type 3 㻌㻢㻡㻟㻞㻥 Suction nozzle Type3 㻌㻢㻡㻞㻤㻣 Frame head holder 23 㻌㻢㻡㻞㻥㻝 32A Pickup plate unit Type 4 㻌㻢㻡㻟㻟㻢 Suction nozzle Type4 㻌㻢㻡㻞㻤㻤 Frame head holder 19 㻌㻢㻡㻞㻥㻜 32B Pickup plate unit Type 4 㻌㻢㻡㻟㻟㻢 Suction nozzle Type4 㻌㻢㻡㻞㻤㻤 Remaining parts 32C Pickup plate unit Type 4 㻌㻢㻡㻟㻟㻢 Suction nozzle Type4 㻌㻢㻡㻞㻤㻤 Frame head holder 23 㻌㻢㻡㻞㻥㻝 40A Remaining parts Remaining parts Frame hea...

Page 30: ... THE LIABILITY OF LOBSTER ON PARTS FOUND TO BE DEFECTIVE IS LIMITED TO RE WORK OR THE REPLACEMENT OF SUCH GOODS AND IN NO CASE TO EXCEED THE INVOICE VALUE OF THE SAID GOODS UNDER NO CIRCUMSTANCES WILL LOBSTER BE LIABLE FOR DAMAGES OR COSTS INCURRED BY THE BUYER OR SUBSEQUENT USER IN RE PAIRING OR REPLACING DEFECTIVE GOODS ROUTINE MAINTENANCE AND REPAIR OF LOBSTER RIVET TOOLS CAN BE PERFORMED BY AN...

Reviews: