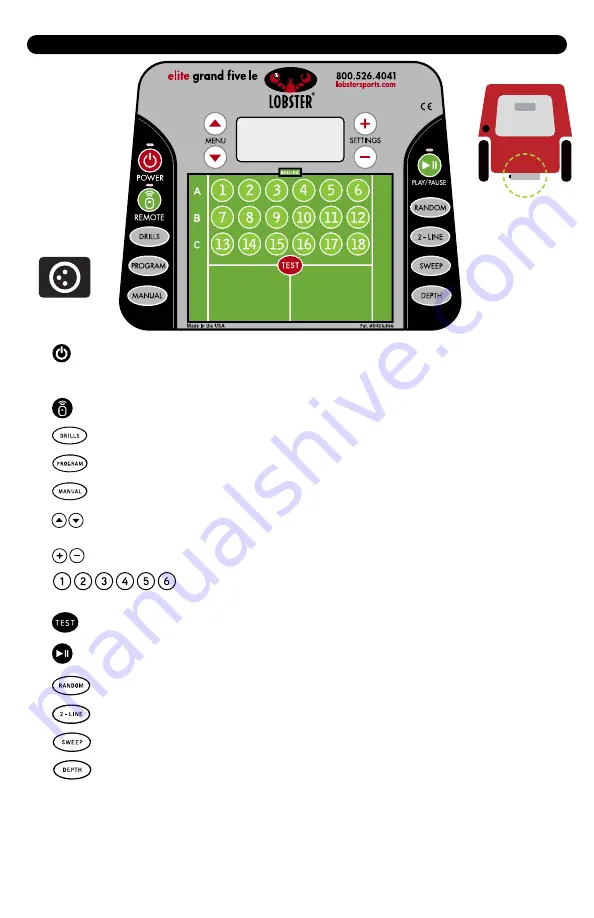
CONTROL PANEL
A
.
Power
–
Push and hold the POWER button to turn the machine on. Battery level is
shown at startup. Both the horizontal and vertical motors will perform functional
checks to calibrate the machine when it is turned on or off.
B
.
Remote
–
Push to turn on/off the remote control receiver.
C
.
Drills
–
12 different pre-programmed sequences that mimic opponent play.
D
.
Program
–
Press to create customized drills.
E
.
Manual
–
Machine will continuously throw a certain shot to a specific location.
F
.
Menu Buttons
–
Used to scroll through the menu options to be selected and adjusted.
A cursor on the LCD will highlight the current selection.
G
.
Settings
–
Used to adjust a highlighted option on LCD screen.
H
.
1-18 Numbered Buttons
–
Used to select desired position for ball
to land in program mode.
(More detailed information can be found in the program section.)
I
.
Test
–
Used to align your machine for proper ball placement on the court.
J
.
Play/Pause
–
Press to play and pause the machine.
K
.
Random
–
Random throws using variations of speed, spin and trajectory.
L
.
2-Line
–
Alternating forehand and backhand shots, with varying degrees of difficulty.
M
.
Sweep
–
Throw balls randomly across the WIDTH (left-right) of the court.
N
.
Depth
–
Throws balls randomly the LENGTH of court, from
short to deep in one row.
0
.
Charger Port
–
Connect to charge the battery.
P
.
Main Power Switch
–
Located on the left side of the metal box directly below the control
panel at the bottom of the machine (shown above).
A
B
C
D
H
K
J
L
C
D
E
F
G
J
M
N
I
H
0
P


