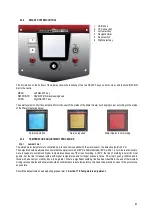
82
23.0
USER INSTRUCTIONS
Once the installation and commissioning is complete, the equipment owner or their representative should be made aware of the
operation of the appliance and its safety devices. A practical demonstration should be given describing each functional step.
Incorrect use may result in injury and will also invalidate the warranty.
23.1
GENERAL REQUIREMENTS
This equipment must be installed by a competent person, registered with an H.S.E. approved
body. All installations must conform to the relevant Gas Safety and Building regulations. Health
& safety requirements must also be taken into account when installing any equipment.
A competent person must also undertake any alterations that require the gas train or flue system
to be broken.
Any interference with a sealed component is forbidden.
Failure to comply with the above may lead to prosecution.
Incorrect use may result in injury and will also invalidate the warranty
23.2
PROCEDURE FOR LIGHTING
7.
Ensure that the gas inlet appliance isolating valve, provided by the installer, is in the “off” position.
8.
Press the power rocker switch, positioned on the back of the appliance to bring the equipment on.
9.
The combustion fan should ramp up to full speed to purge the combustion chamber and then drop back to half rate in order
to light. As the gas inlet appliance isolating valve is closed, the controls should go to a flame failure condition after four
ignition attempts. If the above occurs correctly, open the gas inlet appliance isolating valve and reset the unit by depressing
the Enter/Reset button on the control panel.
10.
The combustion fan will repeat the pre-purge procedure and attempt to light. Once a flame is established, the LCD display
will change to display the rate at which it is firing.
23.3
PROCEDURE FOR SHUTTING DOWN
To take the appliance out of service, hold down the RIGHT SELECT key (SHDN) in the main menu and choose yes. If the appliance
in to be shut down for a long period of time, the power supply should be isolated using the rocker switch on the back and the gas
supply should be isolated at the manual isolation valve.
Summary of Contents for ECOKNIGHT EKW116CE
Page 28: ...28 Max distance between brackets ...
Page 29: ...29 ...
Page 30: ...30 ...
Page 34: ...34 ...
Page 35: ...35 ...
Page 55: ...55 15 8 WIRING DIAGRAM 15 8 1 WIRING DIAGRAM ...
Page 56: ...56 15 9 LADDER DIAGRAM 15 9 1 LADDER DIAGRAM ...
Page 87: ...87 ...
Page 88: ...88 ...


