20
To install the flue connection to the EKW175CE water heater the following procedure should be followed:
1.
Insert the exhaust transition (Item 6 in
Figure 8.6
) into the exhaust port on the heater.
2.
Insert the flue temperature sensor (supplied with the water heater) into the location hole on the exhaust
transition.
NOTE: IF THE FLUE TEMPERATURE SENSOR IS NOT FITTED, THE FLUE GAS MAY EXCEED THE
MAXIMUM TEMPERATURE RATING OF THE FLUE AND CAN LEAD TO SEVERE PERSONAL INJURY, DEATH
OR SUBSTANTIAL PROPERTY DAMAGE.
3.
Insert the 90° elbow (Item 5 in
Figure 8.6
) in to the exhaust transition ensuring the socket is pointing
upwards.
4.
Insert the 100mm to 130mm expander (Item 4 in
Figure 8.6
) in to the 90° elbow.
5.
Insert the 130mm to 150mm expander (Item 3 in
Figure 8.6
) in to the 100mm to 130mm expander.
6.
Insert the air intake transition (Item 2 in
Figure 8.6
) into the intake connection (Item 1) and tighten the worm
drive clip.
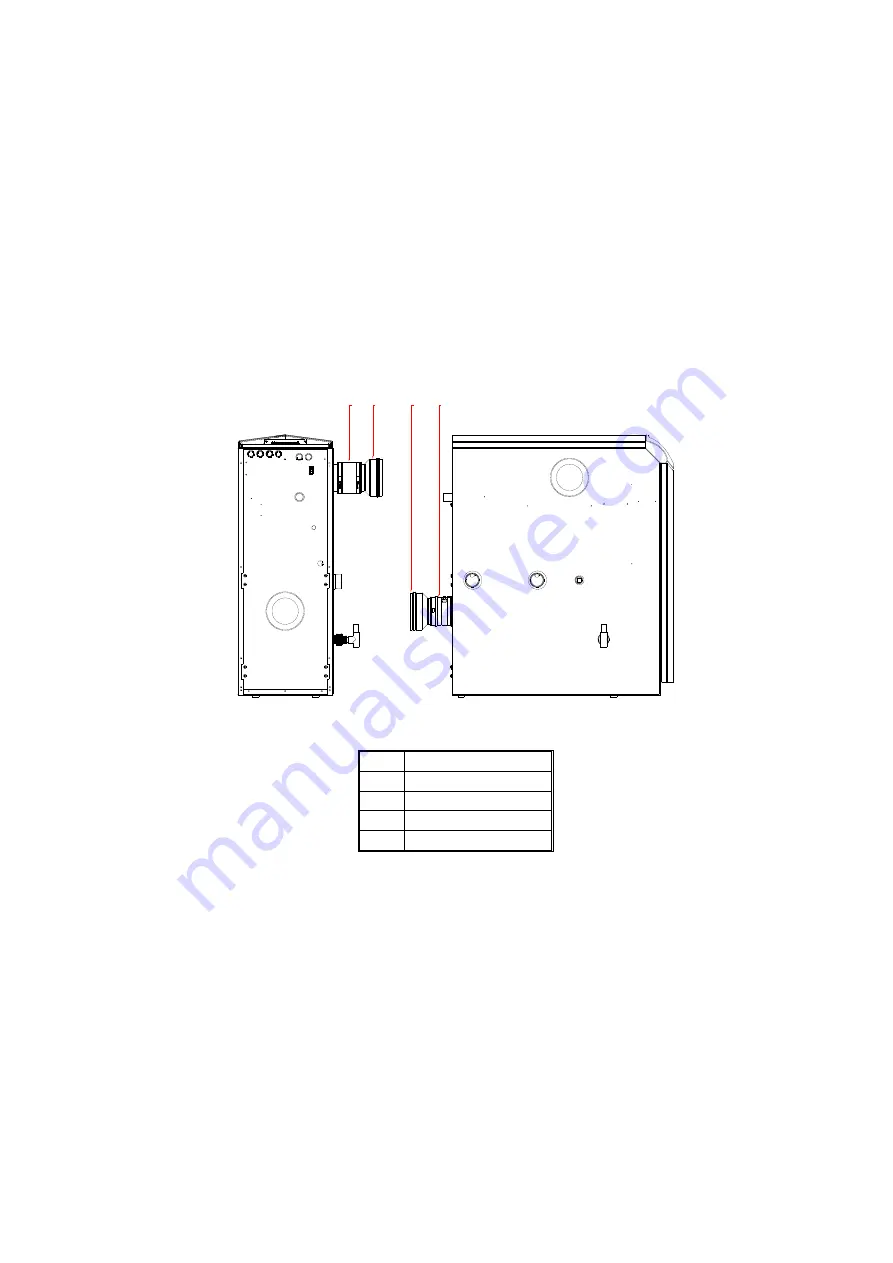
8.7.4
EKW205CE – EKW235CE
FIGURE 8.7
FLUE CONNECTION DETAILS EKW205CE – EKW235CE
ITEM
DESCRIPTION
1
Intake Connection
2
Air Intake Transition
3
Exhaust Transition
4
Flue Collar
TABLE 8.5
FLUE CONNECTION DETAILS EKW205CE – EKW235CE
To install the flue connection to the EKW205CE – EKW235CE water heaters the following procedure should be
followed:
1.
Ensure that the flue collar (Item 4 in
Figure 8.7
) is correctly located in the appliance and that the flue
temperature sensor (supplied with the water heater) is located in the grommet in the collar.
NOTE: IF THE FLUE TEMPERATURE SENSOR IS NOT FITTED, THE FLUE GAS MAY EXCEED THE
MAXIMUM TEMPERATURE RATING OF THE FLUE AND CAN LEAD TO SEVERE PERSONAL INJURY, DEATH
OR SUBSTANTIAL PROPERTY DAMAGE.
2.
Insert the air intake transition (Item 2 in
Figure 8.7
) into the intake connection (Item 1) and tighten the worm
drive clip.
3.
Insert the exhaust transition (Item 3 in
Figure 8.7
) into the flue collar (Item 4) and secure with the worm
drive clip.
2
3
4
1


