42
14.2.2
EKW115CE
1.
Remove the top and front access covers from the unit (no tools required for removal).
2.
Remove the impulse tube and wiring plug from the gas valve.
3.
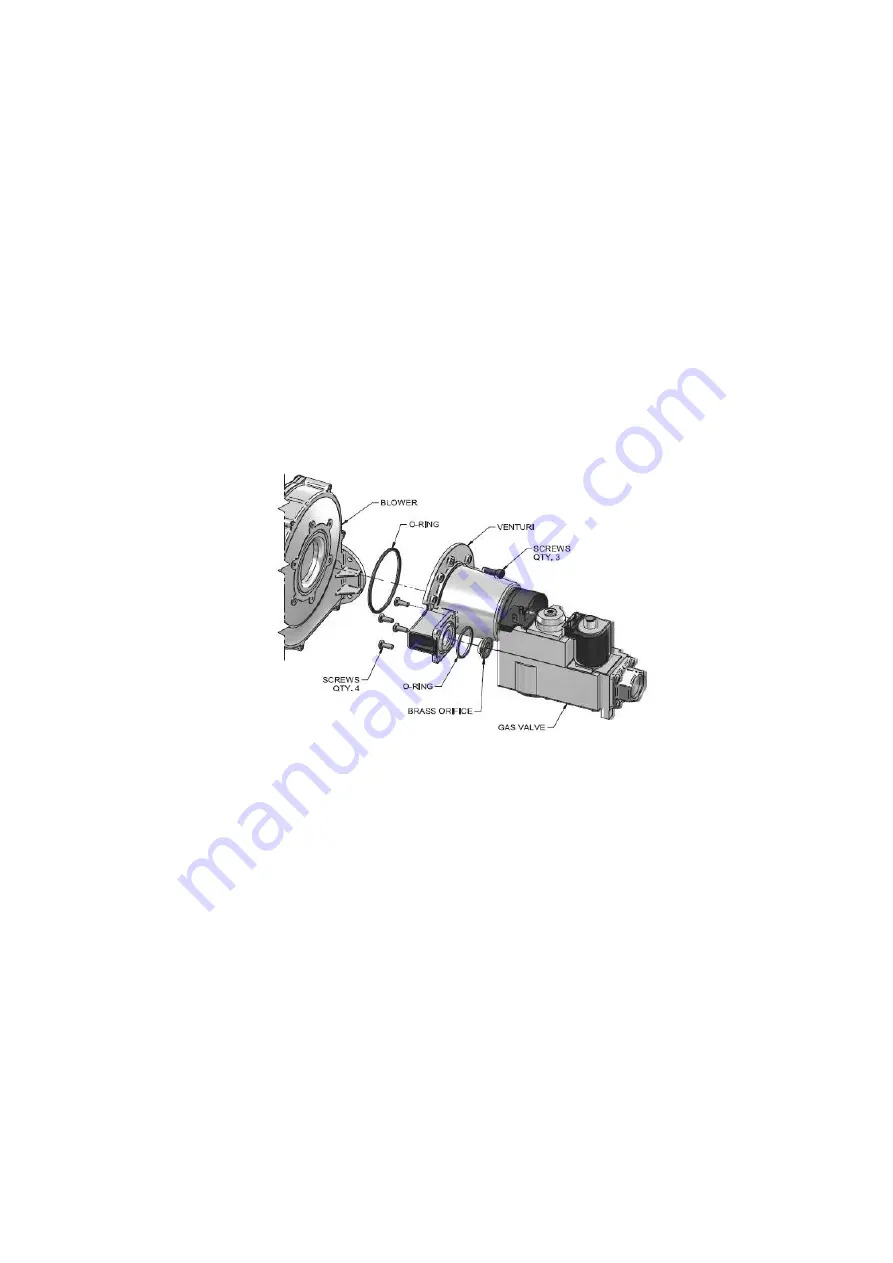
Remove the three screws securing the venturi to the fan.
NOTE:
When separating the venturi from the fan, take care not to damage the O-ring inside the fan (
Figure 14.2
).
4.
Remove the four cap-head screws securing the gas valve to the venturi (
Figure 14.2
).
5.
Locate the propane orifice disk from the conversion kit bag. Verify that the stamping on the orifice disk is
correct for the water heater (see
Table 14.1
).
6.
Remove the existing orifice from the O-ring in the side of the gas valve and replace it with the orifice from
the kit. Position and secure the orifice in the valve as shown in
Figure 14.2
.
7.
Reposition the gas valve against the venturi and replace the star-drive screws (
Figure 14.2
) securing the
valve to the venturi.
8.
Inspect the O-ring inside the fan. Handle the O-ring with care, do not damage. Reposition the venturi
against the fan and replace the screws securing the venturi to the fan (
Figure 14.2
).
9.
Refit the impulse tube and wiring plug to the gas valve.
10.
After installation is complete, attach the propane conversion label (in the conversion kit bag) next to the
water heater rating plate.
Attach the LPG warning label (in the conversion kit bag) to the appliance casing,
next to the gas inlet pipework.
11.
Replace the top and front access covers.
FIGURE 14.2
CONVERSION PROCEDURE EKW115CE


