8
4
Fault History Screen
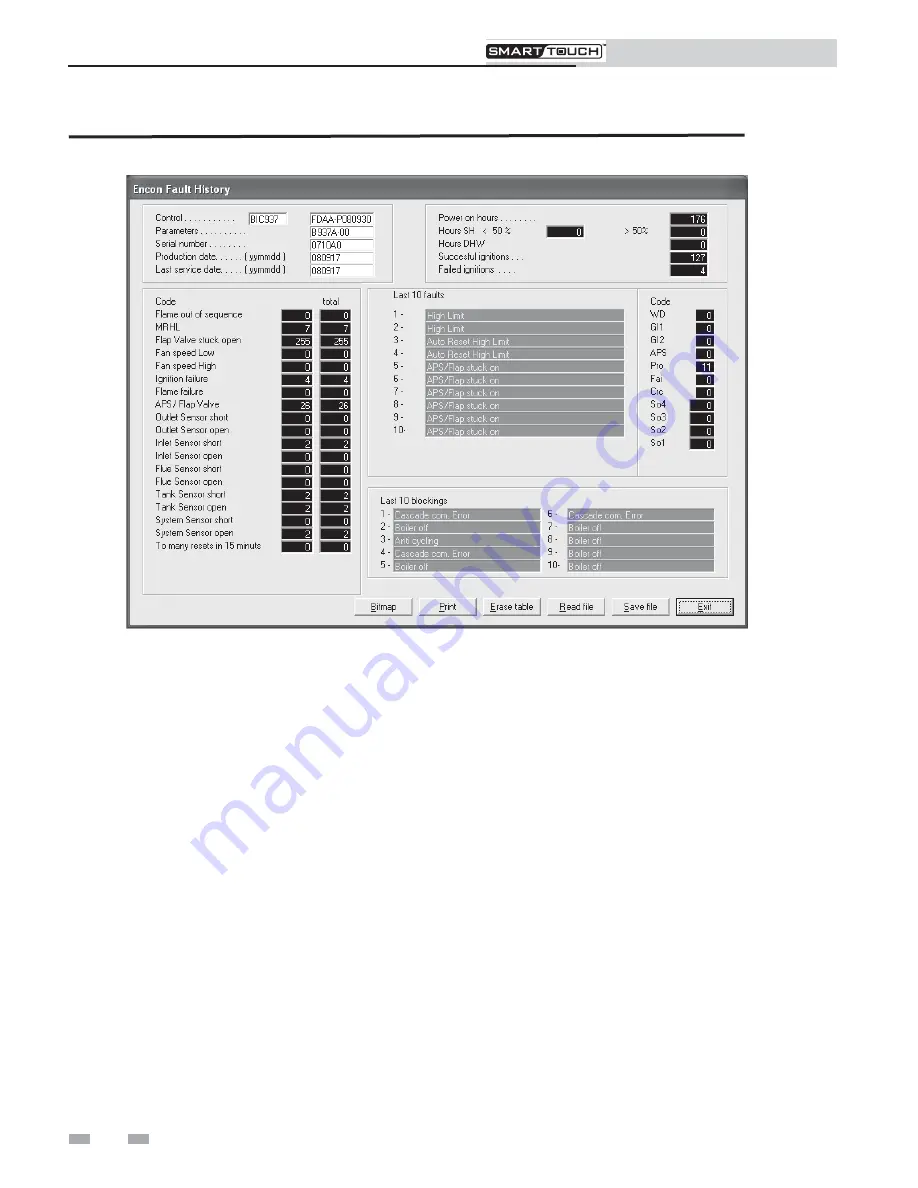
Figure 4-1
Fault History Screen
The Fault History Screen provides historical data about the
operation of the SMART TOUCH controls.. Click on the
Fault history
button along the top of the Main Screen
window (FIG. 1-1), and then click on
Read from Control
in
the pull-down menu. After uploading data from the selected
program, a window will appear with the status of numerous
counters and lists of the most recent events (see FIG. 4-1
above). Included are details of the control board serial
number, software version, default parameters, production
date, and last service date. The number of times various
faults have occurred is also shown. The last 10 faults are
listed, as well as the last 10 blockings (a blocking is an event
that causes the burner to shut off). In addition, the number
of hours the control has operated in various states is shown,
as well as the number of successful and failed ignition
attempts. Finally, a count of internal checks is shown.
The total number of occurrences of certain faults are also stored
in the control and shown on the left side of the screen. The
column on the right shows the total occurrences since the
control was built. The column on the left shows the total
occurrences since the table was reset. Press the
Erase table
button at the bottom of the window to clear the totals in the
column on the left. This will also clear the Last 10 faults and the
Last 10 blockings.
Some of this information may be needed by a service technician
to diagnose a problem, so provision is made to create a file in
which to save this data. Click on
Save file
, and define a file
name and the folder in which to save it. A bitmap can also be
saved by clicking on the
Bitmap
button at the bottom of the
Fault History Screen (FIG. 4-1). The bitmap file will be saved
to the folder ENCONFLS located below the file in which the
SMART TOUCH program resides.
PC Program Instructions


