background image


www.pclocs.com.au    www.lockncharge.com  


Parts Box 
 

Quantity  Item 

Image 

1  Instructional booklet (QuickStart Guide) 


1  Numbered stickers sheet (1 

 18) 


1  3m Extension Power cord 


(UK version image for illustration only)


2  Wall Bracket fixings


1  PIN finder tool 


2  Master Override Keys 
1  Key ring 


1  A B Stickers 


36  Velcro cable management straps 


Instructions for Putnam 18C Charging Station 


Purpose

: The Putnam 18C is a cabinet designed to store, secure and charge personal electronic devices such as tablets, 

phones, laptops, Chromebooks etc. utilising the power adaptor supplied with the device. It can be supplied as a single 
cabinet or stacked in a tower of two with obligatory pedestal. 
 

Ratings: 

Model 10227: Putnam 18C cabinet only 
100-125Vac 50/60Hz 15A 
 
Model 10229: Putnam 18C Pedestal (only sold with 2 x cabinets) 
100-125Vac 50/60Hz 15A 
 

Warning label: 


Unbox the cabinet(s) and pedestal (if installing 2-cabinet tower) then position the cabinet(s)/pedestal in your desired 
location, then fix cabinet to the wall to prevent tipping over. 

Wall fixing must be completed to safely use this product. Only suitably qualified persons shall install.


Summary of Contents for PUTNAM 18C

Page 1: ...of the owner and or user to determine the correct and safe use of any equipment and product To the extent that the law permits any liability which may be incurred as a result of the use or future use...

Page 2: ...lectronic devices such as tablets phones laptops Chromebooks etc utilising the power adaptor supplied with the device It can be supplied as a single cabinet or stacked in a tower of two with obligator...

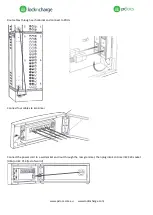
Page 3: ...www pclocs com au www lockncharge com Benchtop location Fit bracket and adjust to wall insert screws Drill holes in wall and insert fixings Completed installation...

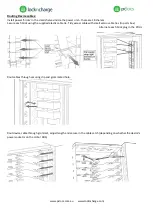
Page 4: ...Stacking cabinets pedestal Operating the Combination Lock Turn anticlockwise to lock Turn clockwise to unlock Installing Wall mounting bracket Combination Lock is set to 0 0 0 0 for shipping See lock...

Page 5: ...wer two cabinets and pedestal the Y cable is to be removed from each cabinet and each Power distribution unit PDU is then connected to the Eco timer powerboard in pedestal using one of 4 x IEC C13 to...

Page 6: ...com Rout cables through each cabinet and connect to PDUs Connect four cables to Eco timer Connect the power cord to a wall socket and rout through the rear grommet then plug into Eco timer IEC C20 so...

Page 7: ...ure each brick using the supplied elastic cable tie Tidy excess cable with small velcro cable ties in parts box Alternate each brick plug in the PDUs Rout cables through securing clip and grommeted ho...

Page 8: ...shelves Remove the shelf brackets and cable ties Unclip the two PDUs Unscrew the mounting plates and Install PDU s on new location move to the adjacent panel Install device plug packs For operation of...

Reviews: