INSTRUCTION MANUAL
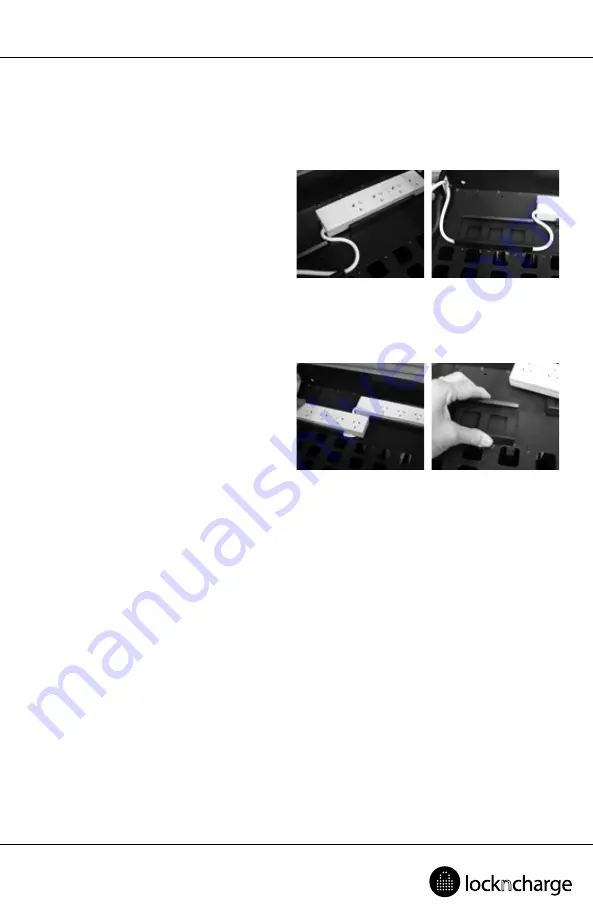
Section B - Fixing the power board in place.
STEP 1.
Having unpacked the un-switched power boards
locate the right hand board in the clip and run
the lead through the left hand clip and out
through the hole to the left. Ensure the lead is
hard up against the inside wall of the clip. Fit the
left hand board into the clip and run its lead out
through the hole to the left. If it better suits your
charger plugs, the boards can be installed the
other way around with leads exiting to the right.
STEP 2.
The power boards should be heard to ‘click’ into
place in the clips if they are fitted correctly. If
the lead from the right hand power board is laid
in the bottom of the left hand clip it will NOT
allow the left hand power board to fully clip into
place. Remove the board and ensure the lead is
positioned hard up against the wall of the clip.
Re-fit the left hand power board.
STEP 3.
In the unlikely event the power boards do not ‘click’ into position and they appear a little loose, the sides of
the clips can be slightly squeezed together to reduce the gap. Re-fit the power boards.
Summary of Contents for Wall Cage 10
Page 7: ...INSTRUCTION MANUAL Compliances and Approvals...
Page 8: ...www pclocs com au www lockncharge com...
Page 15: ...BEDIENUNGSANLEITUNG L nderzulassungen...
Page 16: ...www pclocs com au www lockncharge com...
Page 23: ...MANUAL DE INSTRUCCIONES Cumplimiento de normativas y aprobaciones...
Page 24: ...www pclocs com au www lockncharge com...
Page 31: ...NOTICE D UTILISATION Conformit et homologations...
Page 32: ...www pclocs com au www lockncharge com...
Page 39: ...MANUALE DI ISTRUZIONI Conformit e approvazioni...
Page 40: ...www pclocs com au www lockncharge com...
Page 47: ...Conformidade e Aprova es...
Page 48: ...www pclocs com au www lockncharge com...


