Note on electrostatic shielding
1. Electrostatically shielded MOS workstations
Components sensitive to electrostatic discharge must be
handled at workstation with electrostatic shielding. An elec-
trostatically shielded MOS workstation is fitted with discharge
resistor which earth all conductive materials, including the
technician working there. Dielectrics are discharged by air
ionisation. The use of soldering irons and measuring equip-
ment at shielded workstation is only possible in conjunction
with isolating transformer in each of the devices used. Meas-
uring equipment chassis are also earthed with discharge re-
sistors.
2. Shielded packaging using conductive materials
To protect against electrostatic charges, electrically conduc-
tive plastics are used for packaging and transport purposes.
Conductive plastics are available in the form of transparent
protective bags, foam plastic, film sheeting or containers.
Sensitive components requiring the use of protective pack-
aging must only be packed and unpacked at shielded work-
stations.
Safety warnings/regulations
1. The repair, modification and testing of mains-operated elec-
tronic devices and their accessories must only be performed
by qualified persons.
2. It is necessary to follow the regulations and safety warnings
to VDE 0701, part 200, as well as the regulations and safety
warnings applicable in the country concerned.
3. VDE 0701, Part 2, contains regulations on the repair, modifi-
cation and testing of mains-operated electronic devices and
their accessories.
4. Before delivery, the device and the connecting leads (includ-
ing any protective earth conductor fitted) must undergo visu-
al inspection, and the insulation resistance and the equiva-
lent leakage current must be measured according to VDE
0701, part 200. The low-resistance continuity of the protec-
tive earth conductor must be verified by measurement to VDE
regulation 0701, part 1.
5. The regulations of the country concerned must also be ob-
served.
6. Only genuine parts must be used for replacing components
marked with the symbol
.
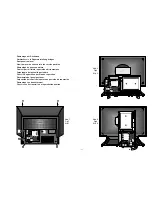
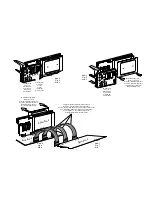
Rear panel removal
Unscrew the five rear panel screws
R
to remove the rear panel.
Insert screw driver into recess
V
. Depress interlocking and at the
same time slide rear panel to the rear (fig. 1).
How to move the chassis into the service position
1. Hold and lift the rear of the chassis and gently pull the chas-
sis toward you (fig. 2).
2. Undo the cable fixtures. Turn the chassis through 90
°
anti-
clockwise and place the chassis behind the set (fig. 3).
3. After servicing ensure all wiring is returned to its original po-
sition and fixed.
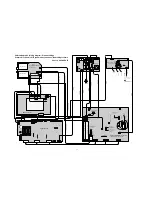
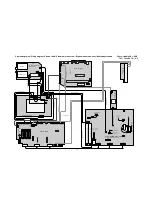
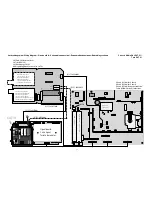
Service position for the signal board
1. Remove the signal board from the main chassis (Basic board),
ensuring all leads are disconnected.
2. Remove the four screws (A) (fig. 4) from the plastic AV cover
and unclip the AV cover from the signal board.
3. Remove the front metal cover from the signal board (fig. 5).
Do the same for the rear metal cover (fig. 6).
4. Fit the three extension leads to the signal board making sure
that the signal board does not touch the basic board (fig. 7).
5. After servicing ensure all wiring is returned to its original po-
sition and fixed.
Note:
The extension lead wire kit is supplied as a service kit. (Part
number 291-90274.920).
☞
Repair information for the signal board
MediaPlus
There is any error on the signal board, please proceed as de-
scribed:
- Remove the EAROM (I 1891) from the printed circuit board. The
TV is able to keep running.
- If you get a static picture, the EAROM is out of order (possible
geometry errors remain unconsidered).
- If the error is still there, it's because of another component on
the signal board.
- If you want to change the signal board at the service head office
in Kronach, insert the EAROM from the damaged signal board
into the new one. So you don't need to make the alignment and
the programming of the TV set.
Important!
Please remove the AV cover at the damaged signal board.
1 - 9
Summary of Contents for Vitros 6381 ZW
Page 114: ...3 39...


