background image

11 -

Installing the TV set

First plan the installation solution for your TV set. See the installation 
instructions of the enclosed table mount for this.
See accessories (page 60) for other installation options.

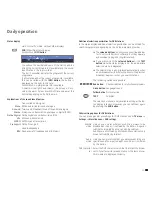
Preparing the remote control unit

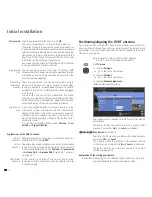
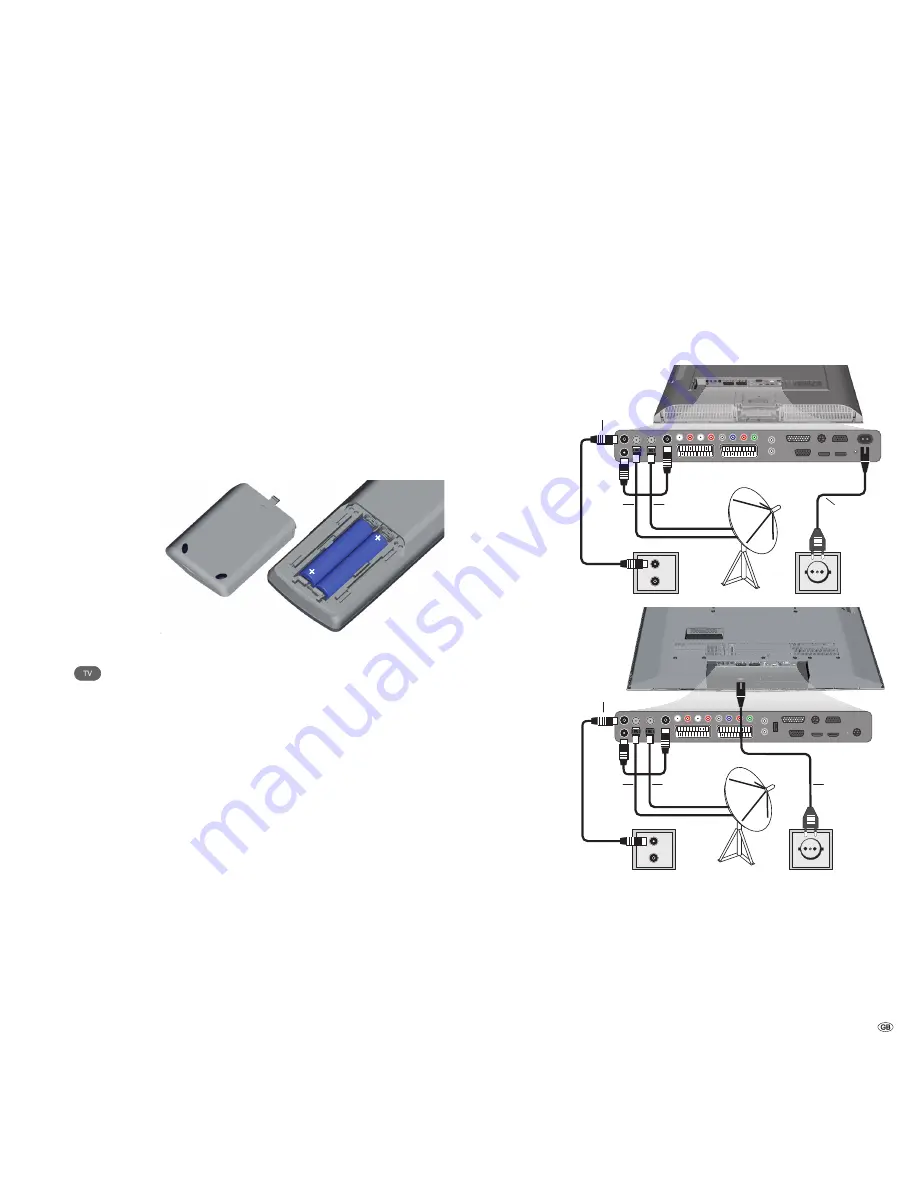
Inserting or replacing batteries

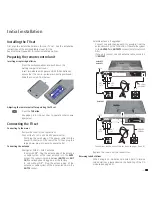
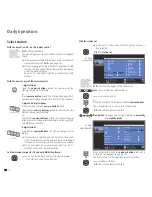
Press the embossed arrow and push down the 
battery compartment cover.
Insert two alkaline manganese LR 03 (AAA) batteries; 
ensure that the + and – poles are correctly positioned!
Slide the cover up from below.

Adjusting the remote control for operating the TV set

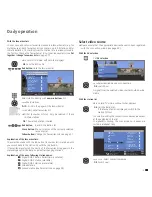
Press the 

TV button

.

See page 54 to find out how to operate other Loewe 
equipment.

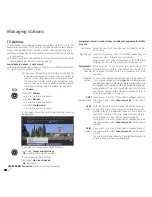
Connecting the TV set

Connecting to the mains

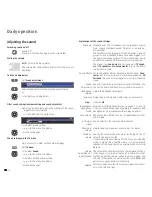
Remove the cover for the connections.
Connect the TV set to a 220-240V power outlet:

First plug the small plug of the power cable into the 

power connection on the rear of the TV, then plug the 
large power plug into a mains power outlet. 

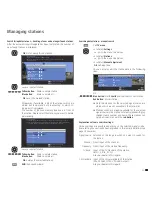
Connecting the antenna

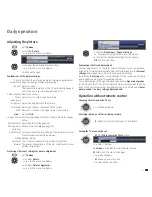
Analogue / DVB-C / DVB-T antenna:

In sets with DR+: Plug the antenna plug of the antenna 

or cable system or the room antenna into the 

ANT2


socket. The connecting cable between 

ANT-TV

 and 

ANT 

OUT

 has already been plugged in at the factory.

In  sets  without  DR+:  Plug  the  antenna  plug  of  the 

antenna or cable system or the room antenna into the 

ANT-TV

 socket.

Initial installation

AAA

  LR03

AAA

  LR03

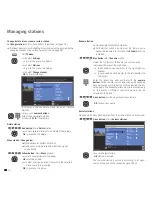
Satellite antenna, if upgraded:

Connect one antenna plug each, for example, from the 
antenna switch or the Twin-LNC of the satellite system 
to the 

ANT-SAT

 and 

ANT-SAT2

 sockets (only for sets with 

DR+).
If you only connect one SAT antenna cable, connect it 
to 

ANT-SAT

.

Replace the cover over the connections.

Receiving coded stations

When using a CA module and a Smart-Card to receive 
coded stations, please observe the handling of the CA 
module (see page 35).

TV

R

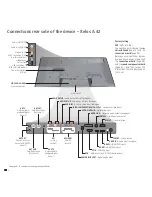
Xelos A42

ANT

SAT

ANT2

ANT

SAT2

220-240V~

50/60Hz

TV

R

ANT

SAT

ANT2

ANT

SAT2

220-240V~

50/60Hz

Xelos A32
Xelos A37

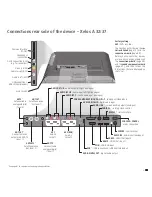
Connections on the back of the set (see also pages 5 and 6).

Summary of Contents for Xelos A 37 Full-HD+ 100

Page 1: ...Operating instructions Xelos A 42 HD 100 Xelos A 37 Full HD 100 Xelos A 32 HD 100 TV 3 3 1 5 6 0 2 6 233 33156 026...

Page 2: ...Picture in Picture PIP 28 Configure Picture in Picture PIP mode 29 Electronic Programme Guide 30 Electronic Programme Guide EPG 30 Configuring EPG 31 Teletext 32 Teletext 32 Teletext menu 33 Digital...

Page 3: ...8 Station list on page 18 MENU Confirm call page 15 Yellow button 3 Last station page 22 Blue button 3 Programme info on off page 22 Select station up 2 Still frame off 2 Still frame on 2 Still frame...

Page 4: ...e standby mode Button Station down in the menu to the left Display Standby Operation Operation without on screen display Radio EPG data capture or timer recording Button R Radio on off 1 back to TV mo...

Page 5: ...adphones connection S VHS connection AVS e g for camcorder Video in AVS Audio in right AVS Audio in left AVS AUDIO IN1 C centre audio input analogue AUDIO LINK 1 surround audio outputs analogue HDMI1...

Page 6: ...left right analogue AUDIO OUT L R audio output left right analogue ANT SAT2 1 Satellite antenna Sat tuner 2 ANT2 1 Antenna cable analogue digital Tuner 2 AV1 Euro AV socket 1 AV2 RGB Euro AV socket 2...

Page 7: ...Table mount assembled Remote control Assist with two batteries Operating instructions of Digital Recorder if there is one integrated in the TV set These operating instructions About this operating ma...

Page 8: ...registered connected and set It is started automatically at the end of the initial installation wizard but can also be called separately see page 47 You will find the sound components wizard in the TV...

Page 9: ...e mains plug of the TV set must be easily accessible so that the device can be disconnected from the mains at any time When you unplug the mains plug do not pull on the cable rather pull on the plug h...

Page 10: ...do not contain any pollutants such as cadmium lead or mercury Used batteries should no longer be disposed of in the do mestic waste according to the Battery Ordinance Dispose of your batteries at no c...

Page 11: ...into a mains power outlet Connecting the antenna Analogue DVB C DVB T antenna In sets with DR Plug the antenna plug of the antenna or cable system or the room antenna into the ANT2 socket The connecti...

Page 12: ...ally in the TV index see Repeat initial installation on page 17 If at least one station is locked the access code must be entered before repeating initial installation see Parental lock on page 38 The...

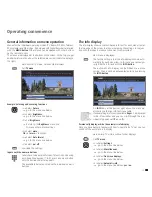
Page 13: ...allation Explanations of the setting possibilities including the upgradeable satellite reception Decide how energy efficiently you want to operate your TV set Depending on the presetting the value for...

Page 14: ...here DVB broadcasts which have an appropriate age identification are locked and can only be watched after entering the access code see page 38 Then the connection and sound component wizard starts wh...

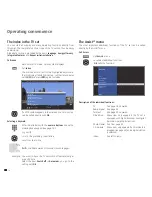
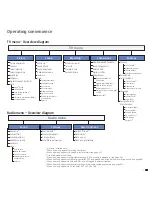
Page 15: ...enus for the individual operating modes TV Radio PIP EPG Teletext PhotoViewer and DR archive if equipped with Digital Recorder are called with the MENU button Other menus can be opened with other butt...

Page 16: ...t to have the TV set switch off automatically at a specific time Select the item Switch off Automatic you go to the setting with OK The Assist menu The most important additional functions of the TV se...

Page 17: ...hone volume Loudness more Sound via 8 Sound effects Sound adjustment Headphone volume Loudness more Loudspeaker sound 2 Headphone sound 2 Auto volume AV output signal Maximum volume Switch on volume V...

Page 18: ...n Call last viewed station for TV sets with MHEG 5 software 56 You can switch back and forth quickly between two stations using these buttons With the station list In normal TV mode without other disp...

Page 19: ...ntenna Digital DVB C station via cable Digital DVB S station via satellite Coded station Locked station see Parental lock on page 38 Select video source Please ensure that the appropriate devices have...

Page 20: ...s the stereo sound a virtual base widening 3D Surround converts a stereo signal into a virtual surround signal Speech Classical Pop Custom music and film sound You can set the treble and bass for musi...

Page 21: ...d in the Personal settings Every signal source has its own personal settings By selecting Presettings the picture settings for the respective currently active signal source are set to predefined value...

Page 22: ...ired picture format is set or press 34to select the desired picture format The Panorama picture format can be set between proportionally correct and format filling display Black bars are visible on th...

Page 23: ...d for specific programmes depending on the DVB programme provider The coloured buttons do not work as described below for TV sets with MHEG 5 software but they operate as described on page 33 Digital...

Page 24: ...for new stations Here you can also call a configuration of the DVB T and DVB S antennae with the green button see page 13 With selection of set location the conventional TV standard colour standard i...

Page 25: ...settings Various settings are possible depending on the selected signal source Some settings have already been explained in the initial installation see page 12 onwards Selection of the range in which...

Page 26: ...nput position one character to the right also for blanks Input position one character to the left deletes the character Enter the letters one after another with the numeric buttons on the remote contr...

Page 27: ...e numeric buttons enter the initial letters in case of alpha betical station order which you want to enter in the favourites list OK transfers the station to the favourites list The new station is ins...

Page 28: ...when you press the PIP button The station of the TV picture is now freely selectable When you press the PIP button again the PIP picture returns to the TV picture and the PIP window closes Start and...

Page 29: ...TV picture and still keep an eye on the PIP picture You can temporarily ban commercials or programme sections to the PIP picture in this way The PIP picture becomes the TV picture again PIP off Config...

Page 30: ...n be programmed Starting and ending EPG Switch EPG on off Awizardwillguideyouthroughthenecessarypresettings the first time you start the EPG If you have analogue reception you enter the data capture f...

Page 31: ...The programmes can be sorted either according to their start times chronologically or according to stations cor responding to station list Calling additional information about the programmes Brief inf...

Page 32: ...ik Die neuen Gesetzesentw rfe 120 Wird auch der Nahverkehr teurer 121 Australien Keine Zugest ndnisse 122 Tote bei Zugungl ck in Schweden 532 Tennis Auftaktmatch wurde abgebrochen 204 Formel 1 Neues R...

Page 33: ...es Russian Greek Polish and Turkish Improved graphic representation of the Teletext Not offered by all stations Digital teletext MHEG 5 In the UK or Ireland the teletext for DVB T stations is transmit...

Page 34: ...set changes from green to orange Switch on the screen with the remote control Red button OK button or RADIO button Switch on the screen on the TV set Press R on the TV set operating ring Radio menu I...

Page 35: ...odule is not twisted in the process The eject button protrudes slightly when the CA module is inserted correctly Searching for encrypted stations The search wizard must only be started when the settin...

Page 36: ...ath This may differ depending on the TV set and the DVB programme pro vided Ask your local dealer for information whether a software update via DVB reception path is possible Automatic information by...

Page 37: ...h This is unnecessary when loading the software with the Load new software after switch off to standby update option If a new software has not been updated by a DVB station you will be reminded of thi...

Page 38: ...nu offers you convenient alarm services Programmed alarms are also active when the TV set has been switched off to standby If the TV set switches on from the standby mode by alarm a screen message app...

Page 39: ...he time and date are recorded automatically The date may have to be entered manually for some stations Enter the time and date manually if you receive station without tele text Call Time and date Call...

Page 40: ...devices modifications OK calls the wizard The connection wizard can be exited at any time with the END button OK Proceed The connection diagram shows the currently logged in equipment OK Proceed conti...

Page 41: ...the external recorder You can also call Digital Link Plus under TV menu Con nections Digital Link Plus END Exit connection wizard Gaming mode Xelos A 37 Full HD 100 only For the inputs of your TV set...

Page 42: ...ket is to be transmit ted digitally a cinch cable must be plugged between the coaxial digital output of the accessory equipment and the AUDIO DIGITAL IN socket of the TV set In addition the digital au...

Page 43: ...ket of the TV set Use a fully equipped Euro AV cable available from your dealer for this If you want to receive and record analogue stations with the receiver tuner built into the recorder the recorde...

Page 44: ...t on the TV set see also page 49 Playback from the device Call AV selection 56Select HDMI1 DVI or HDMI2 DVI socket With Digital Link HD capable devices the device name may possibly appear in place of...

Page 45: ...of the PC or accessory equipment to the AUDIO DIGITAL IN socket of the TV set with a cinch cable The digital audio input can be assigned to the PC IN socket by TV menu Connections Miscellaneous Assig...

Page 46: ...e to the AUDIO IN1 L R sockets of the TV set by a dual cinch cable Alternatively connect the digital audio output of the exter nal device to the AUDIO DIGITAL IN socket of the TV set with a cinch cabl...

Page 47: ...pages 60 and 61 Play sound via active speakers Connect your active speakers to the audio outputs AUDIO OUT L R of the TV set with cinch cables Switch the TV set to playback via active speakers Call T...

Page 48: ...centre input of the TV set AUDIO IN1 C with a cinch cable Attention Do not use the centre speaker connection of the amplifier use the centre pre amp output instead Connecting digital audio amplifiers...

Page 49: ...able to the AUDIO DIGITAL IN socket on the TV set If new devices are connected and registered in the connection wizard the digital audio input AUDIO DIGITAL IN is assigned in the connection wizard see...

Page 50: ...es with Digital Recorder and DR recordings by EPG Serial can be selected additionally see also the instruction manual of the Digital Recorder When the automatic time control is activated only once onl...

Page 51: ...nalogue stations The timer data are transmitted automatically from the TV set to the recorder after programming is complete For DVD recorders in addition the recording quality SQ or EQ is also transmi...

Page 52: ...the photo overview see right column If several media are available select with 34memory medium and then with OK start PhotoViewer Ending the PhotoViewer Remove used memory medium Or Press END button w...

Page 53: ...e heard during the PhotoViewer operation Select memory medium from which the photos are to be reproduced This menu item is only displayed if at least two memory media are available Open folder Folders...

Page 54: ...utton is pressed the display of the selected operating mode lights up TV REC DVD RADIO This allows you to check which operating mode the remote control is set to every time you press a button Setting...

Page 55: ...D player Auro 2216 PS 8116 DT Sound off on LED indicator for current operating mode Switch over to operate TV set Switch over to operate Recorder Sleep timer Set TV picture format RADIO Mono Stereo DI...

Page 56: ...the basic adjustment Close the menu Specifying the switch off position This is where you specify the position that the TV will take when it is switched off In order for the TV set to return to the de...

Page 57: ...n the connection diagram b The AV standard is set incorrectly c The signal type is set incorrectly a In the connection wizard TV menu Connections New devices modifications compare the connection diagr...

Page 58: ...not registered in the connection wizard or is connected differently to shown in the connection diagram Intheconnectionwizard TVmenu Connections New devices modifications compare the connec tion diagr...

Page 59: ...frequency of the speakers 90 Hz Teletext TOP FLOF Level 2 5 Page memory 2000 Digital teletext only in UK IRL with active MHEG 5 software MHEG 5 Connections max equipment Mains socket Supply voltage E...

Page 60: ...ojector With the Loewe Individual Sound Projector you can enjoy digital Surround Sound without expensive installation and connection of several speakers The Sound Projector is easy to set and operate...

Page 61: ...or Unit RS232C Art No 70460 050 The Motor Unit RS232C upgrade kit allows you to stand the TV set on a table or floor stand solution with a motor controlled rotating foot Then the Loewe Individual Soun...

Page 62: ...t with concealed setup Controlling the recorder for timer recordings Digital Link Plus System for controlling recorders according to protocol 50 For analogue stations the station and timer data are tr...

Page 63: ...ation of TV and Loewe system components even more convenient LNB LNC The crucial electronic component of a satellite antenna is referred to as an LNB Low Noise Block Converter It is mounted in the foc...

Page 64: ...ge to switch the TV device to playback Symbol rate Describes the transmission speed for data transmission T Terrestrial In data transmission a wireless transmission that does not use satellites as int...

Page 65: ...e phone keypad 15 Move picture vertically 22 Muting 20 N New devices modifications 40 Numeric buttons 15 16 18 O On screen displays 39 Overview diagram 17 P Page selection 32 Parental lock 38 PC IN 45...

Page 66: ...l Perlar 12 37135 Verona VR Italia Tel 39 045 82 51 611 Fax 39 045 82 51 622 Email Stefano Borgognoni loewe it PL Trading pz 2004 Ltd 27 Aliat Hanoar St Givataiim 53401 Israel Tel 972 3 57 27 155 Fax...

Reviews: