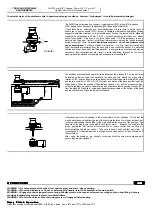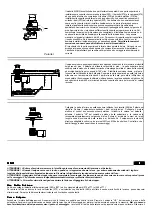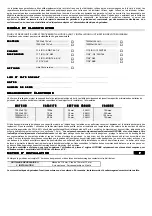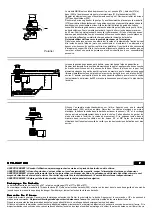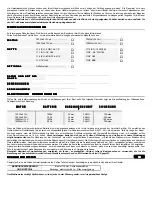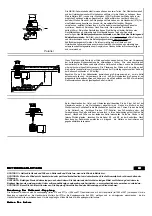
To engage the clutch insert the handle supplied into the clutch nut (273) or gipsy cap (285) tighten it turning clockwise until you cannot move the handle any more.
To disengage the clutch loose the clutch nut or the gipsy cap turning counter clockwise.
R
R
R
Ra
a
a
aiiiis
s
s
siiiin
n
n
ng
g
g
g T
T
T
Th
h
h
he
e
e
e A
A
A
An
n
n
nc
c
c
ch
h
h
ho
o
o
orrrr
Start the engine of the boat. Be sure that the clutch is well engaged. Draw out the handle from the gipsy cap.
Push the button "UP" of the foot switch or remote control.
Do not use the windlass to pull the boat to the anchor
.
Release the button "UP" to stop the manoeuvre.
When you haul the last metres of the chain , pay attention to the anchor, which may damage the bow of your boat.
If case the anchor be stranded and the Lofrans circuit breaker gets released , wait some minutes before put it back into service and try the manoeuvre once more.
Should the circuit breaker stop again , we suggest to fix the chain to a cleats or bollard , then use the boat engine to break the anchor loose.
For your safety we strongly recommend to turn
OFF
the circuit breaker and engage the chain stopper during navigation. Reactivate the circuit breaker and
disengage the chain stopper before anchoring.
L
L
L
Lo
o
o
ow
w
w
we
e
e
errrriiiin
n
n
ng
g
g
g T
T
T
Th
h
h
he
e
e
e A
A
A
An
n
n
nc
c
c
ch
h
h
ho
o
o
orrrr
When you wish to lower the anchor very quickly , it is necessary disengage the clutch. The gipsy may freely run on its shaft and release the chain into the
water. The chain fall can be controlled tightening the gipsy cap with the handle . At the end of the operation engage the clutch.
Under usual conditions , we suggest to lower the anchor electrically , pushing the button "DOWN" placed on the remote control or foot switch.
You will have always a perfect control of the manoeuvre , which can be interrupted any moment releasing the button "DOWN" .
Once anchored , we suggest in order to reduce the windlass load , to use a chain stopper and fix the chain with a rope to a strong point as a cleat.
U
U
U
Us
s
s
se
e
e
e O
O
O
Offff T
T
T
Th
h
h
he
e
e
e D
D
D
Drrrru
u
u
um
m
m
m IIIIn
n
n
nd
d
d
de
e
e
ep
p
p
pe
e
e
en
n
n
nd
d
d
de
e
e
en
n
n
nttttlllly
y
y
y F
F
F
Frrrro
o
o
om
m
m
m T
T
T
Th
h
h
he
e
e
e G
G
G
Giiiip
p
p
ps
s
s
sy
y
y
y
Stop the run of the chain , fasten it to a strong point as a chain stopper or similar. Disengage the clutch. Turn clockwise around the drum with two laps of rope.
Keep the end of rope. Push the button "UP" , recovering the rope at the same time. Engage the clutch at the end of the operation.
R
R
R
Ra
a
a
aiiiis
s
s
se
e
e
e T
T
T
Th
h
h
he
e
e
e A
A
A
An
n
n
nc
c
c
ch
h
h
ho
o
o
orrrr IIIIn
n
n
n C
C
C
Ca
a
a
as
s
s
se
e
e
e O
O
O
Offff E
E
E
Em
m
m
me
e
e
errrrg
g
g
ge
e
e
en
n
n
nc
c
c
cy
y
y
y
Insert the emergency handle in the clutch nut or gipsy cap. Turn clockwise , overcoming a strength due to the spring (301). As there is no ratio , please keep in
mind in case of deep anchoring the stress will be hard.
M
M
M
M A
A
A
A IIIIN
N
N
N T
T
T
T E
E
E
E N
N
N
N A
A
A
A N
N
N
N C
C
C
C E
E
E
E
WARNING ! = Before operate turn the windlass off at the main switch and remove with attention the chain from the gipsy .
A correct and periodic maintenance operation is essential for the best efficiency of your windlass. At least once every month remove the salt layer , which forms
periodically on the outer casting , to avoid electrolysis problems which could prejudice the windlass performances. Wash with a fresh water and clean all the
surfaces , particularly in the most hidden points , where salts deposits. We recommended , at least once every six months , to disassemble the windlass gipsy
following the instructions below.
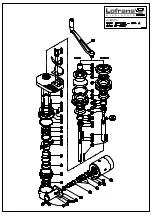
Standard version : using the handle unscrew (273) , remove (274, 275) then unscrew (217) , remove (288 and 289). Remove (276) and extract (277).
Low profile version :using the handle unscrew (285) then remove (286), unscrew (217) , remove (288 and 289). Remove (276) and extract (277).
Clean and check all the parts , spray all with CRC 3097 "LONG LIFE" or WD40. Watch if there are no electrolysis traces and grease the main shaft thread.
After a long inactivity period , the electric motor could run slowly. We recommend to check and clear the brushes and replace it if necessary.
We strongly recommend to separate , at least once every year , the windlass from the deck to clean and remove the salt layer under the base.
The gearbox is proper filled with SAE 90 long life oil. If there is a leak of oil from the body , it will be necessary to disassemble and replace the seals. For this
purpose , it is available a complete set of seals . At the beginning and at the end of the season , check the motor and control box, removing eventual residues and
covering the terminals with grease .
O
O
O
OR
R
R
RD
D
D
DE
E
E
ER
R
R
RIIIIN
N
N
NG
G
G
G S
S
S
SP
P
P
PA
A
A
AR
R
R
RE
E
E
E P
P
P
PA
A
A
AR
R
R
RT
T
T
TS
S
S
S
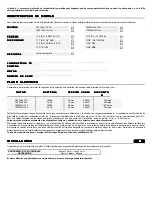
To identify a windlass spare parts see the spare part list. When ordering spare parts , please specify for the AIRON model the code
B.05.101
, give us a
complete model classification , the serial number , the item number and the quantity.
Contact the nearest authorised LOFRANS' distributor or directly LOFRANS' S.r.l. fax++ 39 (039) 2004299 .
IIIIN
N
N
NF
F
F
FO
O
O
OR
R
R
RM
M
M
MA
A
A
AZ
Z
Z
ZIIIIO
O
O
ON
N
N
NIIII R
R
R
RIIIIG
G
G
GU
U
U
UA
A
A
AR
R
R
RD
D
D
DA
A
A
AN
N
N
NT
T
T
TIIII G
G
G
GL
L
L
LIIII A
A
A
AS
S
S
SP
P
P
PE
E
E
ET
T
T
TT
T
T
TIIII D
D
D
DIIII S
S
S
SIIIIC
C
C
CU
U
U
UR
R
R
RE
E
E
EZ
Z
Z
ZZ
Z
Z
ZA
A
A
A D
D
D
DE
E
E
EL
L
L
L S
S
S
SA
A
A
AL
L
L
LP
P
P
PA
A
A
A----A
A
A
AN
N
N
NC
C
C
CO
O
O
OR
R
R
RE
E
E
E
IIII
ATTENZIONE !
il salpa-ancore non è progettato per essere utilizzato come presa di forza a bordo dell’imbarcazione. La cima o la catena devono essere fissate
a punti fissi come bitte o altro.
ATTENZIONE !
non eccedere nel carico le prestazioni indicate. Vi suggeriamo di assistere il salpa-ancore durante l’operazione di recupero , dirigendo
l’imbarcazione verso il punto di ancoraggio alla minima velocità.
ATTENZIONE !
installare sempre un appropriato interruttore magneto-termico per proteggere il circuito ed il motore elettrico da surriscaldamento e danni.
ATTENZIONE
!
disattivare sempre il salpa-ancore quando non è in uso per prevenire azionamenti accidentali.
ATTENZIONE !
sempre tenere mani,piedi e dita lontane dal salpa-ancore quando è in azione. Se la catena si incastra , disattivare il salpa-ancore e con estrema
cauzione , tentare di liberare la catena.
ATTENZIONE !
non utilizzare il salpa-ancore per impieghi diversi o in modo differente rispetto a quanto previsto dal presente manuale.
G
G
G
G A
A
A
A R
R
R
R A
A
A
A N
N
N
N Z
Z
Z
Z IIIIA
A
A
A


