16
Carbide Cutter OM
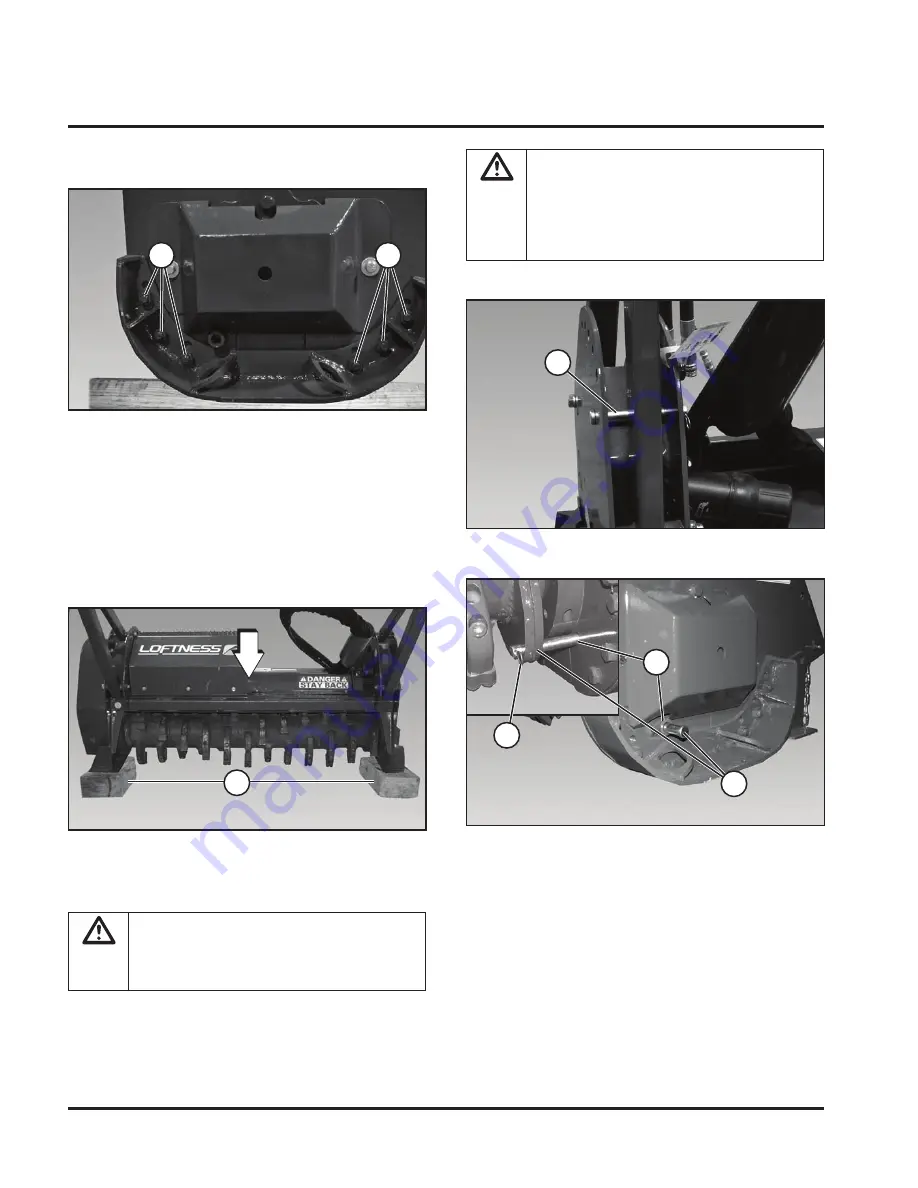
Remove the rotor lock pin (1) from the storage position.
Install the rotor lock pin (1) into the opening (2) on the left
side of the carbide cutter.
Align the hole in the rotor with the lock pin. Install the
rotor lock pin (1) through the rotor and install the retaining
pin (3).
Set-up Instructions
Skid Adjustment
NOTE:
The skid(s) can be adjusted to increase or
decrease the distance between the ground and
the rotor.
Remove the six nuts (1) and raise or lower the skid to the
desired height. Re-install the six nuts and tighten securely
against the skid.
Rotor Locking Pin Installation
Raise the carbide cutter off the ground and place blocks
(1) underneath the skids. Lower the carbide cutter down
on the blocks.
1
1
1
1
WARNINg:
Rotor must be stabilized with
rotor locking pin to prevent accidental
rotation any time the rotor is exposed for
service work.
WARNINg:
Do not remove the locking pin
for any reason when one or more knives
are missing from the rotor assembly. The
imbalance could cause the rotor to turn
without warning causing serious personal
injury.
2
3
1
Summary of Contents for 51CCH
Page 2: ......
Page 4: ......
Page 6: ......
Page 8: ......
Page 12: ...2 Carbide Cutter OM...
Page 22: ...12 Carbide Cutter OM...
Page 37: ...27 Carbide Cutter OM PARTS IDENTIFICATION Parts Identification...
Page 68: ...58 Carbide Cutter OM...
Page 73: ......


