FRAMER'S
EDGE
MAT CUTTER
MODELS 650, 655 & 660
L o g a n G r a p h i c P r o d u c t s I n c . , 1 1 0 0 B r o w n S t r e e t , Wa u c o n d a , I L 6 0 0 8 4 To l l F r e e 1 8 0 0 3 3 1 6 2 3 2 w w w. l o g a n g r a p h i c . c o m
11
E. Blade Depth Adjustment Straight Cutter
1. Micro Adjustment Screw
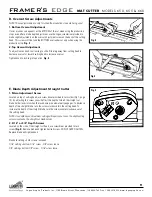
Located on top of cutting head, use screw driver provided to turn screw (Fig 1, page
10). By adjusting this screw you will effect the depth at which the straight cut
blade holder locks into when the lock down pin automatically engages. To decrease
depth of the straight blade, turn the screw clockwise into the cutting head. To
increase the depth of the straight blade, turn the screw counter-clockwise out of
the cutting head.
NOTE: Any depth beyond maximum setting will require you to use the depth setting
screws located on the straight cut blade holder.
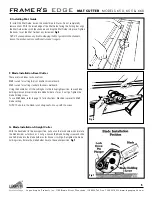
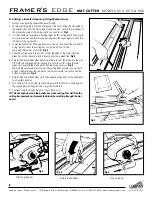
2. 3/16" or 3/8" Depth Screws
Located on the side of the straight cut head, use screwdriver provided to turn
screw
(Fig. 5
). Remove blade and tighten desired screw. DO NOT OVER-TIGHTEN.
Replace blade and tighten knob.
Standard setting = both screws loosened.
3/16" setting = bottom 3/16" screw , 3/8" screw loose.
3/8" setting = bottom 3/8" screw , 3/16" screw loose.
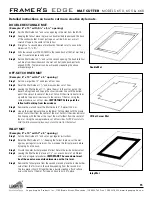
Fig 5
Fig 3
D. Overcut Screw Adjustments
NOTE: These adjustments are only for when the production stops are being used.
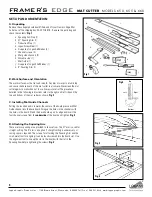
1. Bottom Overcut Adjustment
If over or under cuts appears at the BOTTOM of the cut when using the production
stops even after a blade depth adjustment, use the Logan screwdriver provided to
make slight adjustments on the overcut adjustment screw on the back of the cutting
head. This screw will fine tune the BOTTOM over/under cut only when using the
production stop.
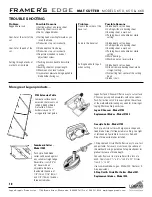
Fig. 3
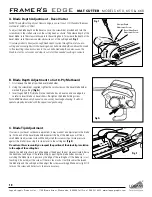
2. Top Overcut Adjustment
To adjust, loosen knob to allow leg to slide. Slide leg away from cutting head to
decrease overcut or toward cutting head to increase overcut.
Tighten knob to lock leg into position.
Fig. 4
Fig 4


