background image

L o g a n   G r a p h i c   P r o d u c t s   I n c . ,   1 1 0 0   B r o w n   S t r e e t ,   Wa u c o n d a ,   I L   6 0 0 8 4   To l l   F r e e   1   8 0 0   3 3 1   6 2 3 2     w w w. l o g a n g r a p h i c . c o m

11

SIMPLEX 

PLUS

M A T   C U T T E R

M O D E L S   7 5 0   &   7 6 0

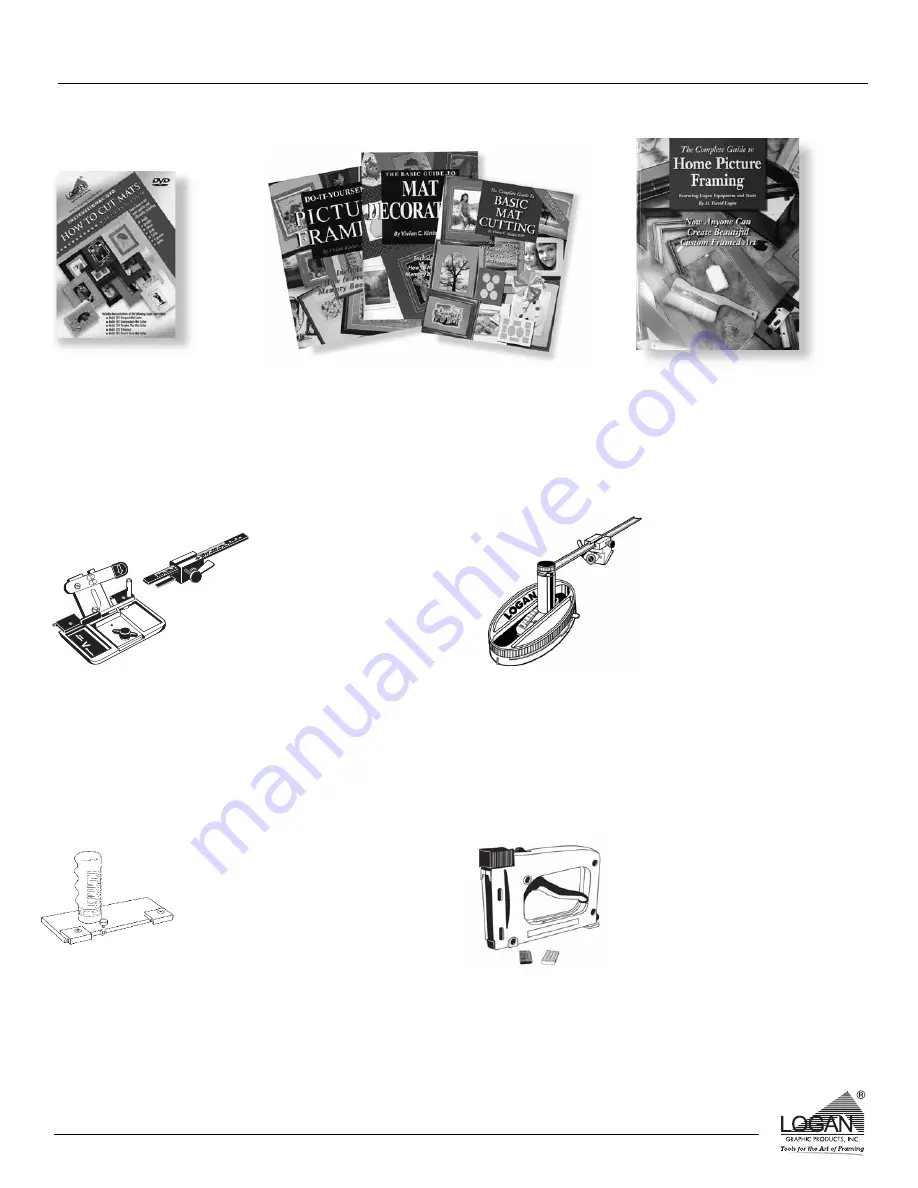
For more creative ideas in matting, pick up a
copy of Logan’s 

“How To Cut Mats”

DVD by 

Vivian C. Kistler, CPF. 

- Model 237-D

Complete and detailed directions featuring Logan's
Picture Framing Tools System. Learn inside secrets
from professional framers for creating your own
custom framed art.

Home Picture Framing - Model F245

Also available are 3 different books on matting and framing also
by Vivian C. Kistler, CPF.

Do It Yourself Picture Framing- Model 241
Mat Decoration Book- Model 240
Basic Mat Cutting - Model 238

3-Step Oval and Circle Mat Cutter is easy to use, fast

and portable. Cuts ovals or circles on the surface of the

matboard using a patented 3-step mechanism for

gradual increase of blade depth.

Converts from oval to circle cutter with a turn of a

knob.

Oval from 3

1

/

4

in. x 4

3

/

4

in. to 20 in. x 23 in. Circles from

4

1

/

2

in. to 20 in.

3-Step Oval & Circle Mat Cutter -

Model 201

Replacement Blades - Model 324

Simplex V-Groover offers a way to cut surface V-Grooves

quickly and accurately with zero overcuts. 

Push-Pull action cuts V-Grooves right on the surface of the

matboard eliminating any need for trimming or taping.

Works entirely with stops.  

Simplex V-Groover - Model 703

Replacement Blades - Model 1258

Secure artwork, backing board and glass into hard or

soft wood frames. Spring-loaded action drives both rigid

and flexible points. For successful operation, use only

authentic Logan points.  

Dual-Drive Point Driver - Model F500-1

Replacement Points:

F53 - Flex Point Strip 600 pcs.

F54 - Rigid Point Strip 600 pcs.

F55 - Flex Point Strip 2,500 pcs.

F56 - Rigid Point Strip 2,500 pcs.

See your local Logan Dealer for availability or call at 800/331-6232 for a dealer near you, or please check our 'where to buy'
section on Logan's website 

www.logangraphic.com

Also available from Logan…

Take the guess work out of glass cutting simply by using

the 

Model 704 Glass Cutter

with the 

Model 750 and

760 Simplex Plus mat cutters

. The 704 mounts onto

the cutting rail in the same way as the standard straight

and bevel cutting heads supplied with the Simplex Plus,

providing quick and easy glass cutting.

Glass Cutter - Model 704

Summary of Contents for simplex plus 750

Page 1: ... parallel mat guide 27 squaring arm plus straight and bevel cutting heads P R O F E S S I O N A L S E R I E S For best results use only authentic Logan blades Use Logan Blade 270 Logan Graphic Products Inc 1100 Brown Street Wauconda IL 60084 USA Phone 847 526 5515 Fax 847 526 5155 Toll Free 800 331 6232 L759N2 5 07 Email cs logangraphic com Model 750 Simplex Plus 40 mat cutter Model 760 Simplex Pl...

Page 2: ...e Should the product need to be returned to Logan for repair or replacement parts authorization for any return must come from Logan in writing Costs of returning the product to Logan including insurances shall be borne by the purchaser Logan shall not be liable for any damages or losses incidental or consequential direct or indirect arising from the use of this product This warranty extends only t...

Page 3: ...oduction cutting to speed up the process of mat cutting Slip Sheet Scrap piece of mat board placed underneath the mat being cut Produces a cleaner cut and longer blade life Squaring Arm Stop Used when downsizing mat board 702 Bevel Cutting Head Start and Stop Indicator Line which shows where to begin and end cut Retaining Screw Screw which keeps blade safely in slot when not in use Anti Crawl Pin ...

Page 4: ...de rail channel screws from the UNDERSIDE of the board and tighten Fig 3 2 To install the Mat Guide loosen each knob three full turns Hold the mat guide at either end and evenly drop the Mat Guide into the aluminum channels and tighten the knobs 3 To loosen turn knobs counterclockwise and slide Fig 4 Fig 1 Fig 3 Fig 4 Top Right Left Bottom Fig 2 1 2 3 4 5 6 7 8 9 10 Squaring Arm Use the line up to...

Page 5: ...he way for blade change Slide one 270 blade all the way in the back of the Blade Holder as shown Fig 5 NOTE The hole in the blade is not designed to line up with the Blade Screw Re tighten the Blade Knob and tilt the Blade Holder down allowing the tip of the blade to enter the Blade Slot Retighten the Retaining Screw Fig 4 Fig 4 Fig 5 Blade Slot OPERATION A STRAIGHT CUTTING A BOARD TO SIZE 1 Remov...

Page 6: ...t cutting only 4 Place the mat color side down under the Guide Rail against the Mat Guide and down against the Squaring Arm Fig 3 5 Using a pencil draw a line down the full length of the back of the matboard Repeat this for the remaining three sides Fig 4 6 Hook the 702 Bevel Cutter on to the Guide Rail 7 Position the cutter so that the Start and Stop Indicator line lines up with the marked line c...

Page 7: ...n the mat 1 4 turn to the right before cutting 5 Hook the bevel cutting head onto the guide rail and slide it up until the Start and Stop indicator lines up with the marked line closest to the top of the machine 6 With the left hand depress the anti crawl pin and pivot the blade holder to insert the blade into the mat Fig 4 7 Release the anti crawl pin and pull the bevel cutting head towards you u...

Page 8: ...ting head onto the guide rail and slide up until the start stop indicator lines up with the marked line closest to the top of the machine Fig 4 7 Slide the top guide rail stop towards you until it makes contact against the bevel cutting head and tighten Fig 5 8 Both guide rail stops are now set to make repeated opposite side cuts on a multiple number of mats of the same size To then cut the other ...

Page 9: ...2 mark on the scale Fig 1 2 Place a scrap piece of matboard under the Guide Rail and up against the Mat Guide at the top end of the machine 3 Using a pencil mark a line across the mat 4 Slide the mat all the way down to the bottom where you are standing keeping the mat against the mat guide but not against the Squaring Arm 5 Draw a line across the mat 6 The piece of matboard should now appear to o...

Page 10: ...ead has a spring back feature installed This spring action is not intended to pull the blade up out of the mat after a cut It is a safety device to prevent the blade from dropping down into the blade slot and cutting into a table your hand etc when not in use 4 A NOTE ON BLADE LIFE No two blades may last the same It is a good idea to install a new blade before starting a new project to insure best...

Page 11: ...pencil line closest to the center of the mat Using the same procedure cut all four sides IMPORTANT At this point the fallout will not drop from the window Step 4 Remove the mat and reset the Mat Guide to 2 Reinsert the mat Step 5 Line up the silver indicator line on the Bevel Cutting Head with the drawn pencil line furthest from the center of the mat Cut until the silver indicator line lines up wi...

Page 12: ...Model 201 Replacement Blades Model 324 Simplex V Groover offers a way to cut surface V Grooves quickly and accurately with zero overcuts Push Pull action cuts V Grooves right on the surface of the matboard eliminating any need for trimming or taping Works entirely with stops Simplex V Groover Model 703 Replacement Blades Model 1258 Secure artwork backing board and glass into hard or soft wood fram...

Page 13: ...GSANLEITUNG Passepartout Schneidesystem mit Laminatplatte Produktionsanschläge paralleler Passepartout Führung 70 cm Auswinkelarm sowie geraden und Winkel Schneideköpfen Modello 750 Simplex Plus Taglierina per passepartout 40 Modello 760 Simplex Plus Taglierina per passepartout 60 MANUALE D USO Sistema di taglio per passepartout con pannello in laminato arresti di produzione guida del passepartout...

Page 14: ... conçu pour vous permettre d acquérir une connaissance approfondie de ce produit Veuillez prendre le temps de vous familiariser avec son contenu avant de commencer à découper Vous verrez que le temps que vous aurez passé ne sera pas perdu et que vous serez alors très vite en mesure de découper des passe partout de qualité INTRODUCTION Congratulazioni per l acquisto della vostra Taglierina per pass...

Page 15: ...Ajustes Y Mantenimiento A Ajuste De la Profundidad de la Cuchilla 10 B Reponer en Paralelo la Guía de la Lámina Perimétrica 11 C Re poner a escuadra el Brazo de Escuadra 11 12 D Datos Útiles 13 Solución de Fallas 14 Guía Creativa de Láminas Perimétricas A Lámina Perimétrica Doble 15 B Lámina Perimétrica de Esquina Desplazada 16 C Lámina Perimétrica de Embutir 17 INHALTSVERZEICHNIS Einführung 1 Pro...

Page 16: ...tre hacia adelante durante la penetración inicial de la cuchilla en la lámina perimétrica Guías de Nylon Guías que permiten que el Cabezal de Corte de Bisel se enganchen en el Carril Guía 702 Winkelschneidekopf Start und Stopp Anzeige Linie die zeigt wo der Schnitt anfängt und aufhört Halteschraube Schraube die die Klinge im Schlitz festhält wenn diese nicht verwendet wird Kriechschutzstift Verhin...

Page 17: ...il der Maschine wie in der Abbildung zu sehen ist Abb 1 ORIENTAMENTO La procedura descritta nelle seguenti istruzioni si riferisce al lato destro e sinistro e alla parte superiore e inferiore dell attrezzo come illustrato Fig 1 B ARMADO Guía de Lámina Perimétrica 1 Presione cada canal de aluminio de la guía de lámina perimétrica dentro de las ranuras del tablero con el extremo redondeado hacia el ...

Page 18: ...ilato rivolto verso il basso nella fessura del portalama e allineare il foro della lama con la regolazione della profondità desiderata Sostituire il portalama e la vite della lama Fig 4 La 701 consente tre regolazioni di profondità Regolazione superiore regolazione di sicurezza Regolazione centrale cartoncino di spessore standard 4 strati di compensato Regolazione inferiore foamboard 3 16 NOTA pri...

Page 19: ...re della guida del passepartout sul segno 2 e serrare le manopole nere Fig 2 3 Prima di effettuare il taglio a smusso accertarsi che il foglio di rinforzo sia ben posizionato L utilizzo di un foglio di rinforzo è necessario La scanalatura diritta sottostante la rotaia di guida serve esclusivamente per i tagli diritti 4 Posizionare il lato colorato del passepartout sotto la rotaia di guida contro l...

Page 20: ...ina in modo tale che l indicatore di inizio e di fine si allinei con la linea tracciata più vicina alla cima dell attrezzo Fig 5 8 Con la mano sinistra premere il perno antiscivolo e inserire il portalama nel passepartout ruotandolo verso il basso Fig 5 9 Rilasciare il perno antiscivolo e tirare la testa di taglio verso di voi finché l indicatore di inizio e di fine non si allinei con la linea sul...

Page 21: ... le passe partout à découper dans l appareil le côté coloré vers le bas avec la feuille doublure en dessous et abaissez le rail de guidage 3 En utilisant un crayon tracez une ligne sur toute la longueur du passe partout en utilisant le rail de guidage comme guide Fig 3 Tournez le passe partout de 1 4 de tour vers la droite avant de découper 4 Placez la première butée sur le rail de guidage et fait...

Page 22: ...a perimétrica de modo que las Guías del Nylon se enganchen en el borde del carril guía Fig 2 5 Tire del Cabezal de Corte Recto hasta que la línea trazada de la parte baja se alinee con la línea del borde inferior Repita hasta que estén cortados todos los bordes Fig 3 E SCHNEIDEN EINER GERADEN ÖFFNUNG Beispiel Schneiden eines Passepartouts mit einem 5 cm breiten Rand 1 Stellen Sie die Passepartout ...

Page 23: ... profundidad de cuchilla Esta profundidad adicional de cuchilla permite que la punta de la cuchilla se flexione y causa enganches y curvas en el corte La profundidad adicional de cuchilla puede también hacer que el indicador de inicio y de parada sea incorrecto lo que da lugar a sobrecortes Esta prueba y ajuste necesita hacerse periódicamente pues la plancha de lámina perimétrica tiene muchas vari...

Page 24: ...ment pas à angle droit et non pas simplement la feuille de feuille de passe partout en exécutant le test de rectangularité Test de rectangularité 1 Placez l équerre contre le côté droit du rail de guidage et le bras d équerrage Fig 1 Assurez vous qu il n existe aucun jour entre le cadre et le bras d équerrage Ajustez le bras d équerrage dans le cas contraire B REPONER EN PARALELO LA GUÍA DE LA LÁM...

Page 25: ...rto de vuelta y ajuste el tornillo A hacia afuera contra el sentido de las agujas del reloj un cuarto de vuelta Fig 2 4 Reinstale el brazo de escuadra y compruebe la escuadra Esto es un método de prueba y error en algunos casos es necesaria más de un cuarto de vuelta en algunos casos menos Neue Glattstellung 1 Indem Sie sehen wo die Lücke ist können Sie bestimmen in welche Richtung der Auswinkelar...

Page 26: ...eturar en su trabajo de cortar vidrio simplemente utilizando el Cortador de Vidrio Modelo 704 con los cortadores de lámina perimétrica Simplex Plus Modelos 750 y 760 El 704 se monta sobre el carril de corte de la misma manera que los cabezales estándar rectos y de corte biselado provistos con el Simplex Plus proporcionando un corte de vidrio rápido y fácil D HILFREICHE TIPPS Bewahren Sie den Schne...

Page 27: ...a no está en una superficie a nivel vea pagina 10 No está utilizando una Hoja de Respaldo por lo menos con la lámina perimétrica que usted está cortando vea pagina 4 Hoja de Respaldo no es tan ancho como el Carril Guía Profundidad de la cuchilla graduada no muy profunda vea pagina 8 Se está aplicando presión desigual al cabezal de corte durante el corte Vea pagina 6 Problem Haken oder Kurven Lösun...

Page 28: ...ensión exterior de 19 05 x 24 13 cm Paso 4 Fije la segunda lámina perimétrica CARA HACIA ABAJO en el dorso encintado de la primera lámina perimétrica asegurándose que esté centrada razonablemente bien Paso 5 Ajuste la Guía de la Lámina Perimétrica a 6 1 cm y corte la segunda abertura La doble pieza que sale caerá de la ventana y la lámina perimétrica estará terminada y perfectamente alineada NOTA ...

Page 29: ...des Passepartouts entfernt zusammenfällt Schneiden Sie alle vier Seiten auf diese Art und Weise HINWEIS Achten Sie darauf dass noch keine Abfallteile herausfallen weil sie das Passepartout für den letzten Schnitt umdrehen PASSEPARTOUT CON ANGOLI INVERSI Esempio 20 x 25 cm con apertura 13 x 18 cm Procedura 1 Disporre la guida del passepartout tu 5 cm e tracciare tutte e quattro le linee Procedura 2...

Page 30: ...zweiten Passepartout und legen Sie das augeschnitten Stück Karton von innerhalb des Rahmens in die Fensteröffnung des zweiten Passepartouts Die beiden Stücke sollten wie ein Puzzle zusammenpassen und eine ebene Oberfläche an der Vorderseite des Passepartouts bilden Kleben Sie das Passepartout mit einem Klebeband HINTEN fest LÁMINA PERIMÉTRICA CON RELLENO Ejemplo 20 3 cm x 25 4 cm con abertura 12 7...

Page 31: ...ollständige und detaillierte Anweisungen zum Logan Bilderrahmen Werkzeugsystem Lernen Sie die Geheimnisse der Profi Rahmer kennen damit auch Sie Ihre Kunstwerke gekonnt einrahmen können Home Picture Framing Modell 245 Informazioni complete e dettagliate sugli attrezzi di incorniciatura Logan Scoprite i segreti dei corniciai professionisti per realizzare le vostre cornici personalizzate Come realiz...

Page 32: ...mplice impiego rapida e portatile Taglia ovali o tondi sulla superficie del cartoncino con l ausilio di un meccanismo brevettato a 3 fasi per aumentare gradualmente la profondità della lama Utilizza lame comuni Logan Modello 324 equivalente Dexter o X Acto Taglierina per passepartout ovali e circolari a 3 fasi Modello 201 Lame di ricambio Modello 324 FR ESP D ITL Simplex V Groover permet de découp...

Reviews: