background image

19

TEMPERATURE/HUMIDITY & TRENDS

VIEWING OUTDOOR CHANNELS 

RECEIVING WIRELESS SENSOR SIGNALS

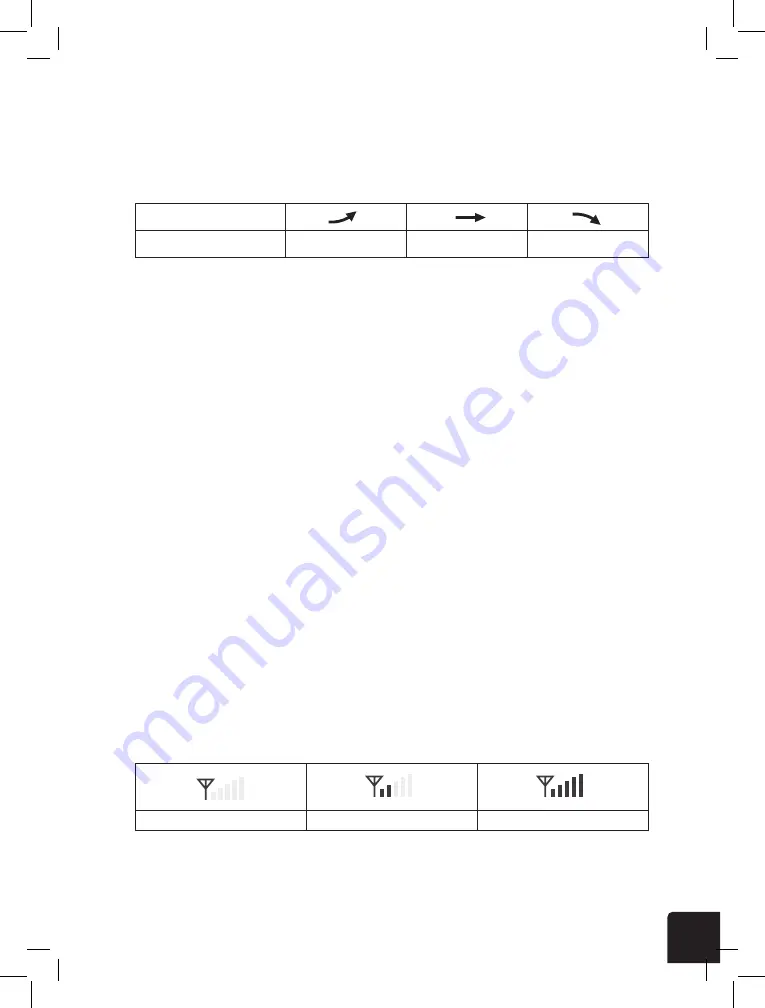
Press the °C/°F button to switch between Celsius and Fahrenheit temperature measurements. The 

arrows show the trend in changes to the temperature/humidity levels.

This console is capable of pairing with the wireless weather sensor and up to 7 additional wireless 

thermal-hygro sensors. If you have 2 or more sensors installed, press the CH button to cycle between 

different wireless channels in normal operating mode, or press and hold the CH button for two (2) 

seconds to toggle auto-cycle mode on, which cycles through displaying all connected channels at 

4-second intervals. While the console is in auto-cycle mode, you can press the CH button once to 

toggle auto-cycle mode off and continue displaying the current channel.

1.   While in normal operating mode, press the SENSOR/SYNC button once to start receiving the 

      current sensor signal on the channel being displayed. (i.e. if you’re on CH 1 and press the SENSOR/

      SYNC button, the current wireless sensor signal being received will only display on CH 1.) The 

      signal icon will start flashing.

2.   The signal icon will continue flashing until it successfully receives a signal. If no signal is received 

      within five (5) minutes, the icon will disappear. 

NOTE:

   •  If/when the temperature outside falls below -40°F (-40°C), the LCD display will show the word 

     “Lo” in the temperature section. If the temperature outside rises above 176°F (80°C), the LCD 

      display will show the word, “HI” in the temperature section. 

   •  If/when the humidity level falls below 1%, the LCD display will show the word “Lo” in the humidity 

      section. If/when the humidity level rises above 99%, the LCD display will show the word, “HI” in 

      the humidity section.

Northern Hemisphere Icons

Southern Hemisphere Icons

Moon Phase

New Moon

Waxing Crescent Moon

First Quarter Moon

Waxing Gibbous Moon

Full Moon

Waning Gibbous Moon

Third Quarter Moon

Waning Crescent Moon

NOTE:

 -In alarm mode, the “   ” icon  will display on the LCD.


Alarm off

Alarm on

Alarm with ice-alert

Temp/Humidity Trend

Arrow Icon

Rising

Steady

Falling

Too cold

Comfortable

Too hot

No signal

Weak signal

Good signal

Summary of Contents for LOWSB510PB

Page 1: ...5 IN 1 WIRELESS WEATHER STATION WITH PC DATA SYNC USER GUIDE LOWSB510PB ...

Page 2: ...l use This product is covered by a limited one year warranty Coverage is subject to limits and exclusions See warranty for details SAFETY PRECAUTIONS PRODUCT FEATURES PACKAGE CONTENTS DISPLAY CONSOLE OVERVIEW LCD DISPLAY OVERVIEW WIRELESS WEATHER SENSOR OVERVIEW WIRELESS WEATHER SENSOR SETUP DISPLAY CONSOLE SETUP CLOCK SET OPTIONS DISPLAY OTHER DISPLAY CONSOLE SETTINGS WEATHER FORECAST BAROMETRIC ...

Page 3: ...sk of shock fire or other hazards 7 Do not cover the ventilation holes on the display with newspapers curtains or any other items 8 Never immerse the display in water If you spill any liquid on the display dry it immediately with a soft lint free cloth 9 Do not use abrasive or corrosive materials to clean the display 10 Do not tamper with the display or the weather vane s internal components This ...

Page 4: ...eather and environmental information directly from your own backyard instead of relying on a national weather station 4 Black and white LCD display screen with amber backlight 5 Can alert you to excessively high low indoor or outdoor temperatures or humidity high wind speeds extreme drops in barometric pressure high heat indexes low wind chills and high low dew points 6 Syncs with installed PC sof...

Page 5: ...xterior 3 Mounting Clamp 1 4 Mounting Base 1 5 Large Mounting Screws 4 6 Large Hexagonal Nuts 4 7 Large Washers 4 8 Small Screws 2 9 Small Hexagonal Nuts 2 10 Rubber Pads for Mounting Clamp 11 Micro USB Cable 1 12 Display Console 1 13 User Guide 1 2 5 7 8 6 9 4 3 10 12 11 13 ...

Page 6: ...ORY button 7 MAX MIN button 8 BARO button 9 WIND button 10 RAIN button 11 INDEX button 12 Alert indicator 13 Wall mount notch 14 CLOCK SET button 15 SENSOR SYNC button 16 C F button 17 DATA button 18 TIME SYNC button 19 Battery compartment 20 Kickstand 21 ALARM button 22 ALERT button 23 RESET button 7 1 2 3 4 5 13 14 15 16 17 18 19 20 21 22 23 6 7 8 9 10 11 12 6 ...

Page 7: ...ns 3 Weather indexes heat index wind chill Beaufort level dew point 4 Wind direction and wind speed 5 Temperature and humidity outdoor 6 Temperature and humidity indoor 7 Multi function historical bar chart 8 Barometer and rainfall 9 Sunrise sunset times 1a 2 7 1b 1c 3 8 4 9 5 6 ...

Page 8: ...1 Rain collector 2 Level 3 Antenna 4 Wind cups anemometer 5 Mounting pole 6 Sensor casing 7 Wind vane 8 Mounting base 9 Mounting clamp 10 Red LED indicator 11 RESET button 12 Battery compartment 13 Mounting clamp screws 1 4 2 6 3 7 10 11 12 5 13 8 9 ...

Page 9: ...UGE TEMPERATURE AND HUMIDITY SENSOR WIND SENSOR 1 Rain collector 2 Tipping bucket 3 Rain sensor 4 Drain holes 1 Sensor shield 2 Temperature and humidity sensor 1 Wind cups anemometer 2 Wind vane 1 1 1 2 2 2 3 4 ...

Page 10: ... three 3 new AA alkaline batteries making sure the polarities match up with the markings inside the compartment 3 Replace the battery door ensuring the watertight O ring is properly aligned This maintains the water resistant seal 4 Replace the battery screw making sure it is tightly fastened down The red LED should begin flashing every 12 seconds ...

Page 11: ...her side and tighten it by river ther side of the pole to the square hole c stand pole and stand s indicator align 4 ND INSTALLATION he battery door at bottom of unit and insert the ccording to the polarity indicated battery door compartment on tightly the water tight O ring is properly aligned in water resistant LED will begin flashing every 12 seconds THE STAND AND POLE op side of the pole to th...

Page 12: ... the rain and wind 2 The wind vane should be pointed due North refer to the arrow on top of the unit in order to be properly oriented and receive accurate wind readings 3 The mounting stand and included clamps should be secured to a post or pole with a minimum of 4 9 ft 1 5 m ground clearance 4 If securing to a pole make sure you add the rubber pads to the clamp before fastening it with the includ...

Page 13: ...batteries making sure the polarities match up with the polarities marked inside the compartment 3 Replace the battery door DISPLAY CONSOLE SETUP 5 wind measurements 2 Choose an open area within 150 meters from the LCD console 3 Install the wireless 5 IN 1 sensor as level as possible to achieve accurate rain and measurements 4 Mount the wireless 5 IN 1 sensor with the wind meter end pointing to the...

Page 14: ...NOTE If nothing appears on the LCD display after you insert the batteries use a pin or similar small object to press the RESET button at the rear MAIN CONSOLE Your main console can pairing up with the wireless 5 in 1 outdoor weather sensor and u optional wireless hygro thermo outdoor sensors Not included Powering up the main console 1 Remove the battery door on the back side of the main unit 2 Ins...

Page 15: ... make adjustments to the next setting 4 Settings cycle through the following options HOUR MINUTE SECOND 12 hour 24 hour format Year Month Day M D D M date format Longitude for sunrise sunset Latitude for sunrise sunset Time Zone Language 5 Press the CLOCK SET button one final time after adjusting all settings options to save and exit or the console will automatically save and exit the menu after 6...

Page 16: ...ur format Year Month Day M D D M format Longitude for Sunrise Sunset Latitude for Sunrise Sunset time zone for Sunrise Sunset Language 5 Press CLOCK SET key to save and exit the setting mode or the unit will automatically exit the setting mode 60 seconds later without pressing any key Hour Minute Second 12 Hr 24Hr Year Month Day Longitude Latitude Time Zone Language EN DE FR ES IT NL RU EN Press t...

Page 17: ... page 29 for more information on setting up your Wireless Weather Sensor in the Southern Hemisphere OTHER DISPLAY CONSOLE SETTINGS Northern Hemisphere Icons Southern Hemisphere Icons Moon Phase New Moon Waxing Crescent Moon First Quarter Moon Waxing Gibbous Moon Full Moon Waning Gibbous Moon Third Quarter Moon Waning Crescent Moon NOTE In alarm mode the icon will display on the LCD Temp Humidity T...

Page 18: ... alarm minute Press and hold either button to move through the minutes quickly 5 Press the ALARM button to save and exit the menu NOTES Once you have an alarm set the icon will be displayed next to the time on the LCD display The alarm function will be activated automatically once you set a time 3 When the clock reaches the designated alarm time the alarm sound will start playing 4 To stop the ala...

Page 19: ...isplay on CH 1 The signal icon will start flashing 2 The signal icon will continue flashing until it successfully receives a signal If no signal is received within five 5 minutes the icon will disappear NOTE If when the temperature outside falls below 40 F 40 C the LCD display will show the word Lo in the temperature section If the temperature outside rises above 176 F 80 C the LCD display will sh...

Page 20: ...oon Third Quarter Moon Waning Crescent Moon Alarm off Alarm on Alarm with ice alert Temp Humidity Trend Arrow Icon Rising Steady Falling Too cold Comfortable Too hot No signal Weak signal Good signal the signal icon will disappear The temperature and humidity will display for the corresponding channel 4 If the signal does not recover within 48 hours the display will become permanent you need to re...

Page 21: ...n Wind Speed Land Condition 0 Calm 1 km h Calm Smoke rises vertically 1 mph 1 knot 0 3 m s 1 Light air 1 1 5km h Smoke drift indicates wind direction Leaves and wind vanes are stationary 1 3 mph 1 3 knot 0 3 1 5 m s 2 Light breeze 6 11 km h Wind felt on exposed skin Leaves rustle Wind vanes begin to move 4 7 mph 4 6 knot 1 6 3 3 m s 3 Gentle breeze 12 19 km h Leaves and small twigs constantly movi...

Page 22: ...er raised Small branches begin to move Branches of a moderate size move Small trees in leaf begin to sway Whole trees in motion Effort needed to walk against the wind Some twigs broken from trees Cars veer on the road Progress on foot is seriously impeded Some branches break off trees and some small trees blow over Construction temporary signs and barricades blow over Trees are broken off or uproo...

Page 23: ...6 63 knot 28 5 32 6 m s 118 km h 74 mph 64 knot 32 7m s Heat Index range Warning Explanation 80 F to 90 F 27 C to 32 C Caution Possibility of heat exhaustion 91 F to 105 F 33 C to 40 C Extreme Caution Possibility of heat dehydration 106 F to 129 F 41 C to 54 C Danger Heat exhaustion likely 130 F 55 C Extreme Danger Strong risk of dehydration sun stroke Sunny Partly cloudy Cloudy Rainy Rainy Stormy...

Page 24: ...mospheric pressure based on the sea level 6 Strong breeze 7 High wind 17 21 knot 8 0 10 7 m s 39 49 km h 25 30 mph 22 27 knot 10 8 13 8 m s 50 61 km h 31 38 mph 28 33 knot 13 9 17 1 m s leaf begin to sway Whole trees in motion Effort needed to walk against the wind Some twigs broken from trees Cars veer on the road Progress on foot is seriously impeded Some branches break off trees and some small ...

Page 25: ...ll since the beginning of the current month 5 RATE current rainfall rate in the past hour updates every 24 seconds 6 ACCUMULATION total rainfall since the last reset will show the record start date on the display for five seconds While in normal operating mode press and hold the C F button for two 2 seconds to reset the ACCUMULATION rainfall record While in normal operating mode press the GRAPH bu...

Page 26: ...perature F or C Past 72 hours F or C Past 72 hours Indoor Humidity Past 72 hours Outdoor Humidity according to the current channel Past 72 hours Rainfall mm or in Past 7 days daily Outdoor Temperature according to the current channel ...

Page 27: ... the MAX MIN records of the specific weather display section 15 Rainfall mm or in Past 7 days daily MAX MIN DATA RECORD The console can record the accumulated and daily MAX MIN weather data with the corresponding time stamp for you to easy review To view the daily MAX MIN Daily max record of indoor temperature In normal mode press MAX MIN key to check daily MAX MIN records The display sequence is ...

Page 28: ...ing High Outdoor Humidity Alert Low Outdoor Humidity Alert High Indoor Temperature Alert Low Indoor Temperature Alert High Indoor Humidity Alert Low Indoor Humidity Alert Wind Speed Alert 40 F 176 F 40 C 80 C 0 1 m s 50 m s 0 1 180 km h 0 1 112 mph 0 1 97 knots 17 2 m s 62 km h 39 mph 34 knots 1 99 40 F 176 F 40 C 80 C 1 99 Outdoor temperature humidity Indoor temperature humidity Wind direction sp...

Page 29: ...nd the related alert icon and readings will flash If the alert alarm is automatically off after 2 minutes the alert icon and readings will still keep flash until the weather reading is out of the alert range The weather alert will sound again when the weather readings falls into the alert range again POINTING THE WIRELESS 5 IN 1 SENSOR TO SOUTH The outdoor 5 in 1 sensor is calibrated to point to N...

Page 30: ...ger default every 30 minutes and user can export these data through the PC software Please consult your local distributor for the PC software download To check data logger memory Press the DATA key to briefly review the remaining number of days the console is able to record based on its current free memory available e g 300 DAY The data logger will stop recording new data once its memory is full T...

Page 31: ...of the PC If the console is connected successfully icon will appear on display and its time and date will be synchronized to that of PC momentarily as indicated by the icon Instant live data from the console will be transmitted to the dashboard screen on the PC In t he P C software click o n icon located at t he t op right hand c orner f or details of operations and s ettings o f Weather Tool prog...

Page 32: ...ll all the parts when they are fully clean and dried N TO CLEAN THE THERMO HYGRO SENSOR 1 Unscrew the 2 screws at the bottom of the radiation shield 2 Gently pull out the shield 3 Remove carefully any dirt or insects inside the sensor casing Do no wet 4 Clean the shield with water and remove any dirt or insects 5 Install all the parts back when they are fully clean and dried PRECAUTIONS NANCE Y RE...

Page 33: ...nded Weather data in console Barometric pressure temperature and humidity Operating temperature range 23 F 122 F 5 C 50 C PC Software Requirements Wireless Sensor Communication Specifications Time Function Specifications Connection interface USB 2 0 Operation system Windows XP Windows Vista Windows 7 Windows 10 or latest version 32 bit 64 bit Hard disk space 50 MB Display resolution 1360 x 768 1920 ...

Page 34: ...st Sunny Partly Cloudy Cloudy Rainy Rainy Stormy and Snowy Display modes Current Memory modes Historical data from last memory reset daily Max Min Alarm Pressure change alert Resolution 0 1 F 0 1 C T Weather forecast Sunny Partly Cloudy Cloudy Rainy Rainy Stormy and Snowy Display modes Current Memory modes Historical data from last memory reset daily Max Min Alarm High Low temperature alert Indoor...

Page 35: ...detail are listed as they are displayed or operate on the console Wind speed unit mph m s km h and knots Wind speed display range 0 112mph 50m s 180km h 97knots Resolution 0 1mph 0 1m s 0 1km h 0 1knots Speed accuracy 2 2 mph or 10 whichever is greater Accuracy for rainfall Range of rainfall 0 19999mm 0 787 3 in Resolution 0 254mm 0 01in Wind direction 16 direction or relative degree reading Rain ...

Page 36: ...s Reorient or relocate the receiving antenna Increase the separation between the equipment and the receiver Connect the equipment into an outlet on a circuit different from that to which the receiver is connected Consult the dealer or an experienced radio TV technician for help The provided shielded USB cable must be used with this unit to ensure compliance with the class B FCC limits Warning Chan...

Page 37: ...his limited warranty only to the consumer who originally purchased the product you It does not extend to any subsequent owner or other transferee of the product WHAT DOES THIS WARRANTY COVER This limited warranty covers defects in materials and workmanship of the Logia 5 in 1 Wireless Weather Station with PC Data Sync the product for the Warranty Period as defined below WHAT DOES THIS WARRANTY NOT...

Page 38: ...Corporation in the U S and or other countries All other products brand names company names and logos are trademarks of their respective owners used merely to identify their respective products and are not meant to connote any sponsorship endorsement or approval Distributed by C A Marketing Inc 114 Tived Lane East Edison NJ 08837 Made in China 2019 C A IP Holdings LLC All Rights Reserved ...

Reviews: